- Call us 01444 237070

-
- Back
- Used Cameras
- Used Accessories
- Used Lenses
- Back
- Used Canon Lenses
- Used Nikon Lenses
- Used Fujifilm Lenses
- Used Sony Lenses
- Used Micro 4/3rds Lenses
- Used Leica Lenses
- Used Panasonic Lenses
- Used Pentax Lenses
- Used Samyang Lenses
- Used Sigma Lenses
- Used Tamron Lenses
- Used Tokina Lenses
- Used Voigtlander Lenses
- Used Zeiss Lenses
- Used Hasselblad Lenses
- Used Video
- Used Film Equipment
- Used Stock Alert
- Used Blank Test
- Sell or Part Exchange
- Used Clearance
- Recently Added Used Equipment
- Park Picks
- Faulty
- Trade-In
- Blog
- New in
- Call us
- Contact us
- Stores
- Sign in
- Categories
- Tips & Inspiration
- Reviews
- News
- Events
- Features
- Buying Guides
- Competitions
Summer Landscape Photography Tips
Every season has something to offer landscape photographers and summer is no exception. There is an abundance of subjects during summer in the UK, from grand scenes and seascapes to abstract details and everything in between. The weather is usually better, days are warmer and evenings are perfect for capturing sunsets, but there are some considerations for landscape photographers, even during this idyllic time of year.
If you want to get out and capture beautiful sunrises or sunsets, you’ll discover some useful summer landscape photography tips in this guide, as well as gear suggestions to help you capture gorgeous landscapes to impress your audience, build your portfolio and maybe even to print and hang on your walls.
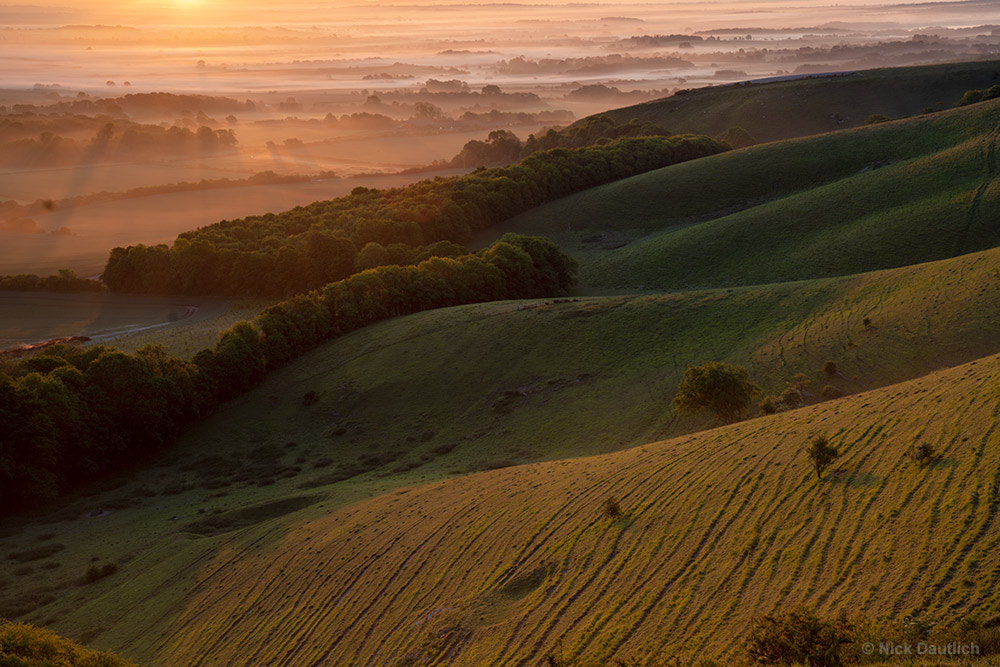
© Nick Dautlich Example 1 (June) with Sony A7R III and Sony FE 24-70mm F/2.8 GM at 60mm. Camera settings: 1/10. f/8. ISO 100 (tripod mounted)
Being prepared for landscape photography
Being well prepared can give you a much better chance of nailing a gorgeous landscape shot, but what does being prepared mean for landscape photographers?
- Clean your gear. It sounds boring, but it really pays to clean your lenses, clean your camera sensor and clean all of your filters before you pack your bag the night before. Dust bunnies, smears and general dirt can ruin a good shot and takes a while to clean up when editing.
- Pack your camera bag the day before. Whether you’re shooting locally or heading somewhere specifically to capture a landscape, it pays to pack all of your gear into a comfy backpack the day before you go. In brief, an equipment packing list might include:
- Main camera and lenses – for landscapes a high resolution camera is preferable and any lenses which work for your subject, from ultra-wide angle to Long lens landscape photography
- ND filters and a LEE filters set, or whichever filter system you use
- Circular polarisers
- Blank memory cards
- Charged main and spare camera batteries
- Tripod and head – aim for a combination of portable if hiking and stable for sharper shots
- Camera cleaning equipment including lens cloths and a dust blower
- Remote shutter release – avoid touching your camera to minimise shake by using a remote trigger
- Know your location. If you’re heading to a new location it’s worth either scouting it ahead of time using Google Earth, or turning up early so that you can find your composition. Some honey-pot locations are easy to shoot without scouting beforehand, but the majority of landscapes warrant some investigation to find the best comp.
- Check the weather for where you’re shooting (using BBC weather or a service for hills including the Mountain Weather Information Service). If you’re shooting a seascape know what the tides are doing. Even during summertime hills and mountains can attract chaotic and dangerous weather and tides can be dangerous if you’re caught without a way of getting to safe ground. On the subject of safety it’s generally worth letting someone know where you will be shooting if it’s off the beaten track.
- Be creative, have fun and always shoot your landscapes in RAW of course!
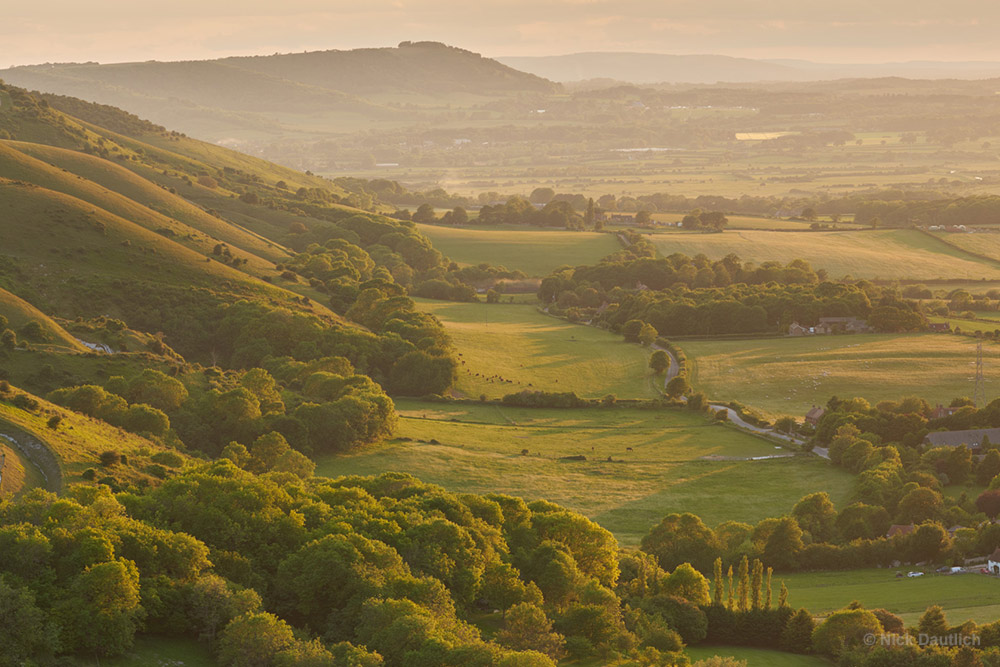
© Nick Dautlich Example 2 (June) with Sony A7R III and Sony FE 24-70mm F/2.8 GM at 70mm. Camera settings: 1/20. f/8. ISO 100 (tripod mounted)
Popular summer landscape subjects
There are no rules as to what you can shoot during summer. Perhaps the most important thing is to choose locations which inspire you to capture something which you want to share. If you’re inspired by a place or scene you’re more likely to come away with an engaging shot. Some of the most popular landscape subjects include:
- Beaches and seascapes
- Seasonal wildflowers, including poppies, heather and orchids
- Rivers and streams
- Forests
- Intimate / abstract scenes
- Farmlands
- Hills and mountains
- Monuments, castles and interesting buildings
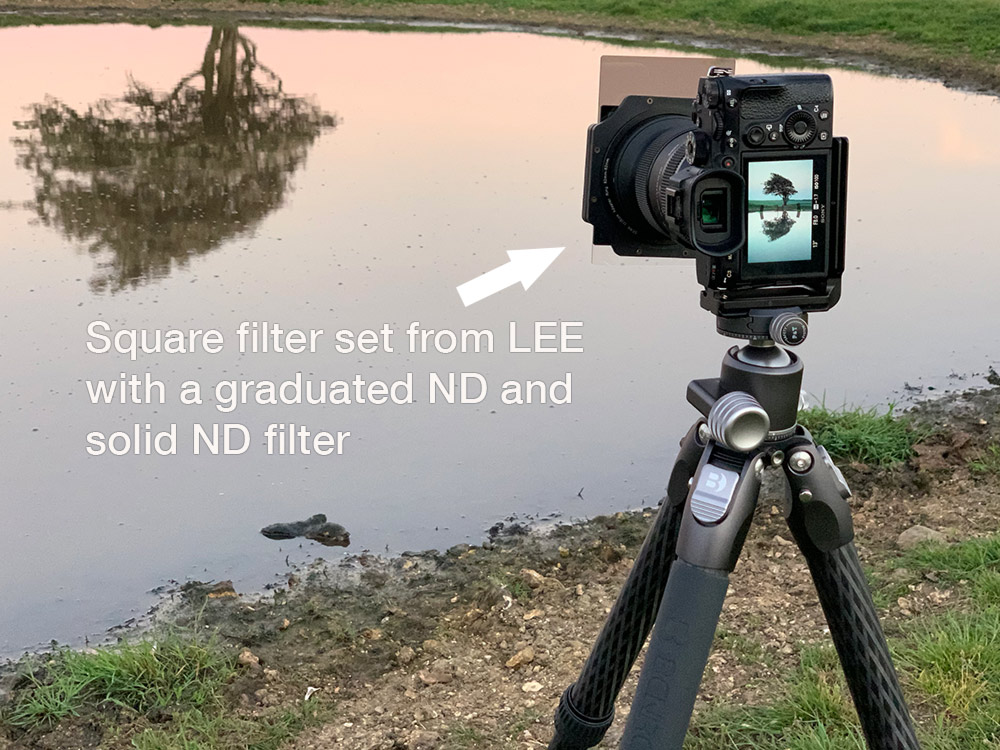
Using a filter system from LEE Filters using two filters: a LEE100 0.6 ND Grad Soft Filter to balance the brighter sky and a 5-stop Lee100 Little Stopper to achieve a long exposure and smooth the water.
Using filters for landscape photography
Learning how to use lens filters to elevate your images is a must for aspiring landscape photographers. While you won’t need a filter for every shot, knowing when to use one and how to use filters is really useful to take your photos to the next-level.
Circular polariser filters
There are two type of filters which are most widely used in landscape photography, starting with a circular polariser, which also goes by ‘CPL’ or simply ‘polariser’. Polarisers are used for a number of reasons including:
- To control (and remove) reflections from wet surfaces, including any water, foliage and rocks
- To enhance blue skies
- To increase contrast and saturation
It’s possible to over-use a polariser, so you may want to take different shots with different levels of polarisation in case you change your mind after a shot. For example you might remove all of the reflections from a stream, but find that 50% polarisation looks better for the wet rocks. Similarly when using an ultra-wide angle lens you can sometimes notice polarisation effects in blue skies, so always check your image on the back of the camera before moving on.
There are two or three different types of circular polariser to consider for your kit. The easiest to control is a standalone CPL filter, which has a single thread size. These are available from all leading filter manufactures and can be purchased to fit directly onto each lens you have by choosing the appropriate mm thread such as 77mm.
If you use a square filter kit from LEE Filters or Cokin you can get a polariser which fits into the square filter holder system. This is convenient and easy for switching between lenses.
You can also get combination filters with both polarisation and ND in-one from H&Y. These are great for landscapes and any subject with water in particular.
Neutral density filters
This brings us neatly onto ND filters or neutral density, which are widely used by landscape photographers. There are several types of ND filter, which are all employed in different ways. What they have in common is all NDs reduce the amount of light entering the lens in some way.
- Solid ND filters – these are typically square filters and are used to slow down your shutter speed. This is valuable when capturing anything which moves in the landscape, such as water or clouds in particular. Slowing the shutter speed will blur movement, perfect for long exposure images and really useful in summer to create some interest in what is often quite slow moving subjects. Typically, solid NDs are found in 1,2,3,5 and 10-stop variations.
- Variable ND filters – these are the same as solid NDs but offer the ability to adjust the level of light and are usually screw-threaded rather than square. Variable NDs (or VND) are used for videography as well, with similar effect. A VND combines several solid ND into one.
- Graduated ND filters are widely used in landscape photography to balance brighter skies. A graduated neutral density filter has a darker shade at the top, which fades either with a hard or soft gradient to no filtration (clear) in the bottom. These fit into your filter holder system and let you to balance bright skies, usually by up to 3-stops. Variable NDs are available in a huge range of options for different conditions, with hard, soft, medium etc. You can negate the need for these by using HDR photography techniques and blending images during editing, but this can be tricky and is more time consuming, and many photographers prefer to get the best exposure out in the field.
A landscape filter kit provides essential filters to get started in a single kit, such as a Cokin Z-PRO Nuances Extreme Full ND KIT, Cokin NX Long Exposure Kit or LEE100 Filter System Deluxe Kit. Don’t forget to add adaptor rings to fit the square systems onto your lens threads.
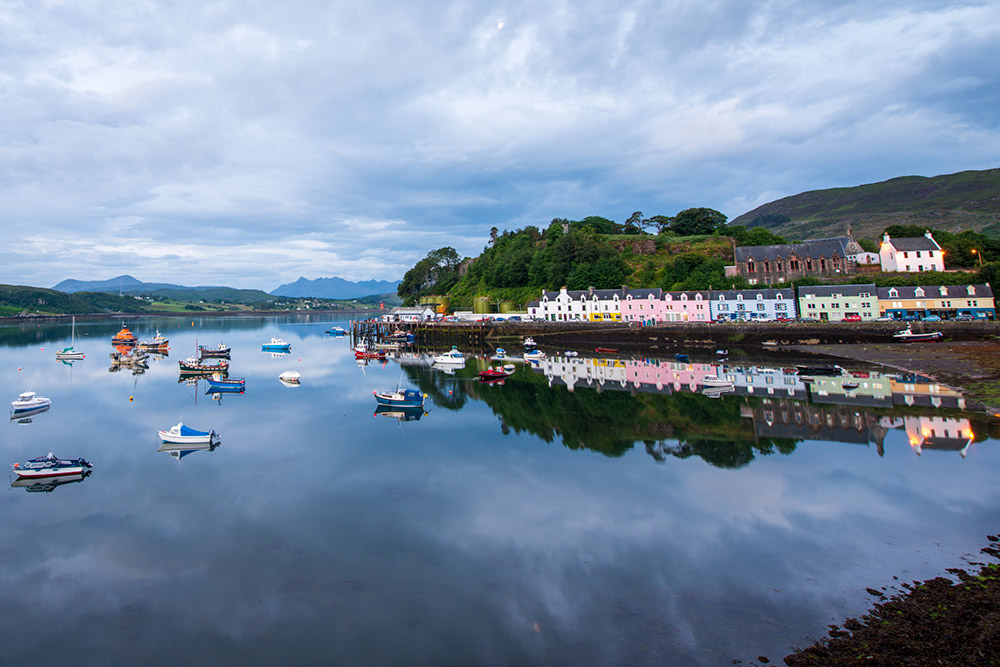
© Nick Dautlich Example 3 (July) with Nikon D800 and Nikon AF-S Nikkor 14-24mm F/2.8G ED at 16mm. Camera settings: 2 sec. f/8. ISO 100 (tripod mounted)
Shooting during golden hour
You’ve no doubt heard that golden hour presents the best light for outdoor photography and while this is true, there’s nothing to stop you shooting at any time of day. You get to make the rules for your photography!
In the northern hemisphere the sun rises and sets more quickly during summer and golden hour can last just a few minutes, rather than the languid winter affair, which can last for a couple of hours. This can mean getting out of bed in the middle of the night in order to get to your location by 4am, and is one of the reasons landscape photographers aspire to Van Life. If you start the day at your location you can get a lie-in to perhaps 4am, which is always welcome! If you choose to shoot outside of golden hour you’ll see more contrast in your images, which can be tricky to handle without ruining an exposure with dark shadows or blown-out highlights. Look to expose for the highlights to avoid blowing out your image. You may find you’re capturing more silhouettes in contrasty light, which can show the mood of a scene beautifully, adding some mystery or drama.
Mornings do present a few advantages for landscape photographers over sunsets, which can make them worth getting out of bed for:
- You’ll be able to get to your location more quickly with less traffic around
- There’ll be fewer people to negotiate in your compositions
- Sunrise tends to be calmer with less wind, which is beneficial when shooting slower from a tripod
- The chances of mist are higher during sunrise, which is sometimes a welcome addition to landscape photos
- You can be all done by 6am and get to scout more locations or head back to bed for a nap
The haze which we see in the atmosphere during summer can be a double edged sword, as it removes contrast and makes it harder show hard lines in your shots. On the other hand it also creates lovely atmospheric scenes and adds mood, which may be absent at other times.
Summary
Summer is a great time to be out shooting landscapes and can yield great results while out enjoying warmer and drier days in nature. Remember to pack sunscreen, insect repellant and some sarnies and share your images with us at Facebook, Twitter and Instagram. Look out for our photo competitions to win goodies with your photos too.
Share this post:
By Nick Dautlich on 18/06/2022
Nick Dautlich
Senior Content Writer and Product Reviewer
Nick Dautlich is the Senior Content Writer and Product Reviewer at Park Cameras, with over 15 years of photography experience. A Sony Imaging Professional and expert reviewer, Nick has worked with major brands such as Canon, Sony and Nikon. His work is also featured on Vanguard World UK’s website, Capture Landscapes, and Shutter Evolve. Nick’s photography includes National Trust projects and magazine covers and he is passionate about landscapes and storytelling. Nick also enjoys hiking and teaching his children about nature. Learn more on his profile page.

Trade in your old equipment
Fast and easy trade in service ensures your old gear is collected efficiently and you are paid quickly! It's very simple to trade in your unwanted photography gear. Just head over to our dedicated Sell or Part Exchange page, fill out the details, and we'll get back to you with an offer for your old gear. Take the cash, or put it towards the cost of your new gear. It's up to you! Find out more
sign up to the newsletter
Keep up to date on the latest photography news, events and offers. Sign up now