- Call us 01444 237070

-
- Back
- Used Cameras
- Used Accessories
- Used Lenses
- Back
- Used Canon Lenses
- Used Nikon Lenses
- Used Fujifilm Lenses
- Used Sony Lenses
- Used Micro 4/3rds Lenses
- Used Leica Lenses
- Used Panasonic Lenses
- Used Pentax Lenses
- Used Samyang Lenses
- Used Sigma Lenses
- Used Tamron Lenses
- Used Tokina Lenses
- Used Voigtlander Lenses
- Used Zeiss Lenses
- Used Hasselblad Lenses
- Used Video
- Used Film Equipment
- Used Stock Alert
- Used Blank Test
- Sell or Part Exchange
- Used Clearance
- Recently Added Used Equipment
- Park Picks
- Faulty
- Trade-In
- Blog
- New in
- Call us
- Contact us
- Stores
- Sign in
- Categories
- Tips & Inspiration
- Reviews
- News
- Events
- Features
- Buying Guides
- Competitions
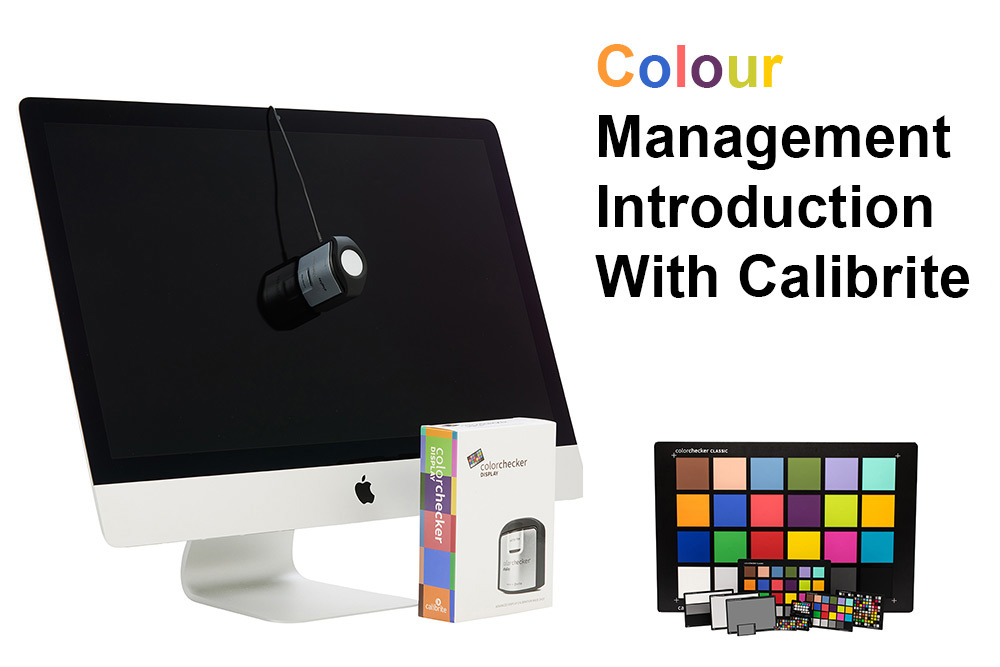
Colour Management Introduction With Calibrite
Getting accurate colours for your photography and video can be difficult without the right calibration tools, so we’ve teamed up with Calibrite who share their expert tips for achieving accurate colour. We’ll learn about printer calibration, calibrating your monitor and streamlining colour workflow using software like Photoshop with this introduction to colour management.
All images © Thomas Adorff
What is Colour Management?
The primary goal of colour management is to achieve a good match across any colour devices. The outcome is consistent colours, which are accurate and appear the same on your camera, monitor when editing, through to the final print if you’re printing out a photograph. Video colour management means getting the same consistent colour results from capture through to the exported movie at the end of your colour grading process.
Why do I need colour management devices?
Colour management devices are designed to help you take control of your colour workflow and improve colour accuracy from capture, through editing to output. Without a device of some kind it’s virtually impossible to accurately gauge neutral greys and white balance, particularly when artificial lighting is used. However it’s also difficult with natural light outdoors, where we may have sunset colours, reflected light or changing colour due to cloud movement for example.
How do I get colours right in my work?
You can make sure you capture colours accurately right from the very first shot you take during any shoot. Using a simple device like the Calibrite ColorChecker chart works in virtually any situation. Whether you’re shooting indoors or outside, once you’ve got your composition and your desired lighting setup, place the ColorChecker chart in the frame for the first take.
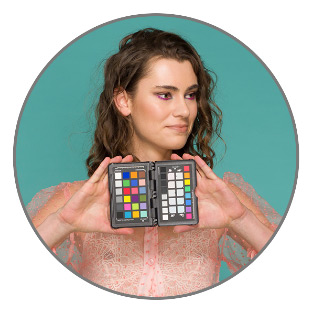
© Thomas Adorff
Then, when editing your series of shots, use the free ColorChecker Camera Calibration Software (available here on Calibrite’s website) to create a colour profile of that first shot with the ColorChecker chart. This allows correct colour settings to be synchronised to all images in the series (provided the images are taken under exactly the same conditions and lighting). The software uses colour patches from the ColorChecker chart to calculate a neutral and accurate colour profile, which you can then use in your favourite editing software, whether Capture One, Photoshop or Lightroom.
Depending on the size of the scene or subject, there is a colour chart for every photographic situation. The most popular are used for portraits and studio work, however Calibrite offers 11 different ColorChecker charts in various sizes to assist from any subjects from macro to aerial photography.
What is the benefit of using a ColorChecker?
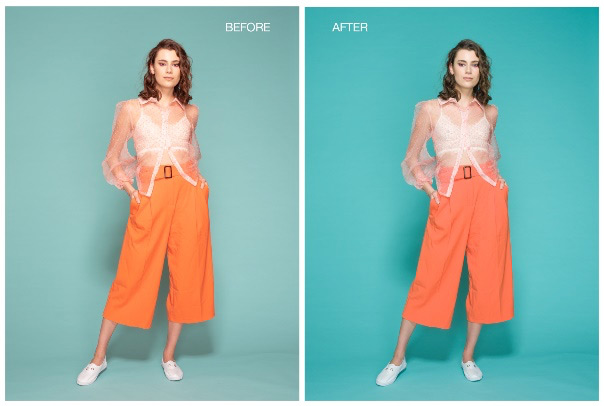
© Thomas Adorff
Comparison shows a before and after when using a ColorChecker chart.
On the left side there is no colour correction, while on the right, colours have been corrected using a ColorChecker chart. When it comes to editing after shooting, software can automatically compensate for any differences in white balance. This saves a lot of time, allowing you to focus on enjoying your work.
Grey Balance Cards
A grey balance card is specifically designed to help obtain consistent image exposure and/or colour in video production, film and photography. The neutral grey colour card’s uniform surface is spectrally neutral (reflecting equal amounts of red, blue and green). This results in an accurate neutral balance at the start of each new photo session.
As with the ColorChecker chart, you can use the free ColorChecker Camera Calibration Software to manage exposure and white balance in post. Calibrite offers different-sized grey cards with different percentages of grey as well as a 3-step grey card, especially, for videographers. Calibrite also offer a specific white balance card.
We currently have three variations of the grey balance card to choose from:
- Calibrite ColorChecker 3 Step Grey Scale Balance Card (perfect for videography)
- Calibrite ColorChecker Gray Balance Classic size (ideal for most photo applications)
- Calibrite Mini ColorChecker Grey Balance Card (run and gun on-location portable card)
Monitor calibration for photography
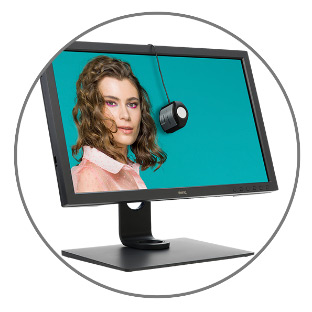
© Thomas Adorff
If a monitor is not properly calibrated, you cannot trust what you see, as colours won’t match what you saw during your photo shoot, and prints will never quite match your monitor either. Did you know that your working space lighting conditions, bright colours in your peripheral view (e.g. wall colour, the colour of the desk) and the monitor viewing angle also influence how you perceive colours on-screen? So, it’s important to know that your monitor is set up correctly in order to learn how to calibrate your monitor for photography.
What does a screen calibration device do?
To achieve consistent computer screen colour, colourimeters such as the Calibrite ColorChecker calibration devices produce a colour profile that is saved to the monitor's display settings. This ensures that your shots are displayed correctly, giving you the confidence to edit them accurately and avoid surprises when it comes to printing. Calibrite monitor calibration solutions are equipped with technically advanced filters and optical systems, fast measuring speeds and high colour accuracy. This gives you the certainty that what you see is what you get!

© Thomas Adorff
This handy comparison chart shows you the difference between monitor calibration devices and their capabilities, so you can choose the perfect one for your requirements.
|
Calibrators |
ColorChecker Display |
ColorChecker Display Pro |
ColorChecker Display Plus |
|
|
Recommended for |
Enthusiast and Pro Photographers, Graphic / Packaging / Industrial / Interior Designers, Stylists |
Pro Photographers, Graphic / Packaging / Industrial / Interior Designers, Stylists |
Pro Filmmakers and Photographers, Graphic / Packaging / Industrial / Interior Designers, Stylists |
Enthusiast and Pro Photographers who print, Graphic / Packaging / Industrial / Interior Designers, Stylists |
|
Why do I need it? |
To ensure colours you see on your monitor are accurate. Save time in post-editing. |
To ensure colours you see on yourmonitor are accurate. Save time in post-editing. Get prints to match your monitor. |
||
|
Proficiency Level |
Beginner to Intermediate |
Beginner to Advanced |
Intermediate to Advanced |
Beginner to Advanced |
|
Calibrator Type |
Colorimeter |
Colorimeter |
Colorimeter |
Spectrophotometer |
|
Software |
CC Studio |
CC Profiler |
CC Profiler |
CC Studio, ColorChecker CameraCalibration Software |
|
Multiple Display Support |
4 Displays |
4 Displays – share and re-use workflows |
4 Displays – share and re-use workflows |
4 Displays |
|
Monitor Calibration and Profiling |
YES |
YES |
YES |
YES |
|
Projector Profiling |
YES |
YES |
YES |
YES |
|
Scanner Profiling |
YES |
|||
|
Printer Profiling |
RGB / CMYK |
|||
|
Camera Calibration |
YES |
|||
|
White Point Settings |
D50, D55, D65, D75, Native, Measured |
D50, D55, D65, D75, Native, Custom, Measured |
D50, D55, D65, D75, Native, Custom, Measured |
D50, D55, D65, D75, Native, Custom, Measured |
|
Max Luminance Measurement |
1000 nits |
1000 nits |
2000 nits |
1000 nits |
|
Ambient Light Measurement |
YES |
YES |
YES |
YES |
|
Ambient Light Monitoring |
YES |
YES |
||
|
Display QA & Uniformity |
YES |
YES |
||
|
Monitor Types Supported |
Industry Standard Laptops, Desktops, Projectors |
Industry Standard Laptops, Desktops, Field Recorders, Projectors |
Industry Standard and HD/HDR Laptops, Desktops, Field Recorders, Projectors |
Industry Standard Laptops, Desktops, Projectors |
|
Included ColorChecker Target |
ColorChecker Classic Mini |
|||
TIP: All monitors require regular calibration to measure ambient light, screen brightness and contrast to create an accurate colour profile. Monitor parameters shift over time due to being switched on and off, warming up and cooling down and laptops lose their original colours just by being carried around. That is why it’s important to recalibrate every 4-6 weeks.
Printer calibration
Photographers can create custom colour profiles for their printers too, saving valuable time and avoiding wasted paper media and ink due to too many unnecessary test prints. The Calibrite ColorChecker Studio is a complete printer colour management tool. It is a spectrophotometer, which creates custom print colour profiles that are saved in the printer driver. It uses intelligent iterative profiling technology that ensures your output is always colour accurate, delivering precise smoothness, highlights, and shadow details. Simply remember to select the correct profile saved in the printer driver before printing. Custom print profiles should be created for different paper types (i.e glossy or matte) and for more accuracy for different paper prints.
© Thomas Adorff
A calibrated colour workflow avoids inconsistencies in colour reproduction between camera, scanner, monitor and printer output.
Calibrite, powered by X-Rite, is the world leader in colour trends, science and technology, helping content creators achieve consistent, true colour on every device, every step of the way. Thanks to Calibrite for providing these tips where we learned that we can get accurate colour by using a chart from the very first shot, through to calibrating our monitors and store a profile which is then used for accurate print colours. Visit our Calibrite page to find the right tools you need to get accurate colour right across your entire workflow for photography and videography.
Special thanks to Calibrite, partnered with X-Rite, who continue as their manufacturer, delivering world renowned products for photo and video colour calibration.
Share this post:
By Park Cameras on 15/03/2022

Trade in your old equipment
Fast and easy trade in service ensures your old gear is collected efficiently and you are paid quickly! It's very simple to trade in your unwanted photography gear. Just head over to our dedicated Sell or Part Exchange page, fill out the details, and we'll get back to you with an offer for your old gear. Take the cash, or put it towards the cost of your new gear. It's up to you! Find out more
sign up to the newsletter
Keep up to date on the latest photography news, events and offers. Sign up now