- Call us 01444 237070

-
- Back
- Used Cameras
- Used Accessories
- Used Lenses
- Back
- Used Canon Lenses
- Used Nikon Lenses
- Used Fujifilm Lenses
- Used Sony Lenses
- Used Micro 4/3rds Lenses
- Used Leica Lenses
- Used Panasonic Lenses
- Used Pentax Lenses
- Used Samyang Lenses
- Used Sigma Lenses
- Used Tamron Lenses
- Used Tokina Lenses
- Used Voigtlander Lenses
- Used Zeiss Lenses
- Used Hasselblad Lenses
- Used Video
- Used Film Equipment
- Used Stock Alert
- Used Blank Test
- Sell or Part Exchange
- Used Clearance
- Recently Added Used Equipment
- Park Picks
- Faulty
- Trade-In
- Blog
- New in
- Call us
- Contact us
- Stores
- Sign in
- Categories
- Tips & Inspiration
- Reviews
- News
- Events
- Features
- Buying Guides
- Competitions
Learn Manual Photography in 10 Minutes
As part of our learn photography series we’re looking at the very first step into advancing your photography skills, which is to learn to shoot in manual mode on your camera. This post is based on the video tutorial which you can watch below, with Gareth showing how you can learn manual photography in 10 minutes.
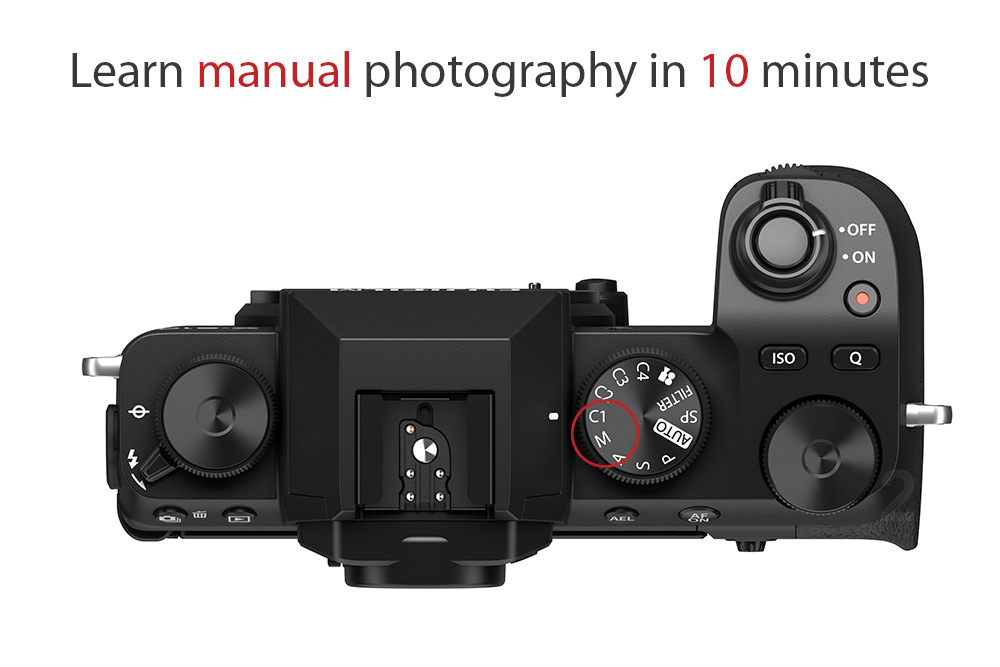
Table of contents
- Video tutorial
- Why take pictures in manual mode?
- Choose a camera which can shoot in manual mode
- Manual camera settings
- The Exposure Triangle
- Aperture
- Shutter speed
- ISO
- Manual settings for different types of photography
- Head out and shoot!
Watch Gareth's video tutorial
Why take pictures in manual mode?
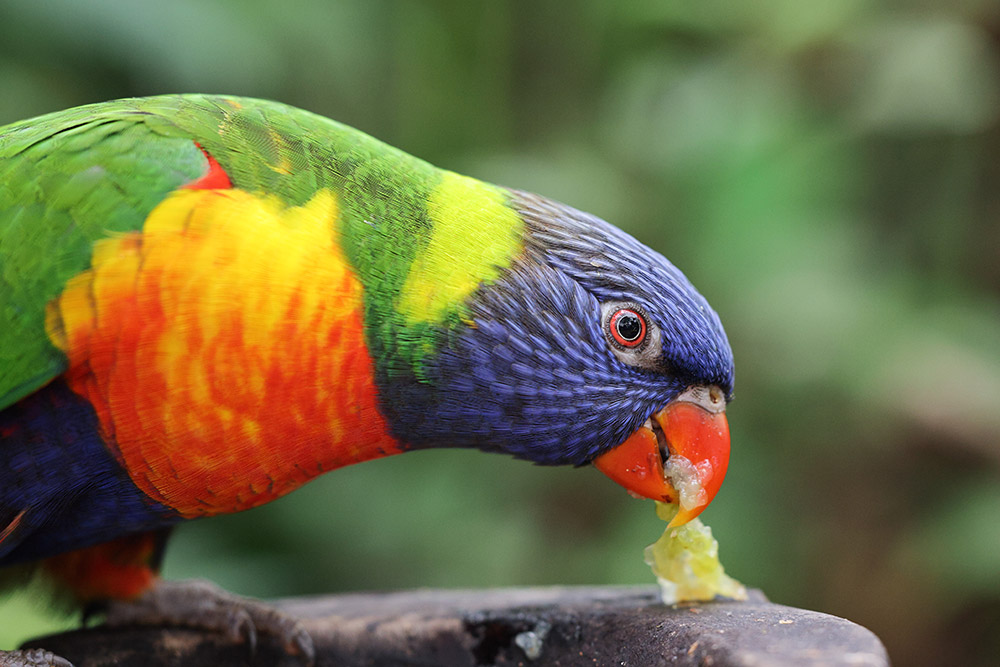
Wildlife. Camera: Canon EOS R5. Exposure: 1/320. f/4 ISO 6400 - Testament to the high ISO capabilities of the mirrorless system and a smooth creamy background attained at f/4
With cameras getting more advanced and even incorporating artificial intelligence to get the best shot, why should we take pictures in manual mode? There’s one primary reason and that is because you can be more creative when you’re in control of the end result. What this means is you get to choose how the outcome will look, by deciding yourself on the camera settings to use.
If you want a really bright photo or ‘high key’ image with lots of light areas, you can change your settings to get it. If you want a portrait with just the eye in focus and everything else blurred, you can change your settings to capture your vision more closely.
When we leave it to the camera to decide the outcome of a photograph, we’re handing over creative control to the software developers who wrote the processing algorithms which the camera uses. This is not at all a bad thing in many situations, as camera companies clearly know their stuff, however they may not guess correctly what you had in mind when composing a shot, only you know your creative vision.
It can be daunting to switch to the ‘M’ on the camera settings dial, but it’s worth it, stick with it and you’ll never look back!
Choose a camera which can shoot in manual
The vast majority of interchangeable lens cameras today have a manual setting available, whether that is a DSLR or mirrorless camera. Quite a lot of compact digital cameras also have this capability, but you should check beforehand if you’re buying one. Finally, bridge cameras will almost certainly have the ability to capture manual photos, although you won’t be able to change the lens on these.
Manual camera settings
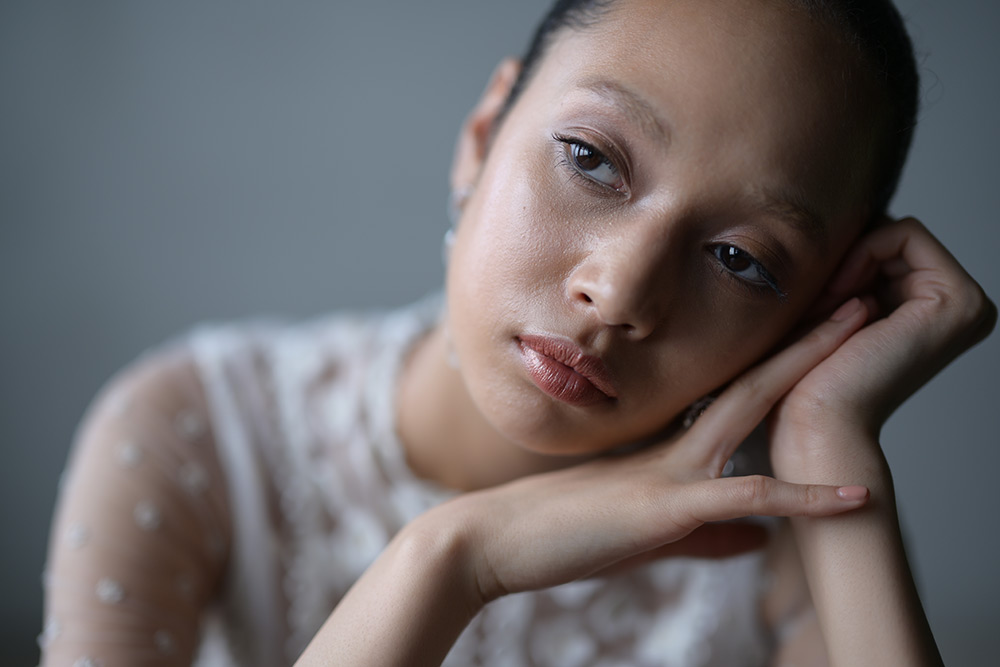
Close-up Portrait: Camera: Nikon Z7. Lens: Nikkor Z50 f/1.2 S. Focal length: 18mm. Exposure: 1/400. f/1.2 ISO 100. This shows the fine depth of field you can get with wider aperture values
The good news is that there are only three settings which affect how an image will look from a technical standpoint. This is referred to as the ‘exposure triangle’ and it has existed, unchanged since the days of film photography. Yes, believe it or not, we still sell film too and these principles are exactly the same, only more critical for film as post processing is a bit harder.
Once you’ve taken the leap and set your camera to the ‘M’ mode (manual) either on a control dial at the top of the camera, or in the menu settings, you’re ready to choose your manual camera settings.
The Exposure Triangle
The three elements of the exposure triangle are:
- Aperture
- Shutter speed
- ISO
Changing any one of these will mean the others will have to also change and the type of subject we’re shooting, or outcome we want typically steers the settings we choose. Each of these three elements controls the amount of light hitting the sensor and photography is all about light as we want to get the correct exposure for our shot, as well as having creative control.
If we let in too much light, the picture becomes over exposed (white) and if we let in too little light the result will be too dark (black). This means the exposure triangle settings all have to work in unison with each other.
Let’s take a moment to look at what each one does:
Aperture
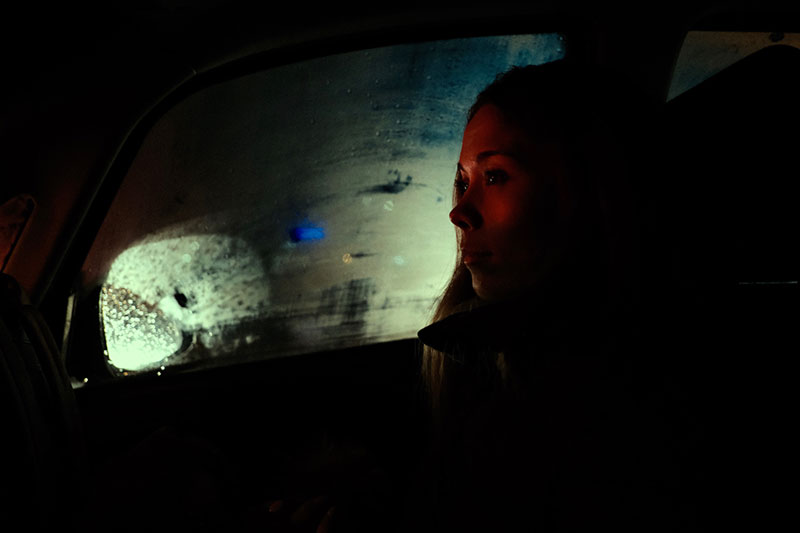
Night portrait: Camera: Fujifilm X-E4. Lens: XF 18mm f2 R WR. Focal length: 18mm. Exposure: 1/90. f/2 ISO 6400. Using a wide aperture and relatively slow shutter speed with high ISO allowed the shot to be taken at night time.
The aperture is essentially the opening in a lens which lets in light, that then hits the camera sensor (or film). The aperture controls the Depth of field, which is the amount (front to back) of an image which is in focus.
It’s a bit confusing because we refer to aperture in a number of ways, using fast, bright, wide, narrow and so on. Lenses dictate what apertures we can use, as they are limited by the size that the aperture will open up to. A ‘wide’ aperture lets in the most light, and a ‘narrow’ aperture lets in the least light, the end result of which is a narrow or wide depth of field. So if we want a wide depth of field we use a narrow aperture (also confusing) and if we want a narrow depth of field, we’ll use a wide aperture. Aperture is counted by an f-stop number, with fast being lower and slow being larger (more confusion)! Here are some examples:
An f/2 lens is considered fast, or bright and will allow us to have just a small part of the photo sharp, with the rest out of focus if that’s what we want. An f/4 lens is relatively slow depending on what focal length it can reach. Typically prime lenses (fixed focal length) will have brighter (or faster) apertures than a zoom lens.
On the whole different lenses are available for every camera system with apertures between f/1.2 through to f/32. Expect to pay a higher price for a lens which has a wider aperture, because they are more difficult to manufacture, using more glass inside. Browse for lenses by manufacturer and camera types in our store.
How does changing the aperture affect the photo?
Different situations can call for different aperture values where we want a different amount of the photo to be sharp. For example, we might want a portrait with the subject nice and sharp, but the background soft and blurry. For this type of image we might use the lens ‘wide open’ at it’s brightest, lowest aperture, f/2 or whatever that number is. This is called having a ‘narrow depth of field’ because less of the photograph, from front to back is sharp, only the subject is sharp. Where we might want a wider depth of field (or deeper depth of field) could be for a landscape photograph, cityscape or any other time when we want a lot of the image in focus, from front to back. Typically we would use an f-stop of around f/8 or f/11 to achieve this wider depth of field where we want more sharpness throughout the image.
When we change the aperture we are adjusting the amount of light hitting the sensor and this is where the other two elements of the exposure triangle come into play. If we open up the lens to a bright aperture we let in more light and if we use a narrow aperture we’re letting in less light, so we have to balance that with either shutter speed or ISO or both.
Shutter speed
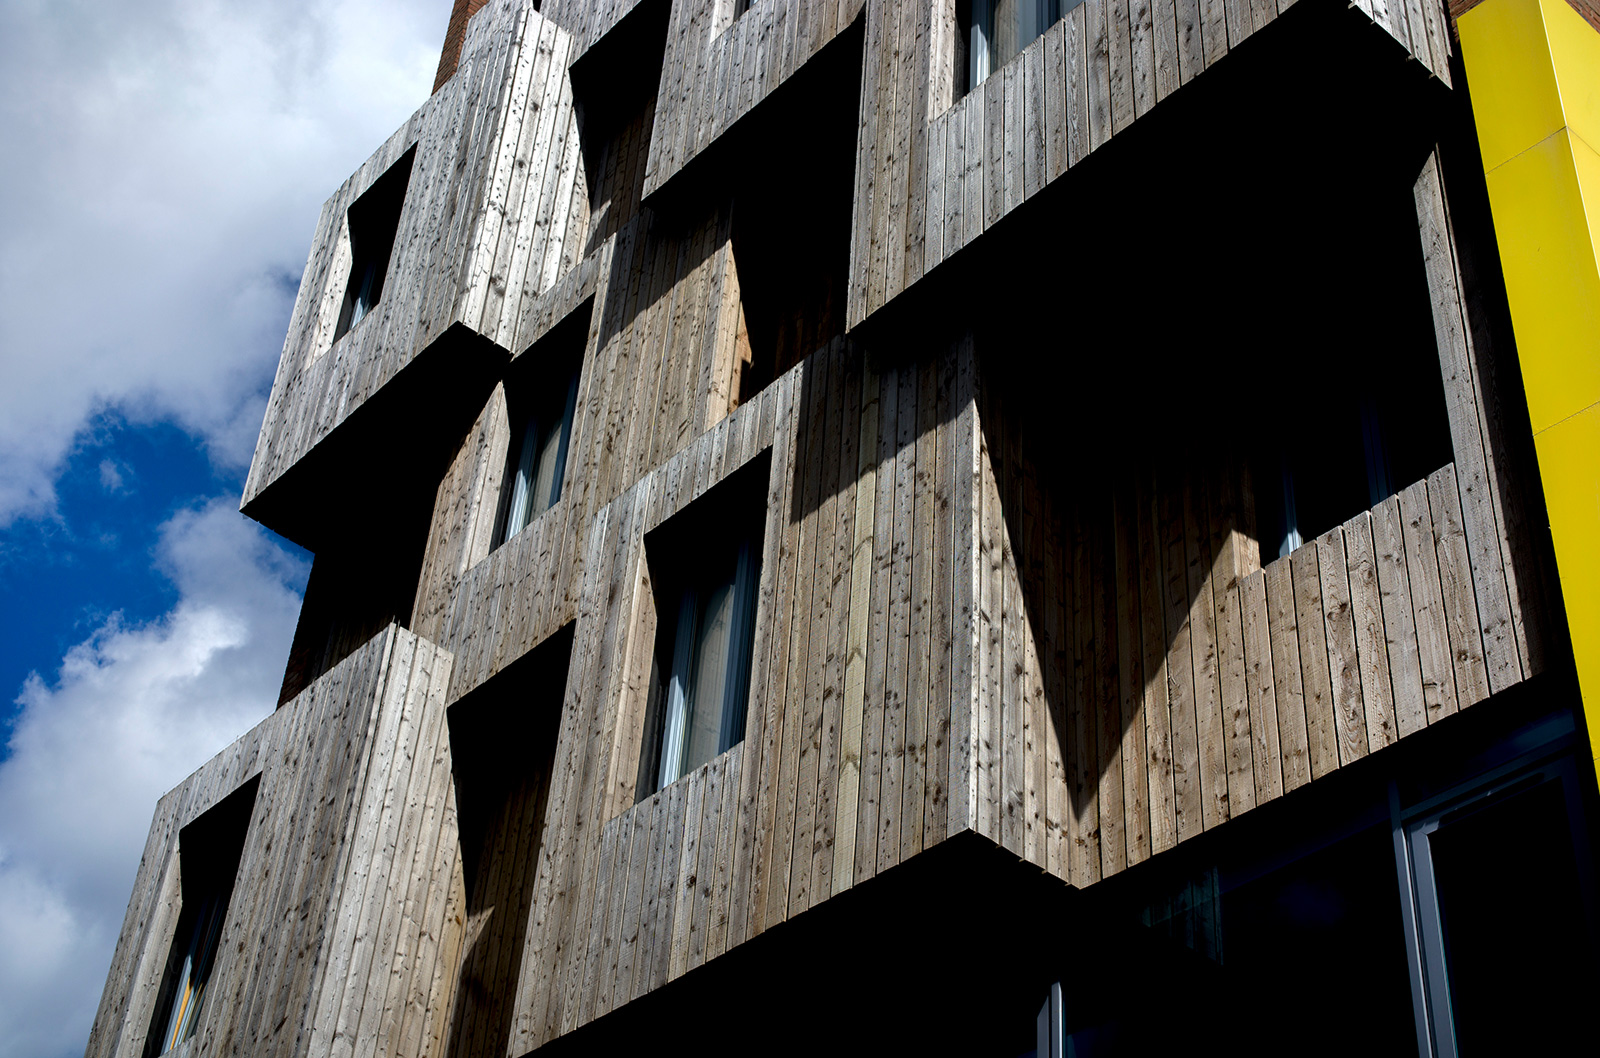
Architecture: Leica M10-R camera. 50mm. 1/1000th sec. ISO 100. f/5.6 - APO-Summicron-M 50 f/2 ASPH. A bright sunlit day meant using a faster shutter speed even at ISO 100.
Shutter speed refers to the amount of time the camera shutter stays open for. A slow shutter speed is anything from around 1/125th of a second right down to 30 seconds and a fast shutter speed is 1/250th second or quicker, up to around 1/3000th of a second.
The shutter speed affects several things depending on the subject you are capturing. If it is a stationery subject like a building for example, we can typically use a slower shutter speed to capture it all sharply. If it is a moving subject like a train for example, we would need to use a faster shutter speed to get it in focus. If we’re taking a portrait of someone while they moving around and we want them to be sharp, we would have to use a shutter speed of at least 1/250th second, or even quicker.
How does shutter speed affect light?
If the shutter stays open for longer we are letting in more light onto the sensor. An example of long exposure photography might be to photograph stars, where we could have the shutter open for 20 seconds or longer. Conversely if we are photographing a sporting event with runners around a track, we would have to use a quick shutter speed, so are letting in much less light to the sensor as the shutter opens and closely in a fraction of a second.
Creative opportunities of shutter speed
Shutter speed gives us creative possibilities with either blurring a subject or making a subject pin sharp where we wouldn’t normally see it. Examples of these are a slow shutter speed used to capture a waterfall. This might mean a manual camera setting for the speed of 1 second, causing the water to smooth out, blurring as it falls quickly down the rocks. This is motion blur.
A really fast shutter speed of 1/2000th second could be used to capture the beating wings of a bee or bird in flight. We would never be able to see the wings of a bee with our naked eyes, but a camera can shoot so quickly it can stop motion, or freeze motion. These are just a few examples of where shutter speed can be used to make creative choices, which a camera set to automatic mode would never understand.
Pitfalls and considerations of shutter speed
There are some inherent problems with shutter speed, the most critical of which is getting a picture sharp if we use a slow shutter speed. This is referred to as different things by different manufacturers, but basically it’s the same thing as motion blur. Because we don’t hold the camera rock steady at slower speeds, the picture can come out blurred.
There are technologies used in some cameras and lenses to combat out of focus images caused by slower shutter speeds. These are in-camera stabilisation and lens-based optical stabilisation. Newer systems can combine stabilisation from both camera and lens based systems in unison for every better results. Stabilisation is also measured in f-stops usually with an EV (exposure value). Really good stabilisation systems might give us between 5-stops and 8-stops of anti-shake advantage. This means if you shoot at 1/15th second (which is very slow) while hand holding the camera, you could be getting stabilisation equivalent to shooting at 1/1000th second, allowing you to get a sharp shot. In practice it also helps to develop a good grip on your camera and lens, creating a stable shooting technique for yourself. When you look back at photos which are blurry, work out what shutter speeds you were shooting at and try and get the best system combined with the best technique you can.
Stabilisation is getting better, with complex systems helping us to get sharper shots, but you could also buy a tripod and shoot at any speed you like. Of course this will only work for certain situations, for example shooting landscapes, cityscapes and wildlife. If you are doing street photography with candid portraits, it’s a tough call to stand there fiddling around with a tripod before you press the trigger!
ISO
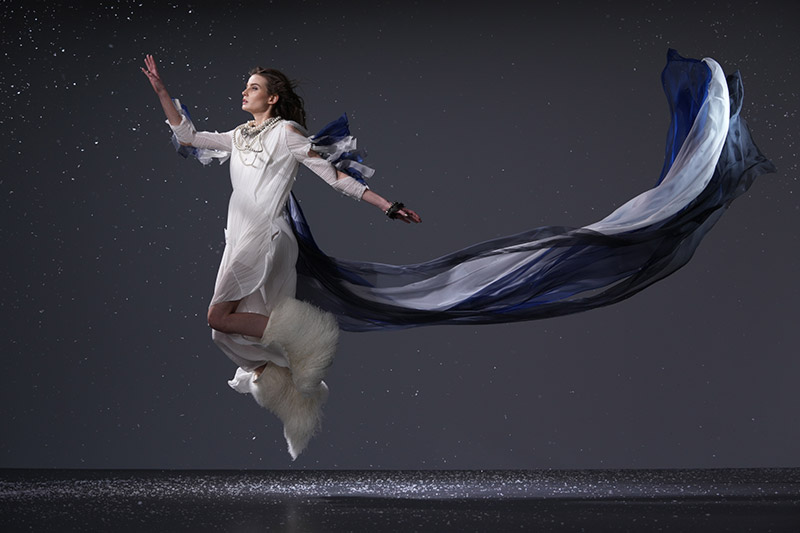
Dance: Sony A1 with FE 70-200mm f/2.8 GM OSS. Focal width: 79mm. Exposure: 1/2000. f/4.5. ISO 400. No flash was needed for this fast moving subject with motion frozen at a fast shutter speed.
The final element in our exposure triangle is ISO. ISO is somewhat arbitrary on digital cameras as it stems from film photography, but cameras still use this value. ISO refers to the light sensitivity of film, or it’s ability to gather light. For digital photography it refers to the sensor’s ability to gather light and all cameras have a base or ‘native' ISO value. This is usually between ISO 64 (Nikon cameras excel at having a good base ISO) up to ISO 200, which is usually found on crop sensor cameras. The larger a sensor, typically the more light it can gather as there is more surface area. The average native ISO is 100 for a full frame camera. It’s a little arbitrary on digital cameras as one camera from a manufacturer set to ISO 100 doesn’t let in exactly the same amount of light as another camera set to the same ISO, but they are roughly equivalent.
How does ISO affect an image
The lower the ISO number, the smoother our images will appear, with less ‘noise’ or ‘grain’ as it is called for film. So shooting at ISO 100 will usually give us nice clean, clear photos with little or no noise. Shooting at high ISO values such as ISO 50,000 will result in noisy images, where details and colours are lost because there’s lots of noisy small dots everywhere.
As with stabilisation systems to avoid shake when using slower shutter speeds, manufacturers are improving sensors over time which are getting better at gathering more light. This means we will often see a camera capable of an ISO range of 100 to 100,000 for example. Even if we see particularly high values in descriptions, expect to see substantial amounts of noise at that level. For me personally, as a landscape photographer, I will try and shoot from a tripod at ISO 100 wherever possible. This avoids noise which generally isn’t appealing in a landscape photo. However if it’s windy and plants and trees are blurring, or I want to freeze motion in water or something like that, I will raise the ISO up to a maximum of ISO 800 or so when needed. Portrait photographers and family photographers shooting a more documentary style of images will go well beyond ISO 6400 or more when they need to. At the end of the day it’s better to get a noisy shot of an amazing moment than no shot at all.
When to change ISO settings
On the whole, we want our photos to have the least amount of noise possible. There are of course exceptions and some people like some noise for certain subjects as it can add extra mood to a photo. However, typically we don’t want much noise as it can be anything from distracting, to completely ruining a shot.
So when would we change ISO from the base (native) setting on the camera? If we want to shoot at a fast shutter speed to capture a moving subject, we are gathering less light as the shutter is only open for a very short time. We might then change our aperture to be as wide as possible, letting in more light. However this might not be enough still and our photo will be under exposed. In this instance we would raise the ISO value from the native setting to something faster until we reach the correct exposure. An example of this is photographing a portrait of someone indoors who is moving around. There’s not a lot of light available as they are inside and we need a quick shutter speed to freeze the motion and avoid a blurry image. So we crank the ISO up to 10,000 which lets the sensor gather more light. The downside as mentioned, is that we get more grainy noise in our end result. Sometimes there’s no getting around this whilst using only natural lighting situations.
How can you get around low light situations?
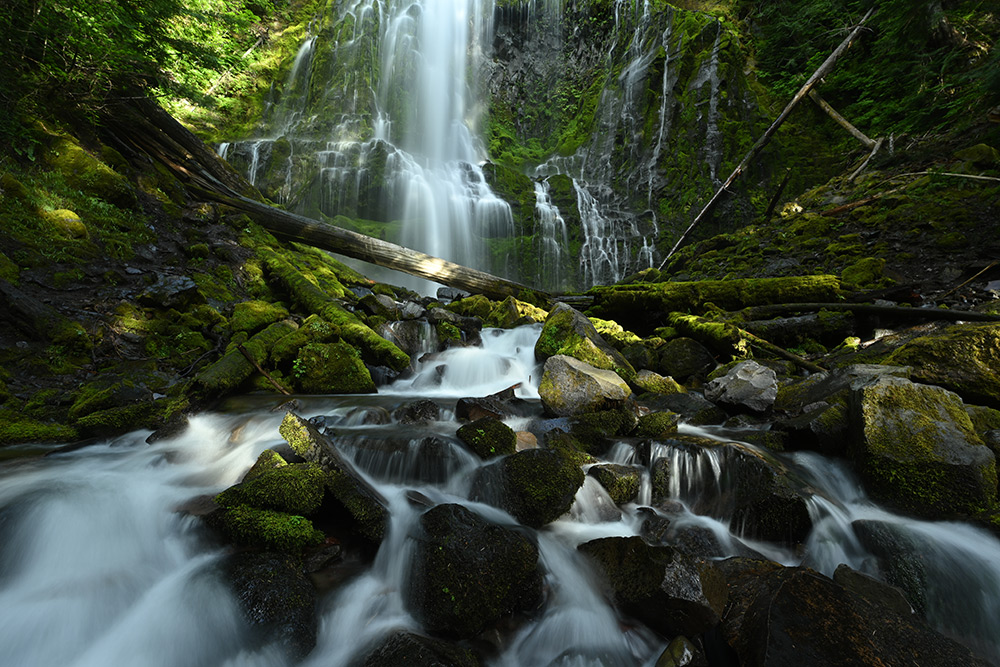
Waterfall: Nikon Z7. Lens: Nikkor Z14-24 f/2.8 S. Focal length: 16mm. Exposure: 1 second. f/13 ISO 100. Using a tripod lets the photographer shoot at slow shutter speeds whilst maintaining the best ISO value possible.
Photographers who shoot indoors or with suitable subjects might invest in a flashgun or other studio lighting set-up. Using artificial light reduces the need to raise ISO and lets us shoot faster as there is more light available. This is a great solution for many, but bear in mind a flashgun cannot be used for every subject and adds another layer of skill required. Artificial lighting is a great solution in the long run for many photographers and another topic, which you can read about in our flash photography basics blog post here.
Manual settings for different types of photography
There are no exact rules for precise settings for different types of photography, however there are general guidelines which we can use as a starting point to experiment with. Here are some examples to get an idea.
Portrait photography settings
As a starting point, if we’re shooting a non-moving portrait (which includes anything from a baby through to a pet) in a well lit room we can use the widest aperture our lens can go to at a medium speed using base ISO as there’s plenty of light around. So the setting would be f/2.8 at 1/250th using ISO 100.
Street photography settings
To capture candid portraits of people walking around on a cloudy day in slightly dark streets, we might use the following settings. f/4 (to get a slightly wider depth of field) at 1/500th second (so we get the moving subject sharp) at ISO 400 because we needed more light.
Landscape photography settings
This one is easy as we are using a tripod to avoid camera shake! We’re shooting a sunset so the light is low and we know we want to stay at base ISO of 100. This means our settings might be something like: f/8 (for a greater depth of field) at 1/3rd second at ISO 100. Without a tripod we’d be scuppered.
Wildlife photography settings
We spotted a fox in our garden during dusk and want to capture a beautiful photo, what sort of settings could we use. The light is lower because it’s dusk and the fox is moving slowly, so we’d need a faster shutter speed of 1/320th using an aperture as wide as possible of f/2.8 which means we had to raise the ISO to ISO 6400. There’s some noise visible in the photo but it was totally worth it for a beautiful shot of a fox!
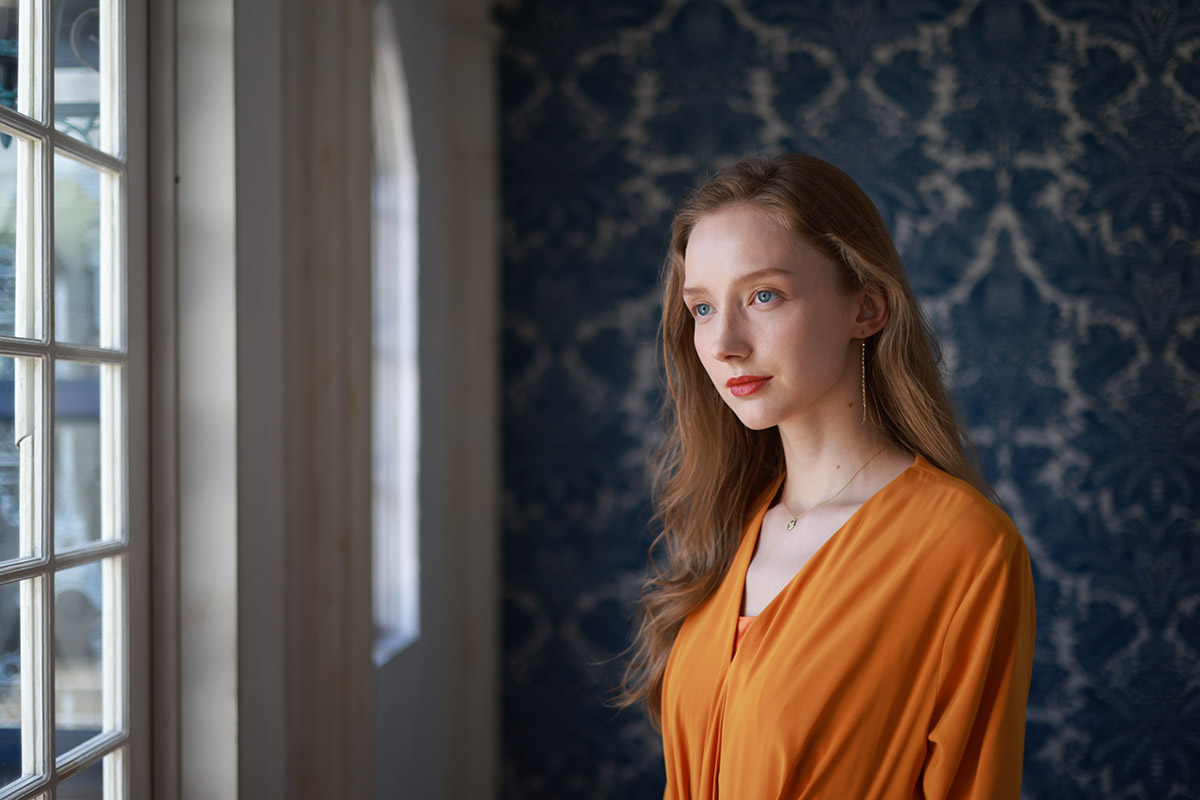
Window portrait: Canon RF 50mm f/1.8 lens with Canon EOS R5 camera body at 50mm. 1/1600 sec. f/1.8 ISO 400. This wide aperture provides a shallow depth of field with a pin sharp portrait subject which is naturally lit.
Time to head out and practice
That’s really all you need to get started with shooting in manual on your camera. The example images give some ideas of settings and it’s a good idea when you’re learning to see what the settings are for photos you like, so you can emulate them in similar conditions. The best thing you can do is to practice and shoot as much as possible, experimenting with the three elements from the exposure triangle. It doesn’t matter if you make mistakes or break the rules, as long as you’re having fun and following your passion and becoming a better photographer along the way.
More tutorials
We are releasing a series of beginner photography tutorials which will be featured in our Photography tips and inspiration section. If you are going to embark on shooting in manual mode, it could be the perfect time to start shooting photos in RAW rather than JPEG. Take a look at our tutorial packed with how’s, why’s and more useful info.
Share this post:
By Nick Dautlich on 13/05/2021
Nick Dautlich
Senior Content Writer and Product Reviewer
Nick Dautlich is the Senior Content Writer and Product Reviewer at Park Cameras, with over 15 years of photography experience. A Sony Imaging Professional and expert reviewer, Nick has worked with major brands such as Canon, Sony and Nikon. His work is also featured on Vanguard World UK’s website, Capture Landscapes, and Shutter Evolve. Nick’s photography includes National Trust projects and magazine covers and he is passionate about landscapes and storytelling. Nick also enjoys hiking and teaching his children about nature. Learn more on his profile page.

Trade in your old equipment
Fast and easy trade in service ensures your old gear is collected efficiently and you are paid quickly! It's very simple to trade in your unwanted photography gear. Just head over to our dedicated Sell or Part Exchange page, fill out the details, and we'll get back to you with an offer for your old gear. Take the cash, or put it towards the cost of your new gear. It's up to you! Find out more
sign up to the newsletter
Keep up to date on the latest photography news, events and offers. Sign up now