- Call us 01444 237070

-
- Back
- Used Cameras
- Used Accessories
- Used Lenses
- Back
- Used Canon Lenses
- Used Nikon Lenses
- Used Fujifilm Lenses
- Used Sony Lenses
- Used Micro 4/3rds Lenses
- Used Leica Lenses
- Used Panasonic Lenses
- Used Pentax Lenses
- Used Samyang Lenses
- Used Sigma Lenses
- Used Tamron Lenses
- Used Tokina Lenses
- Used Voigtlander Lenses
- Used Zeiss Lenses
- Used Hasselblad Lenses
- Used Video
- Used Film Equipment
- Used Stock Alert
- Used Blank Test
- Sell or Part Exchange
- Used Clearance
- Recently Added Used Equipment
- Park Picks
- Faulty
- Trade-In
- Blog
- New in
- Call us
- Contact us
- Stores
- Sign in
Call us: 01444 237070
Search terms
Brands
Category
Products
[[{name}]]
[[{attributes.Price}]]
- Categories
- Tips & Inspiration
- Reviews
- News
- Events
- Features
- Buying Guides
- Competitions
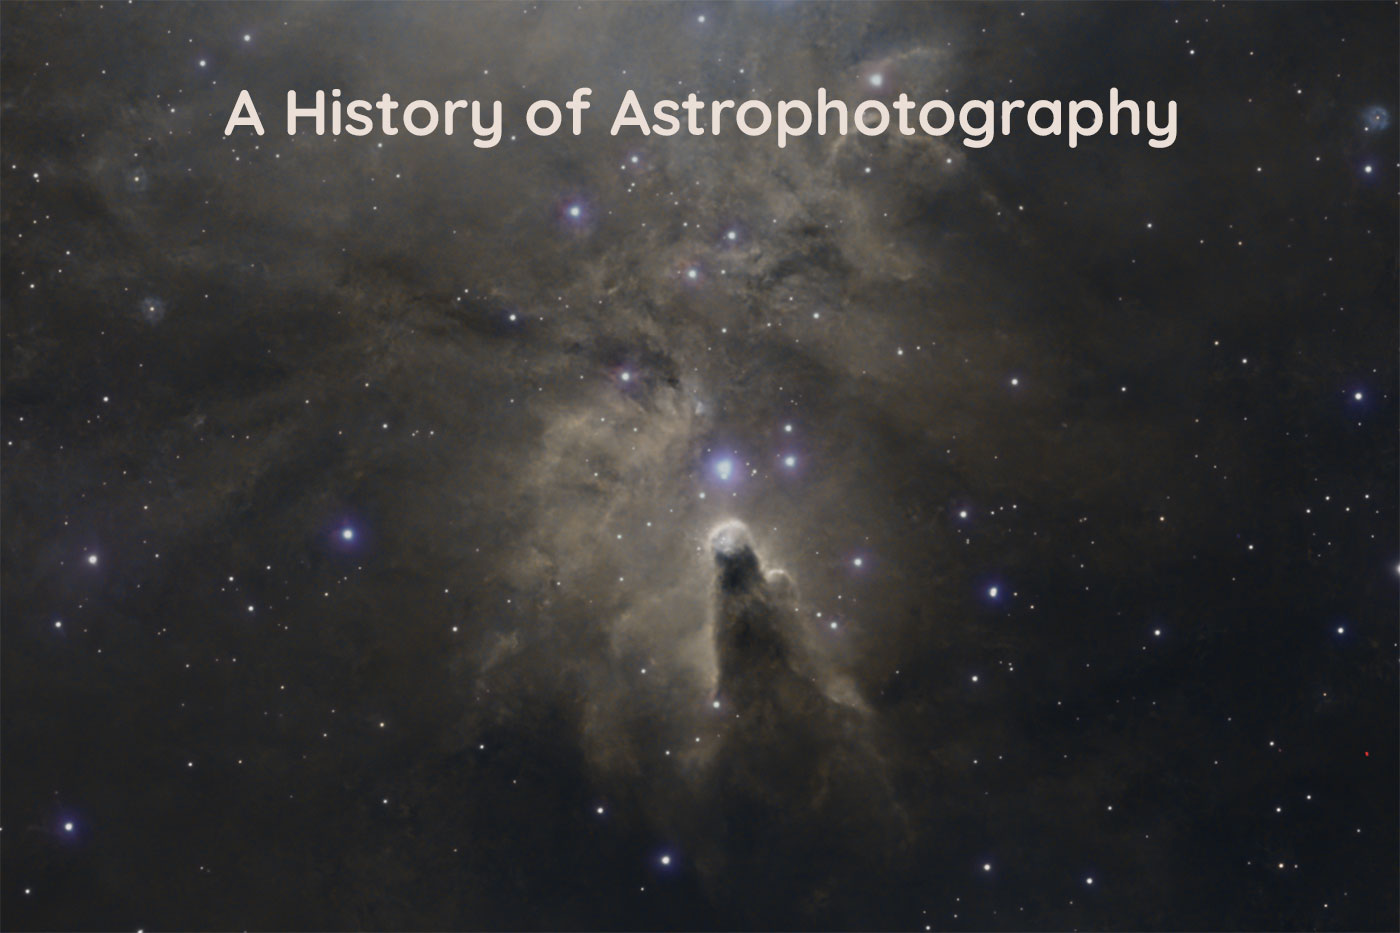
A History Of Astrophotography
Astrophotography began in the 1830's. The earliest attempt we can still see today came in 1840, when John William Draper produced a daguerreotype of the Moon from New York. It was crude by modern standards, but it proved that the 'camera' could capture celestial objects and opened the door to a new way of studying the heavens.
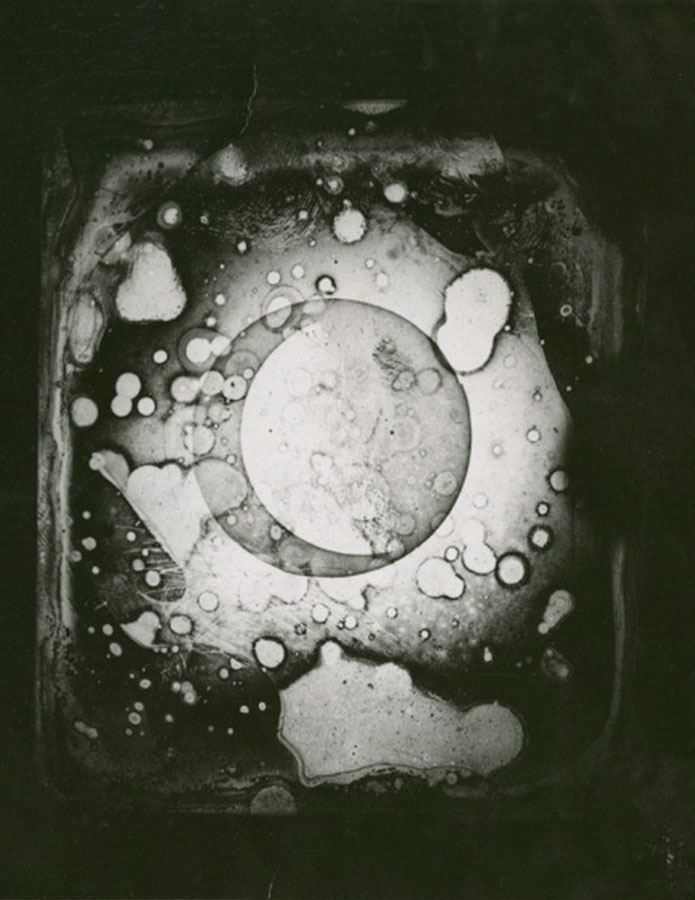
March 26, 1840, mirror-reversed shot. Credit: John William Draper, Public domain, via Wikimedia Commons
Whilst Draper captured this wonder, he wasn't the first, just that his survived. That credit goes to French inventor Louis Daguerre, pioneer of daguerreotypes, who as far as we know first took a picture of the Moon on 2nd January 1839. However, sadly his lab and all of his images were lost when the building caught fire in March 1839.
Over the following decades, improvements in photographic chemistry and telescope design made longer exposures possible. This was chemists experimenting with capturing pictures, the term photography, let alone astrophotography was a few years off being coined! In 1850, the first photograph of a star (other than the Sun), Vega, was taken at Harvard College Observatory. These early images were small, faint, and difficult to produce, but they demonstrated that photography could reveal details invisible to the human eye. It is believed that this image was taken with a 15 inch refracting telescope with a 90 second exposure at Harvard College Observatory 16-17 July 1850.
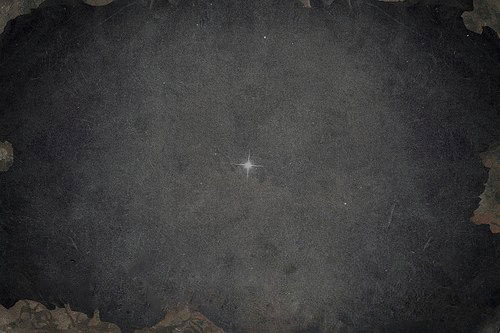
Credit: John Adams Whipple/Public domain/Wikimedia Commons
Daguerreotype photography, This process involved:
- A silver‑plated copper sheet polished to a mirror finish
- Sensitising the plate with iodine vapour to form silver iodide
- Exposing the plate at the telescope’s focal plane
- Developing the latent image with heated mercury vapour
- Fixing the image with a salt or hypo solution
The daguerreotype was extremely sensitive to bright objects but very slow for faint ones, which is why photographing a star (other than the Sun) was such a major achievement.
The Great Refractor (Harvard)
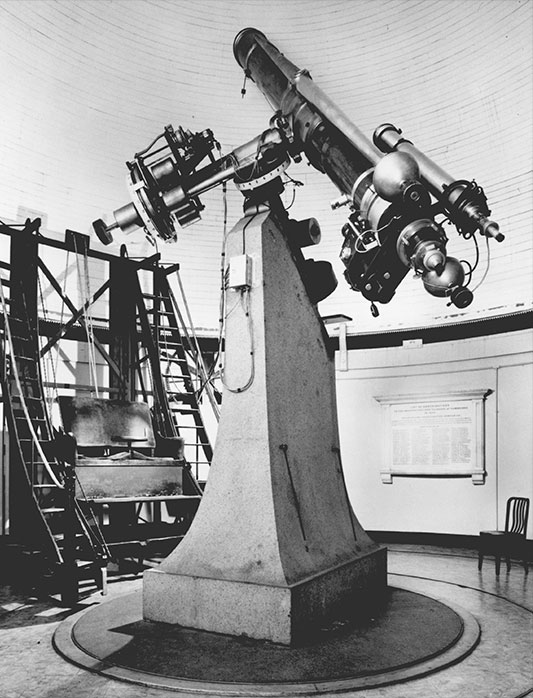
Credit: Harvard
The real transformation came in the 1880s with the work of Isaac Roberts. Using long exposures on glass plates, he captured deep‑sky objects with unprecedented clarity. His 1888 photograph of the Andromeda Nebula showed spiral structure that no sketch had ever captured accurately.
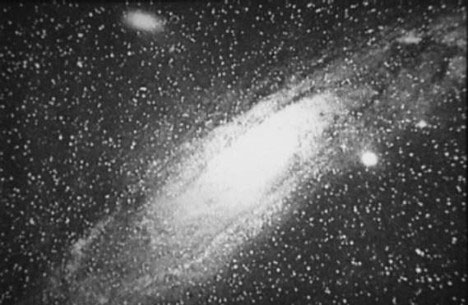
Credit: Isaac Roberts, taken December 29, 1888, published in A Selection of Photographs of Stars, Star-clusters and Nebulae, Volume II, The Universal Press, London, 1899
Roberts followed with images of the Pleiades and the Orion Nebula, proving that photography could reveal faint structures far beyond the reach of visual observers. This era marked the point where astrophotography became a scientific tool rather than an experimental curiosity.
The Pleiades
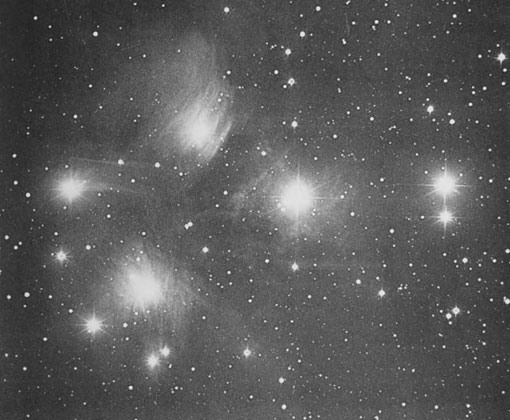
The Nebulae of Pleiades. EXIF 20 inch reflector, 4 hour exposure - 8th December 1888. Three others were taken between 23rd October and end of December 1886, but I can’t find the images!
Published in A Selection of Photographs of Stars, Star-clusters and Nebulae, Volume II, The Universal Press, London, 1899
The Orion Nebula
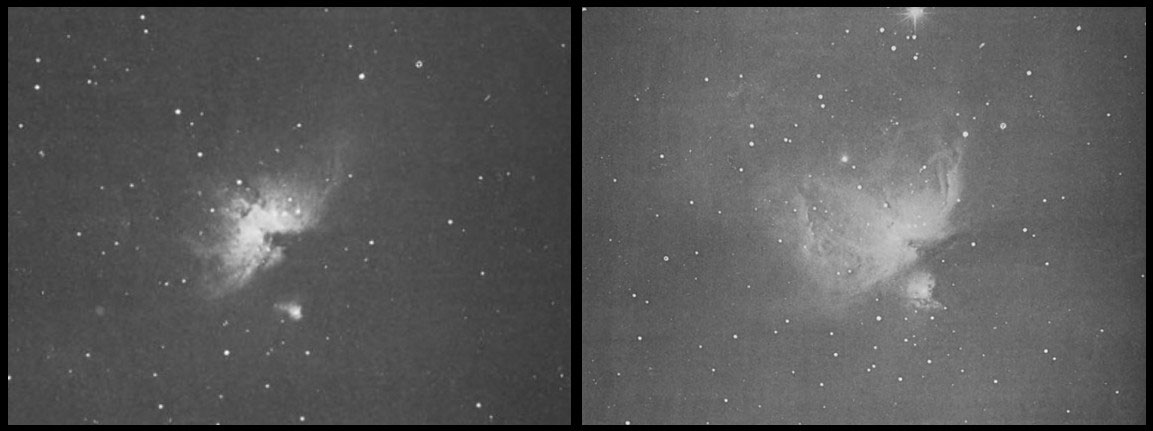
The Great Nebula in Orion - Left: 20 inch reflector on 18th December 1886. 15 min exposure. Right: 20 inch reflector on 24th December 1886. 81 min exposure.
Published in A Selection of Photographs of Stars, Star-clusters and Nebulae, Volume II, The Universal Press, London, 1899
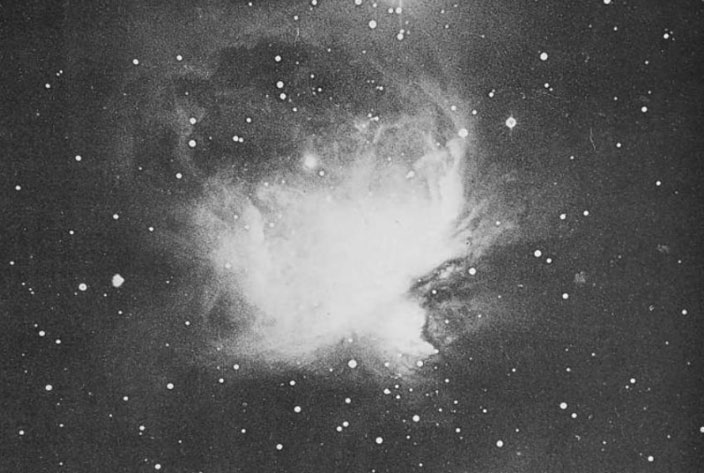
The Great Nebula in Orion. EXIF: 20 inch reflector on 18th December 1889. 205 min exposure.
Published in A Selection of Photographs of Stars, Star-clusters and Nebulae, Volume II, The Universal Press, London, 1899
By the early twentieth century, photographic plates had become the standard method for recording the sky. Observatories around the world built enormous plate archives, some containing hundreds of thousands of images. These plates allowed astronomers to measure brightness, track changes over time, and discover new objects. Photography turned astronomy into a data‑driven science. One collection that I find particularly fascinating is that of the Maria Mitchell Association, they boast a collection of 8,000 plates and whilst not as numerous as other institutions they do have a very rich quality to their collection.
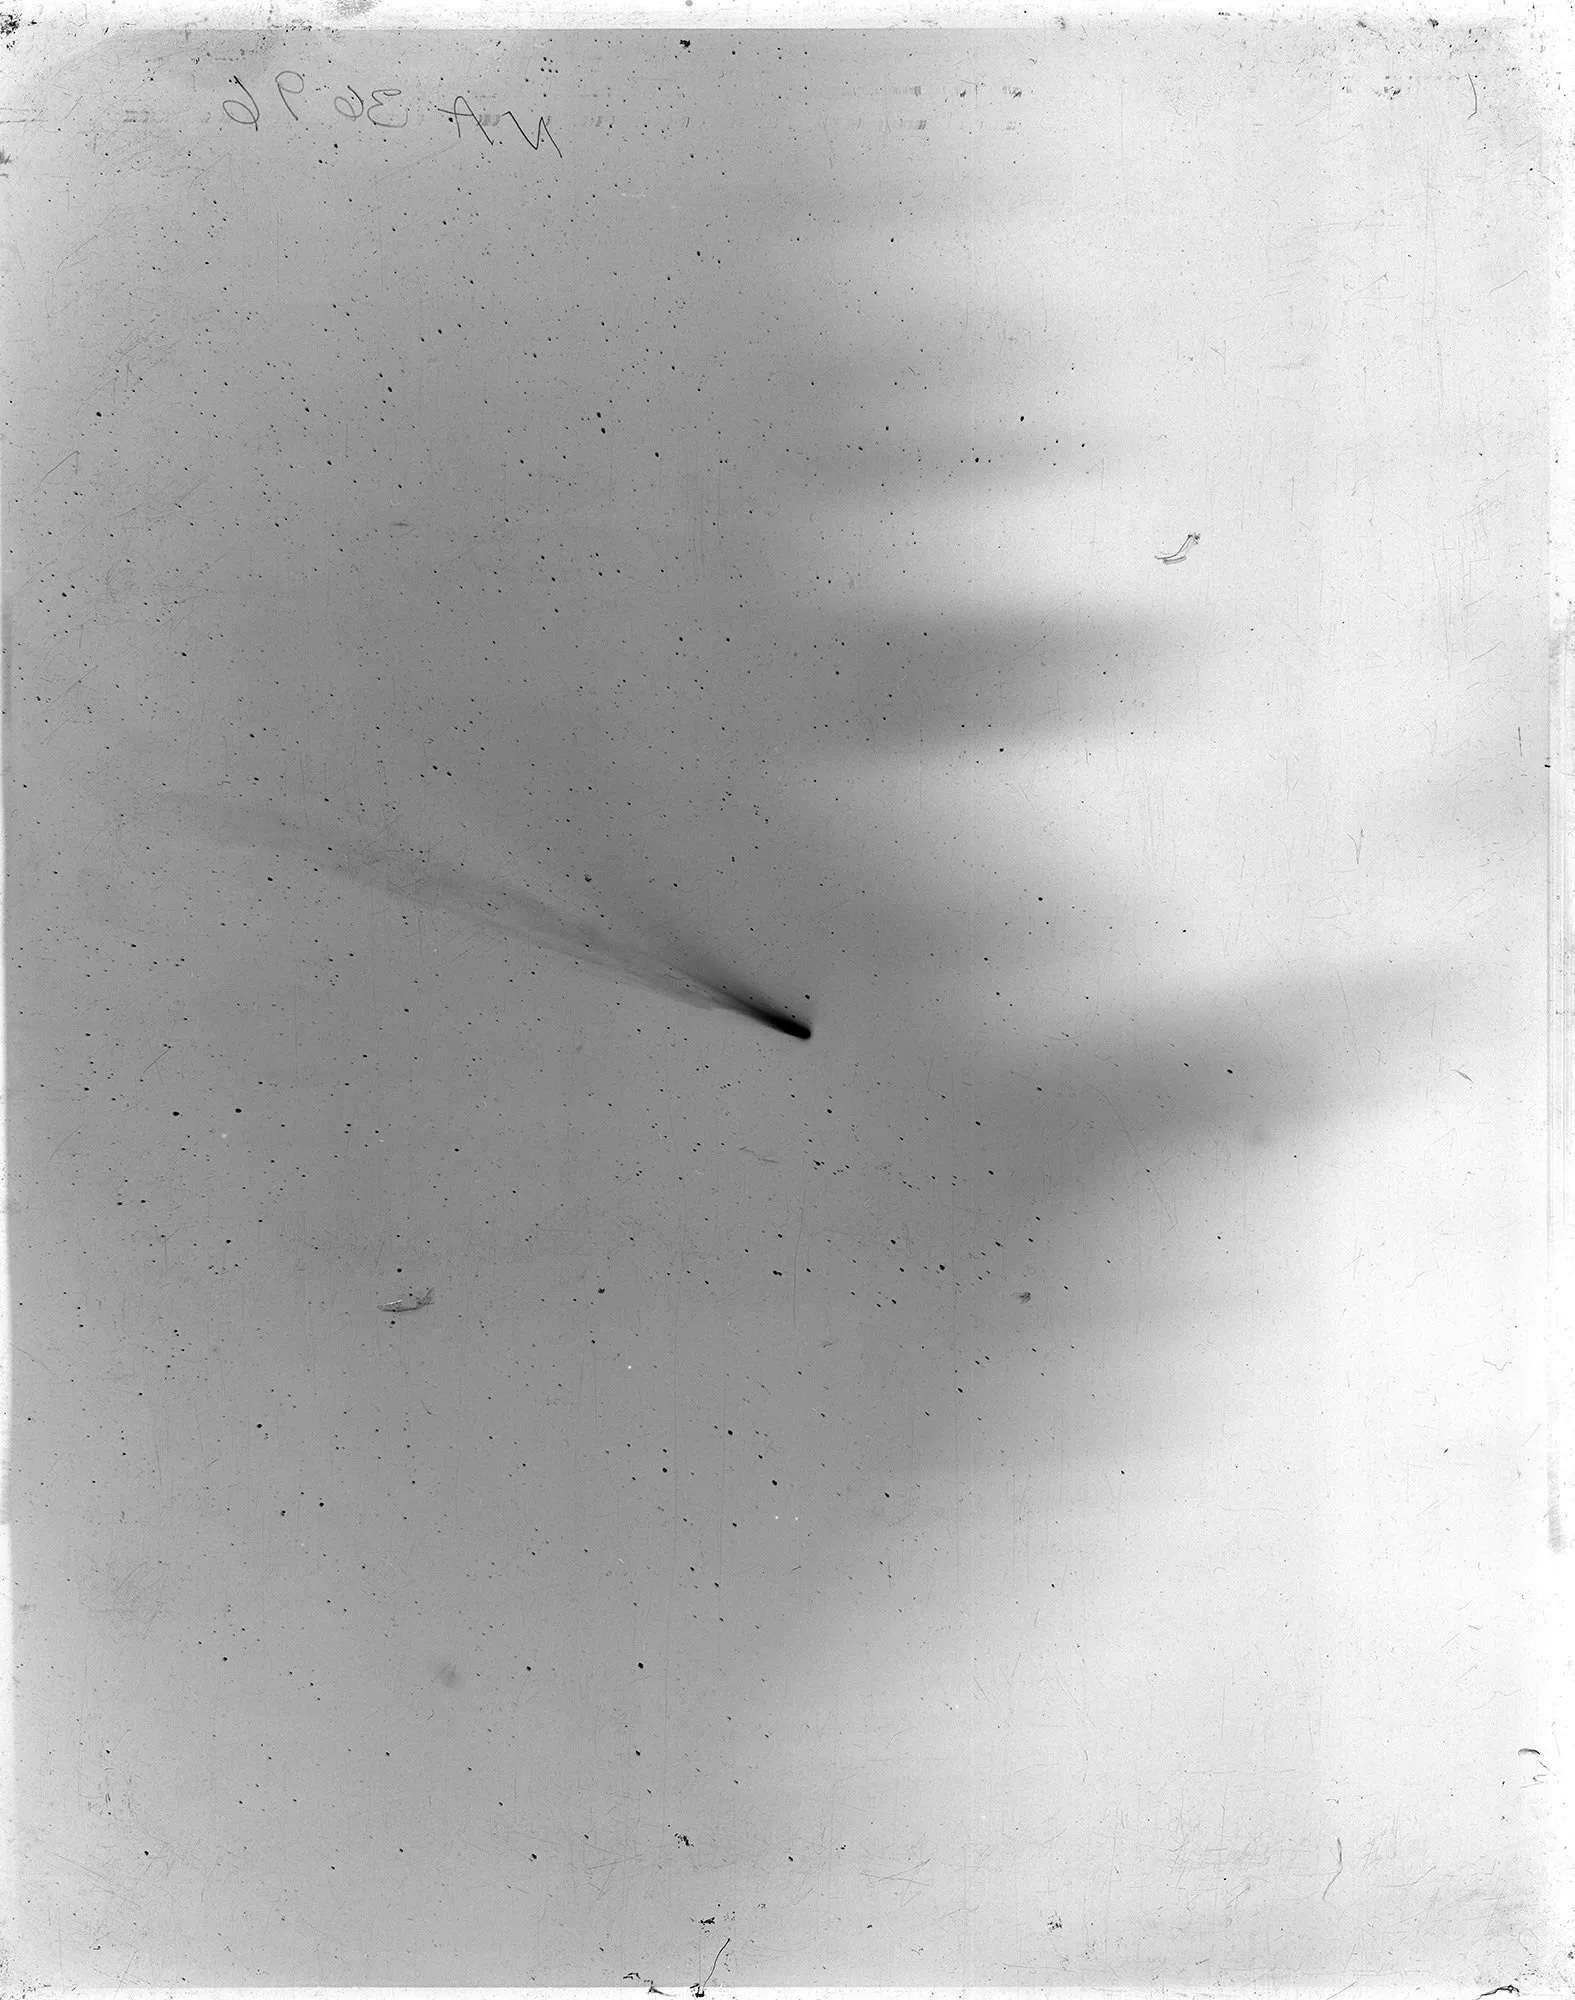
Plate NA3696, Credit
This plate in the collection listed as: '3696,12,26,31.6,15,57_08_22,,,', suggests that is was a 15 minute exposure of a comet located at RA 12:26, with a declination 31.6 on 22nd August 1957, having this information I believe this to be comet 'C/1957 P1 (Mrkos)' but that is a guess from what I can find.
Even after consumer photography switched to film in the early 1900s, professional observatories kept using plates for decades. The transition was slow, uneven, and driven by very specific technical reasons.
• Stability
Glass doesn’t flex. That means star positions stay accurate to fractions of an arcsecond — essential for astrometry.
• Large format
Plates could be 8×10 inches, 14×14 inches, even 20×20 inches.
Film could not match that size without distortion.
• Archival longevity
A glass plate stored properly lasts centuries.
Film decays, curls, shrinks, and loses contrast.
• Uniform emulsion
Plates had a perfectly flat, even coating.
Film had thickness variations and grain clumping.
Film entered astrophotography mainly through amateur astronomers, not observatories.
Why amateurs adopted film:
It was cheap
It was easy to load
It didn’t require a darkroom to prepare
Commercial emulsions improved rapidly
Hypering techniques (gas‑hypersensitisation) boosted sensitivity
By the 1960s–1980s, amateurs were routinely using:
Kodak Tri‑X
Kodak Technical Pan
Fujicolor films
Ektachrome for comets and aurorae
Hypersensitised 2415 film for deep sky
This era produced some legendary amateur astrophotographers, such as:
Evered Kreimer
One of the most influential amateurs of all time.
He co‑authored The Messier Album with Mallas, and his deep‑sky photographs from the 1960s were decades ahead of their time. Kreimer’s work proved that amateurs could produce scientifically useful deep‑sky images with modest equipment.
Don Parker
The undisputed master of planetary astrophotography in the film era.
His Mars, Jupiter, and Saturn images were so good that professional observatories used them for atmospheric studies. Parker’s work bridged the gap between amateur and professional planetary science.
David Malin
A professional astronomer, yes — but his techniques came straight out of the film/darkroom world, and amateurs worshipped his methods.
He pioneered:
hypersensitisation
unsharp masking
contrast enhancement
multi‑layer colour composites
His work at the Anglo‑Australian Observatory set the standard for deep‑sky colour photography.
Jerry Lodriguss
One of the first to push film astrophotography to its absolute limit in the 1980s and 1990s.
He mastered Kodak Technical Pan, hypersensitised emulsions, and long‑exposure deep‑sky imaging. Later he became a major figure in the transition to digital.
Tony Hallas
A legend in both film and early digital eras.
His film images of nebulae and galaxies were among the best ever produced by an amateur. Hallas was also one of the first to adopt advanced darkroom techniques that later evolved into digital processing workflows.
Dennis di Cicco
A long‑time Sky & Telescope editor and a superb astrophotographer.
He was one of the first amateurs to produce professional‑quality deep‑sky images on film. He also built the first home‑made CCD camera ever used by an amateur.
Michael Covington
Not just an astrophotographer but a teacher of the craft.
His book Astrophotography for the Amateur (1985) became the bible of film astrophotography. He helped an entire generation learn how to use film effectively.
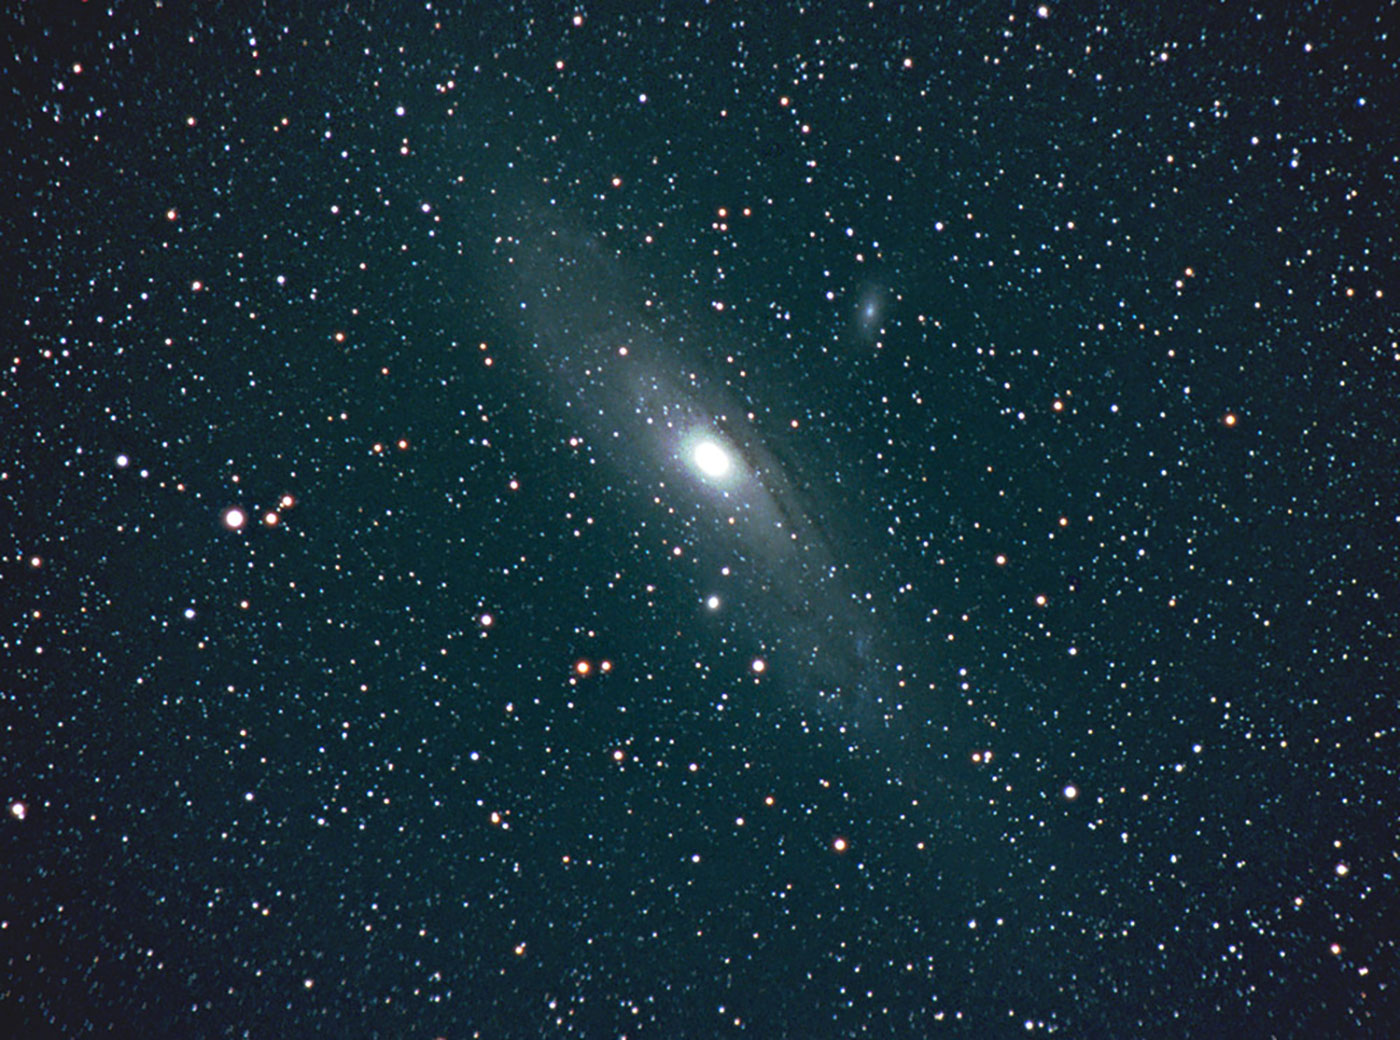
The Andromeda Galaxy. Stack of 5 film exposures taken in 2002, all on Elite Chrome 200, all with a Nikon 300/4 ED IF AF lens; they total about 2 hours of exposure. Digitized and processed in 2007. Credit
But even then, professionals still preferred plates.
The next major leap came with electronic detectors. In the 1970s and 1980s, charge‑coupled devices replaced photographic plates and film. CCDs were far more sensitive, produced cleaner images, and allowed digital processing. This shift revolutionised both professional and amateur astrophotography. Suddenly, faint galaxies and nebulae that once required hours of exposure on glass plates/film could be captured in 'sub-frames' each taking a few minutes with digital sensors.
In the mid 1980's amateurs were experimenting with CCD cameras, some even building their own, most notably Ian Swann at Orwell Park Observatory, I tried to find a picture of the camera itself, sadly I couldn’t.
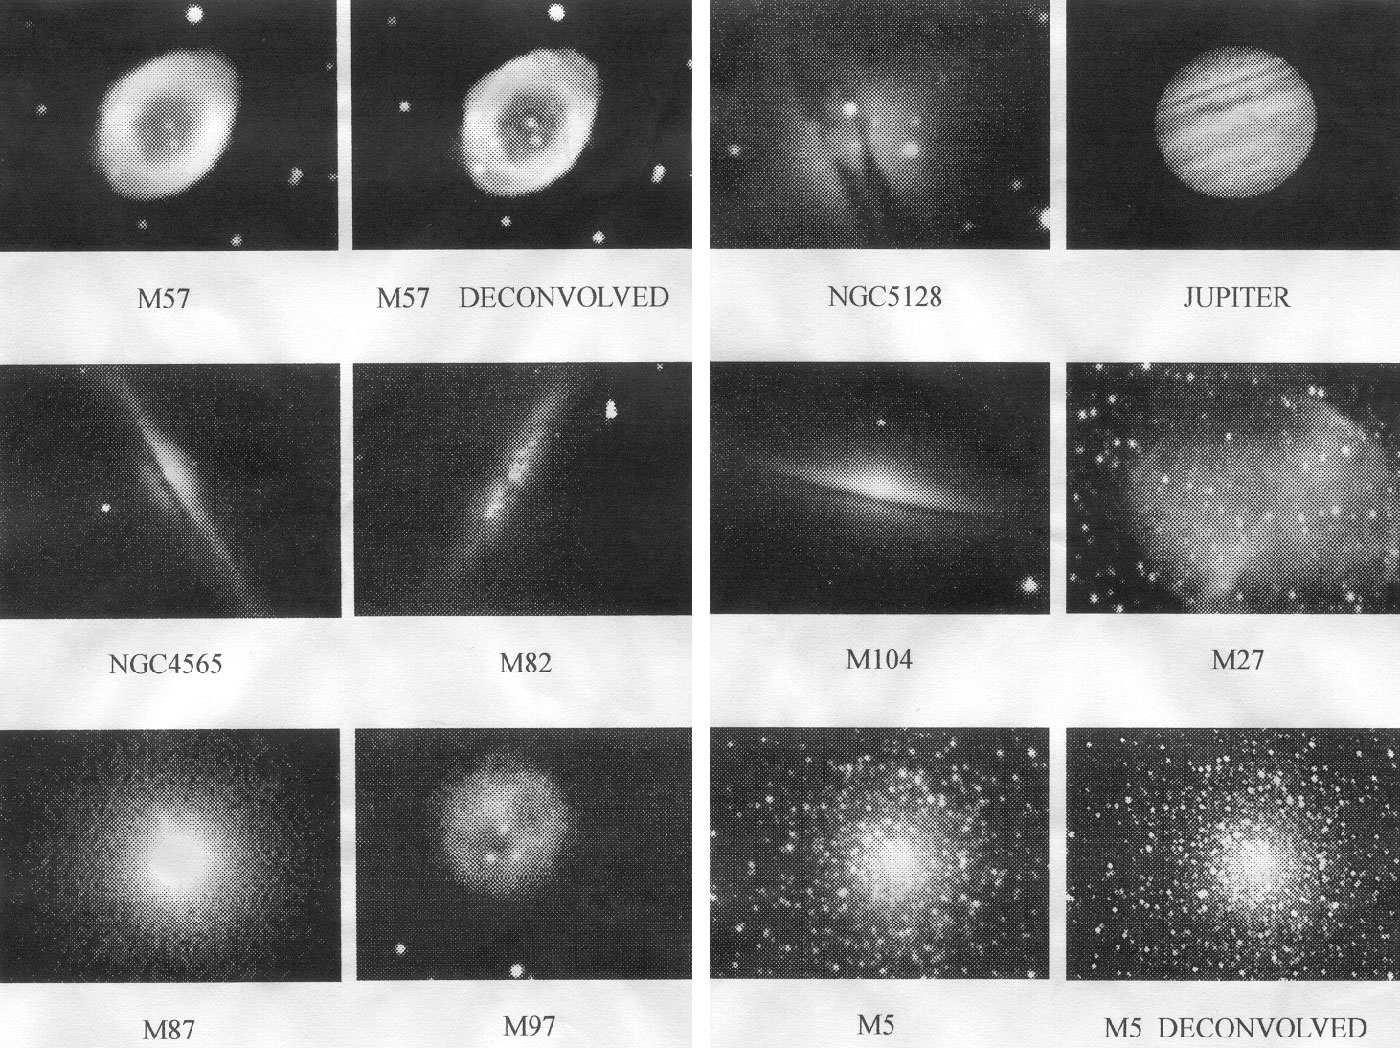
May 1992 - Credit
These early adopters were pioneers — soldering electronics, writing their own software, and adapting telescopes manually.
By the early 1990s, CCDs became commercially available to amateurs through companies like SBIG (Santa Barbara Instrument Group), Texas Instruments and a few others.
CCDs began replacing film for serious deep‑sky work and Amateur observatories started publishing CCD images. Magazines like Sky & Telescope and the TV programme The Sky at Night began featuring amateur CCD results.
This period marks the true shift away from film for most advanced amateurs.
Meanwhile, Space‑based telescopes pushed the field even further. The Hubble Space Telescope, launched in 1990, produced images with a clarity impossible from the ground. Its deep fields revealed galaxies billions of years old and reshaped our understanding of the universe.
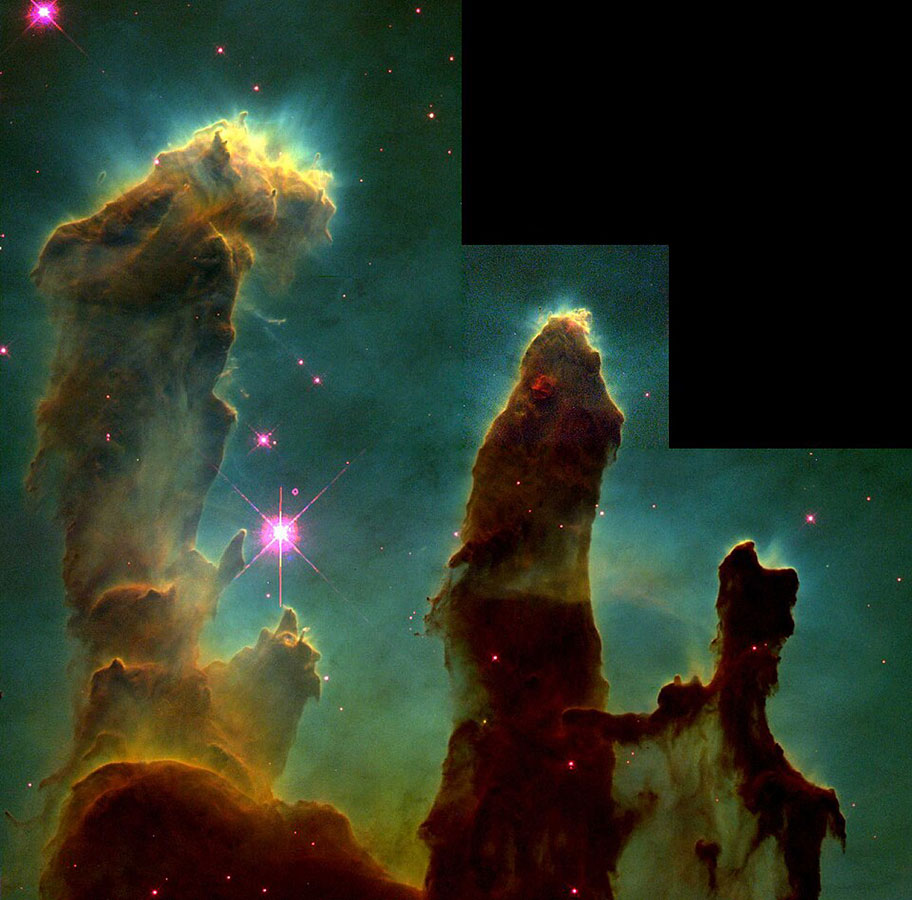
The Pillars of Creation in the Eagle Nebula taken by the Hubble Space Telescope in 1995
Credit: NASA, Jeff Hester, and Paul Scowen (Arizona State University)
The Hubble Palette — also called SHO — maps three narrowband emission lines to the RGB channels in a false‑colour image:
SII → Red
H‑alpha → Green
OIII → Blue
This mapping solves a scientific problem: H‑alpha and SII are both red in real life, so if you mapped them to their natural colours, they would blend together and become indistinguishable. The Hubble team deliberately separated them into different channels so astronomers could analyse shock fronts, ionisation zones, and gas structures.
The palette emerged during the mid‑1990s, when Hubble’s WFPC2 camera began producing narrowband images of emission nebulae. Astronomers needed a way to:
- Distinguish overlapping emission lines
- Highlight structural differences
- Create consistent scientific colour maps across datasets
This led to the now‑iconic gold‑and‑blue look of objects like the Pillars of Creation, where sulphur‑rich regions appear golden and oxygen‑rich regions appear blue. The palette became widely recognised after these images were released to the public. This imaging technique forms part of the tool box that many an amateur astrophotographer can easily exercise using their consumer grade equipment.
On Christmas Day 25 December 2021 on an Ariane 5 rocket, The James Webb Space Telescope launched into space which extended this capability into the infrared, revealing structures hidden behind dust and capturing light from the earliest galaxies.
JWST is a 6.5‑metre infrared space observatory developed by NASA with the European Space Agency (ESA) and the Canadian Space Agency (CSA). It is the successor to Hubble, but not a replacement — it observes in a different part of the spectrum and is optimised for studying the early universe, star formation, and exoplanet atmospheres.
Carina Nebula, NGC 3324
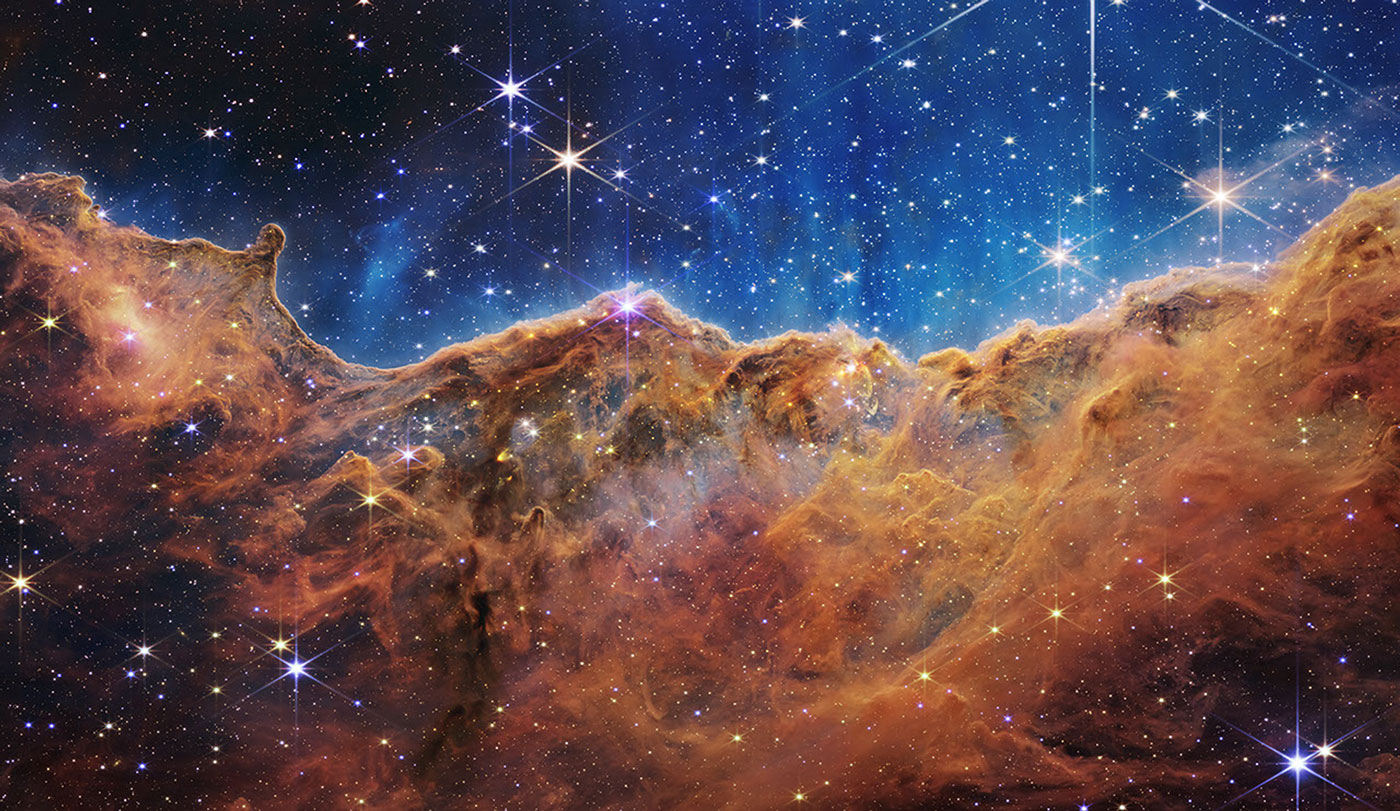
Credit Image: NASA, ESA, CSA, STScI
This scene that looks like a rugged, moonlit mountain range is actually the boundary of NGC 3324, a young star‑forming region inside the Carina Nebula. Webb’s Near‑Infrared Camera (NIRCam) captured this view in infrared light, revealing pockets of stellar birth that were hidden from every previous telescope.
Nicknamed the Cosmic Cliffs, this structure forms the rim of a vast hollow carved out of the nebula. The cavity — about 7,600 light‑years from Earth — has been sculpted by fierce ultraviolet radiation and powerful stellar winds blowing from massive, hot, newly formed stars just above the frame. Their energy slowly erodes the wall of gas and dust, shaping it into the dramatic ridge seen here.
Thanks to NIRCam’s sharp vision and extraordinary sensitivity, the image exposes hundreds of stars that were previously invisible, along with numerous distant background galaxies.
Ground‑based observatories also advanced. Adaptive optics systems corrected for atmospheric turbulence, allowing telescopes on Earth to approach space‑based resolution. Facilities such as the Very Large Telescope and the Atacama Large Millimetre Array continue to push the limits of what can be imaged from the ground. One notable image that springs to mind is the Cone Nebula taken by European Southern Observatory (ESO) to mark its 60th Anniversary.
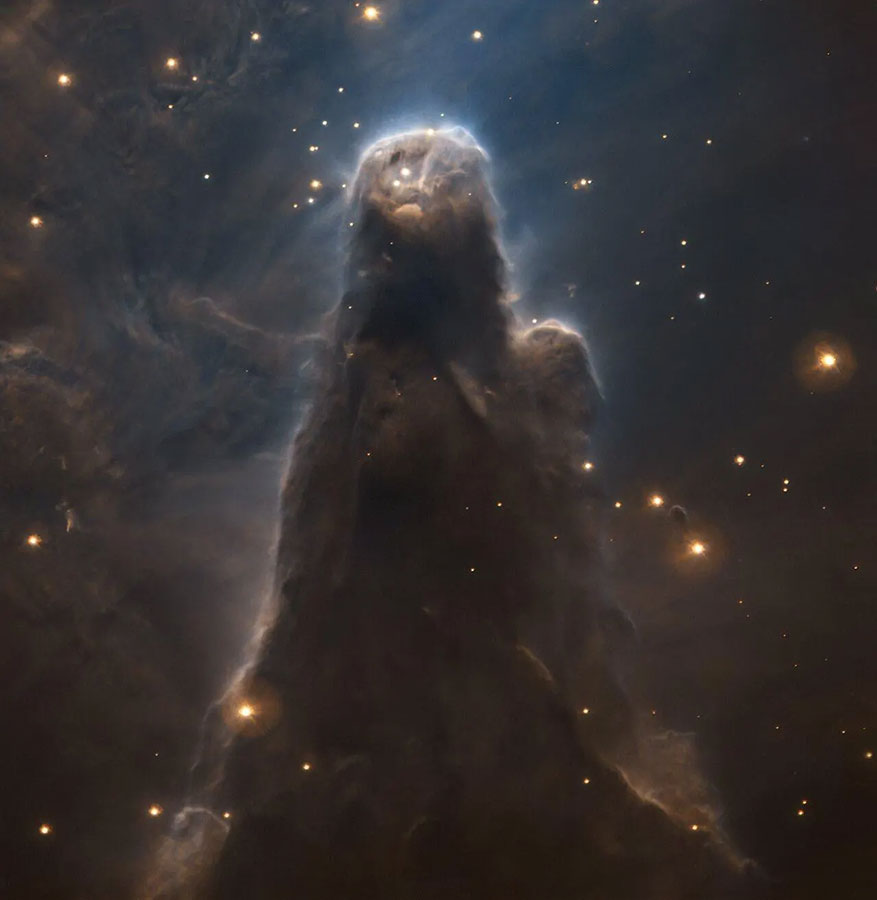
eso2215a, 10 November 2022, 14:00, 660nm H-Alpha and 677nm SII filters. Credit ESO
Meanwhile, amateur astrophotography has undergone its own revolution. Affordable CMOS cameras (such as OM System OM-3 Astro), portable equatorial mounts, and high‑quality refractors allow enthusiasts to capture images that rival professional work from just a few decades ago. Software for stacking, calibration, and processing has made it possible to reveal faint nebulae and galaxies from suburban gardens. Electronically assisted astronomy has made deep‑sky imaging accessible even under light‑polluted skies. A case in point here is my attempt to recreate the Cone nebula picture from ESO, using affordable telescope equipment that you can buy off the shelf, and software that you can run on a home computer.
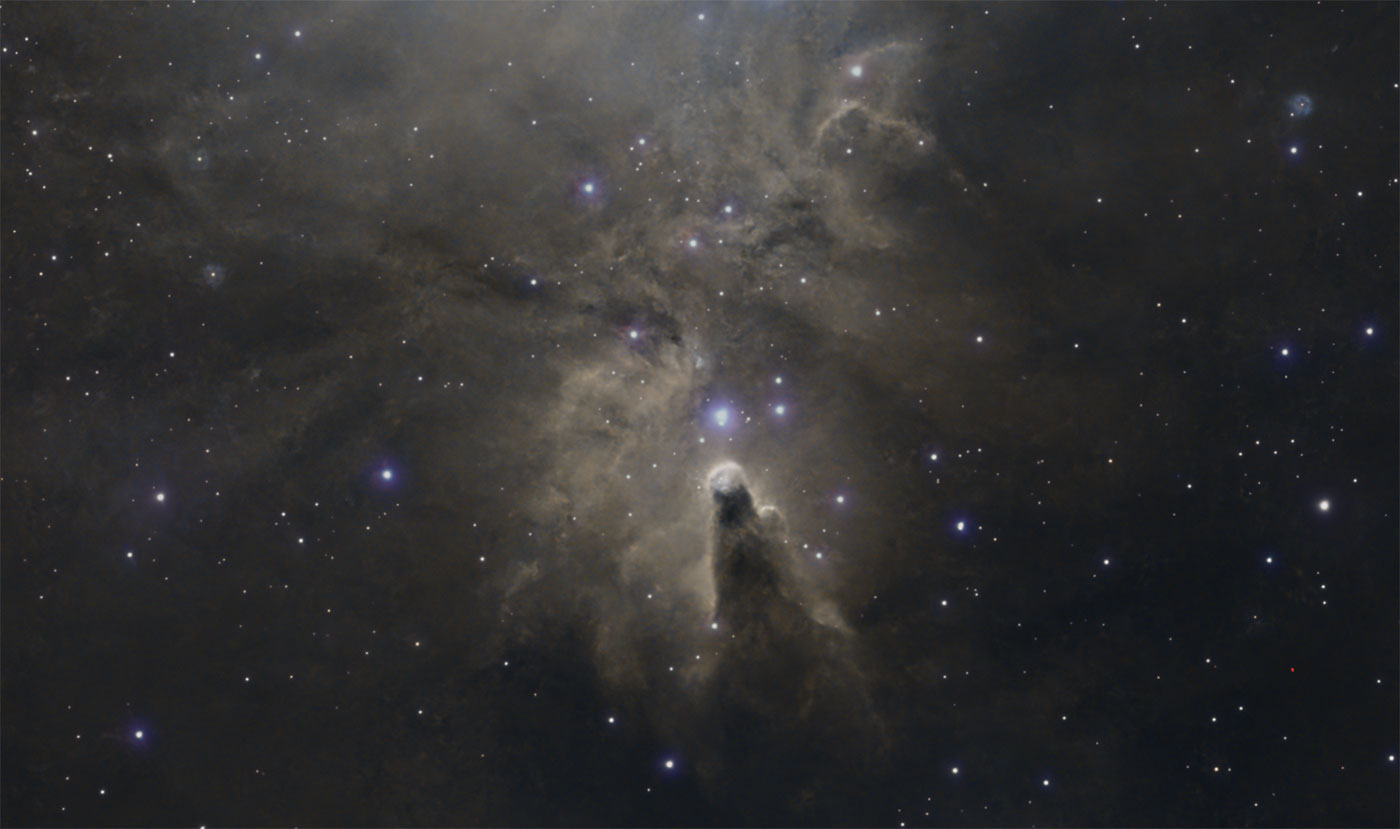
Credit Jonathan Penberthy Feb 2026 - you can read about how it was taken here
This is a picture of my rig, for only a few thousand pounds we can rival (in my opinion!) close to those images that were once only possible with very high-end equipment, and 40 years ago impossible with any equipment!
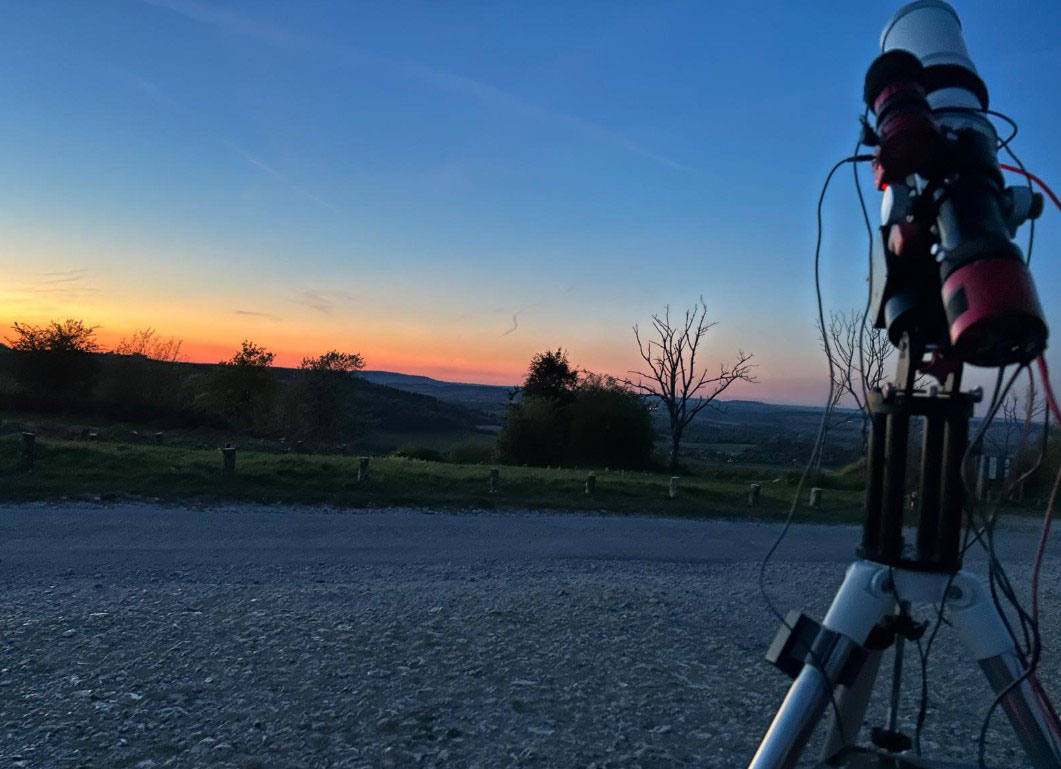
Credit: Tetiana Kirovych, April 2026 - South Downs UK.
Camera: ZWO ASI585MC Pro.
Telescope: Altair Astro 70ED Telescope (420mm) (Call for pricing 01444 237070)
Mount: Juwei 17 - similar ZWO AM5N
Filter: Optolong L eNHance (Call for pricing 01444 237070)
Filter: (10 x 30 seconds for stars) UV/IR Cut (Call for pricing 01444 237070)
Guide Camera: ZWO ASI120mm-s
Guide Scope: SVBony 30mm (f4) (Call for pricing 01444 237070)
Computer: ZWO ASIAIR pro
Power Station: Eco Flow River 2 - similar
Obviously setting up my rig takes about 30 mins, and requires a little technical skill, however these days we are blessed with affordable Smart Telescopes which are not only relatively compact but also deliver amazing results like:
The Dwarf 3
S30 (ZWO Seestar S30 All-in-One Smart Telescope)
All deliver excellent results, which only 10 years ago would have been unthinkable.
Today, astrophotography is a blend of science, technology, and creativity. Professionals use it to study the universe, while amateurs use it to explore and express. From Draper’s first lunar daguerreotype to modern multi‑wavelength images from space telescopes, the field has evolved through constant innovation. Each generation has found new ways to capture the sky, revealing a universe richer and more complex than anyone in the nineteenth century could have imagined.
Share this post:
By Jonathan Penberthy on 28/05/2026

Jonathan Penberthy
Cosmic Shutter Seeker and Star Programmer
Jonathan Penberthy is the Cosmic Shutter Seeker and Star Programmer at Park Cameras, with over 20 years of experience as a software engineer. His career journey has spanned industries, but a move to Park Cameras sparked a passion for astrophotography. Jonathan’s interest began while working on a lens selection app, leading him to explore the night sky with a Canon 7D. When he’s not programming or photographing the stars, he enjoys sailing and navigating by the cosmos. Learn more on his profile page.
Trade in your old equipment
Fast and easy trade in service ensures your old gear is collected efficiently and you are paid quickly! It's very simple to trade in your unwanted photography gear. Just head over to our dedicated Sell or Part Exchange page, fill out the details, and we'll get back to you with an offer for your old gear. Take the cash, or put it towards the cost of your new gear. It's up to you! Find out more
sign up to the newsletter
Keep up to date on the latest photography news, events and offers. Sign up now