- Call us 01444 237070

-
- Back
- Used Cameras
- Used Accessories
- Used Lenses
- Back
- Used Canon Lenses
- Used Nikon Lenses
- Used Fujifilm Lenses
- Used Sony Lenses
- Used Micro 4/3rds Lenses
- Used Leica Lenses
- Used Panasonic Lenses
- Used Pentax Lenses
- Used Samyang Lenses
- Used Sigma Lenses
- Used Tamron Lenses
- Used Tokina Lenses
- Used Voigtlander Lenses
- Used Zeiss Lenses
- Used Hasselblad Lenses
- Used Video
- Used Film Equipment
- Used Stock Alert
- Used Blank Test
- Sell or Part Exchange
- Used Clearance
- Recently Added Used Equipment
- Park Picks
- Faulty
- Trade-In
- Blog
- New in
- Call us
- Contact us
- Stores
- Sign in
- Categories
- Tips & Inspiration
- Reviews
- News
- Events
- Features
- Buying Guides
- Competitions
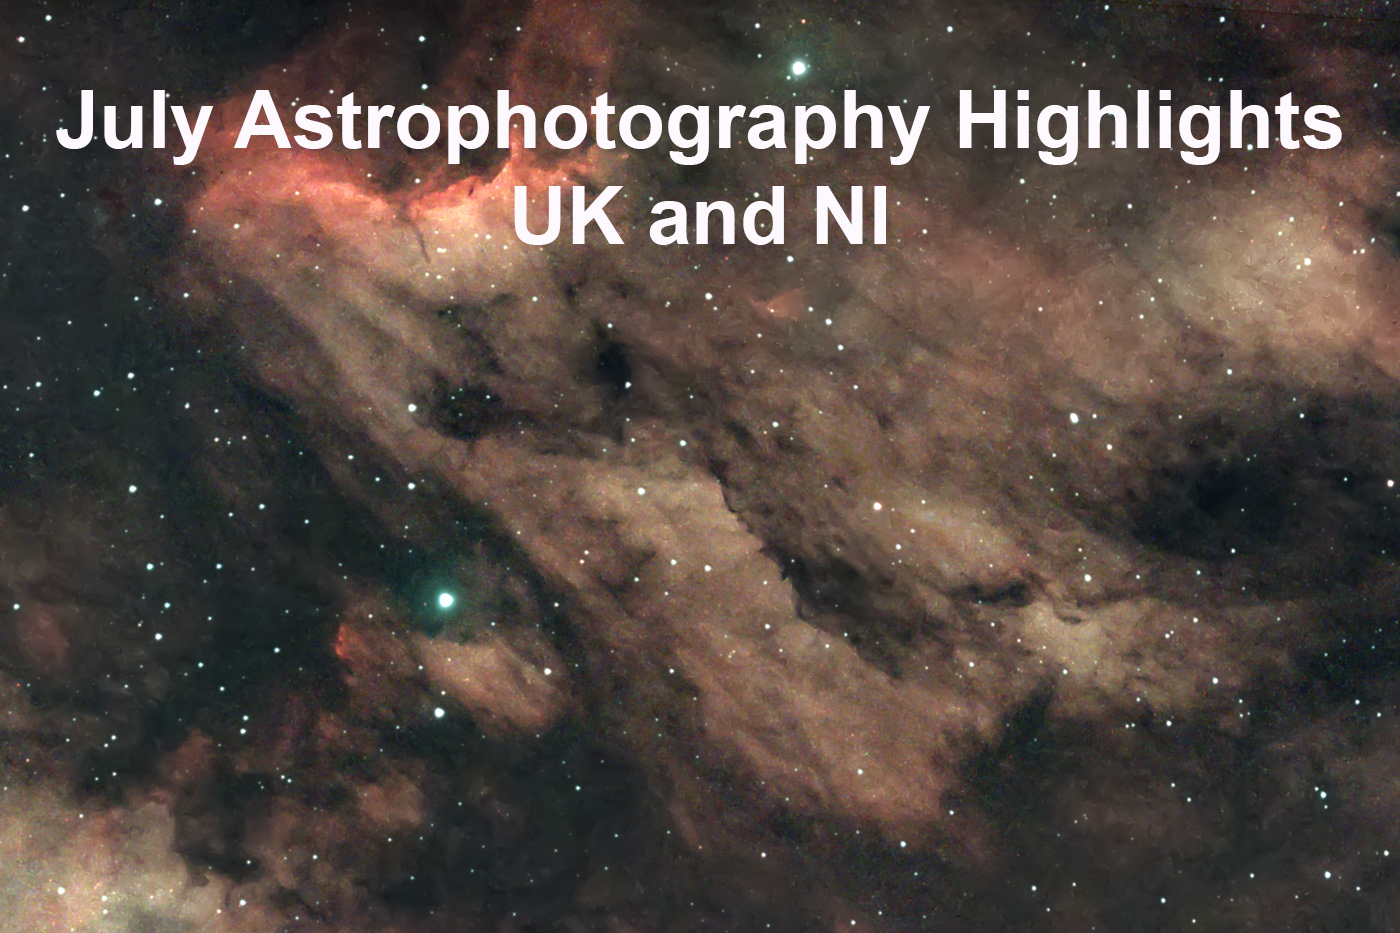
July Astrophotography Highlights UK and NI
Don’t underestimate the value of an astro club…
At the time of writing this blog, we have less than 3 weeks until astro dark returns on 21st July. I really can’t wait. I don’t know if anyone has ever calculated the number of extra exposures you need to try to compensate as best you can for the lack of darkness, but I should imagine it must be in the region of five times more, if possible at all.
This past month I have been making a concerted effort to improve my guiding.
For those that don’t know what this is, I shall quickly explain. I have a Sky-Watcher EQ5 Pro equatorial mount. This means that the tripod and mount are polar aligned with the north (or south if you are on that side of the planet) celestial pole. Essentially, to us, the whole night sky rotates around this point. In reality, what happens is that our planet is spinning. Obviously, as you may know, trying to photograph a moving object—or in our case, we are moving relative to the stars—is fraught with issues. As such, these sturdy mounts do a great job of keeping the imaging train pointing in the same place in the night sky.
Of course, the closer you try to image a distant target, the more accurate your focus and tracking need to be. In order to assist this, it is common for a secondary scope to be attached to the primary imaging train, with its own camera. This rig then monitors one or more stars, and as they move in the frame, the software sends a signal to the mount to correct it.
The average deviation of the mount’s drift is based on two factors: the Right Ascension (RA), which is horizontal drift, and the Declination (Dec), which is vertical drift. The combined error is called Total RMS (Root Mean Square) and is measured in arcseconds.
Knowing the arcsecond view of my imaging train and the Total RMS means I can tell if my image is what I call ‘astro sharp’ or not. This subtle blurry impact can usually only be seen when a close extreme crop is made. It is caused by the slight movement deviation of the mount when a long exposure is made.
Step 1 – Gather setup details
In my case:
- Camera: Canon 500D
- Sensor size: 22.3 mm × 14.9 mm
- Resolution: 4752 × 3168 pixels
- Telescope: Altair Astro 70ED
- Aperture: 70 mm
- Native focal length: 420 mm
- Reducer: 0.8×
- Effective focal length: 336 mm
- Mount: Sky-Watcher EQ5 Pro
Based on a quick Google, the best Total RMS I can expect is between 1.5–2 arcseconds
Step 2 – Calculate image scale
Image scale (arcsec/pixel) = (206.265 × pixel size (µm)) / focal length (mm)
- Pixel size = 22.3 mm / 4752 ≈ 4.7 µm
- Focal length = 336 mm
So:
Image scale ≈ (206.265 × 4.7) / 336 ≈ 2.89 arcsec/pixel
Step 3 – Calculate field of view
FOV (in degrees) = (sensor dimension (mm) × 57.3) / focal length (mm)
- Horizontal FOV = (22.3 × 57.3) / 336 ≈ 3.80°
- Vertical FOV = (14.9 × 57.3) / 336 ≈ 2.54°
Or in arcminutes:
Approx. 228′ × 152′
So with this, I can say that if my Total RMS remains below 2.89 for the duration of the sub frame (300 seconds), my image will be astro sharp. However, sadly when I began looking into this a few weeks ago I noticed that my tracking on at least one axis, or both, or the Total RMS was above this, around 3 to 4 Total RMS.
With the help of those at my astro club, I’ve tried to improve the usual suspects first:
- Balanced the scope on both axes
- The mount is level
- Imaging train is in focus
- No snagging cables
- Ensure polar alignment is accurate
The impact of this is much more than I thought. For each 30 arcseconds of polar alignment error, I can expect an additional 0.22 pixels of drift with my current setup. Doesn’t sound like much, but to put it into perspective, a 30 arcsecond polar alignment error with guiding, over a sub exposure length of 60 seconds, could add 0.1 to 0.3 arcseconds to the Total RMS.
In summary, my guiding must remain below 2.89 Total RMS for the duration of the sub exposure. Sadly, any vibration caused by wind or movement near the mount can impact this. As such, the risk in my opinion for taking long exposures like 300 seconds or more is too high. The likelihood of wasting that sub for better exposure is just not worth it. I therefore must reduce my exposure time. For now I am trialling 180 seconds, but I fear that may also be too much, and I may need to reduce further.
So as you may ask, as one chap from my astro club did, why am I bothering? Well, the reason is I want to upgrade my camera, but as I can tell from the maths above, the problem will only worsen with a smaller field of view. Therefore, I believe I should focus on tuning my mount, and if that doesn’t work, then consider buying a new one altogether, such as the ZWO AM3 or AM5.
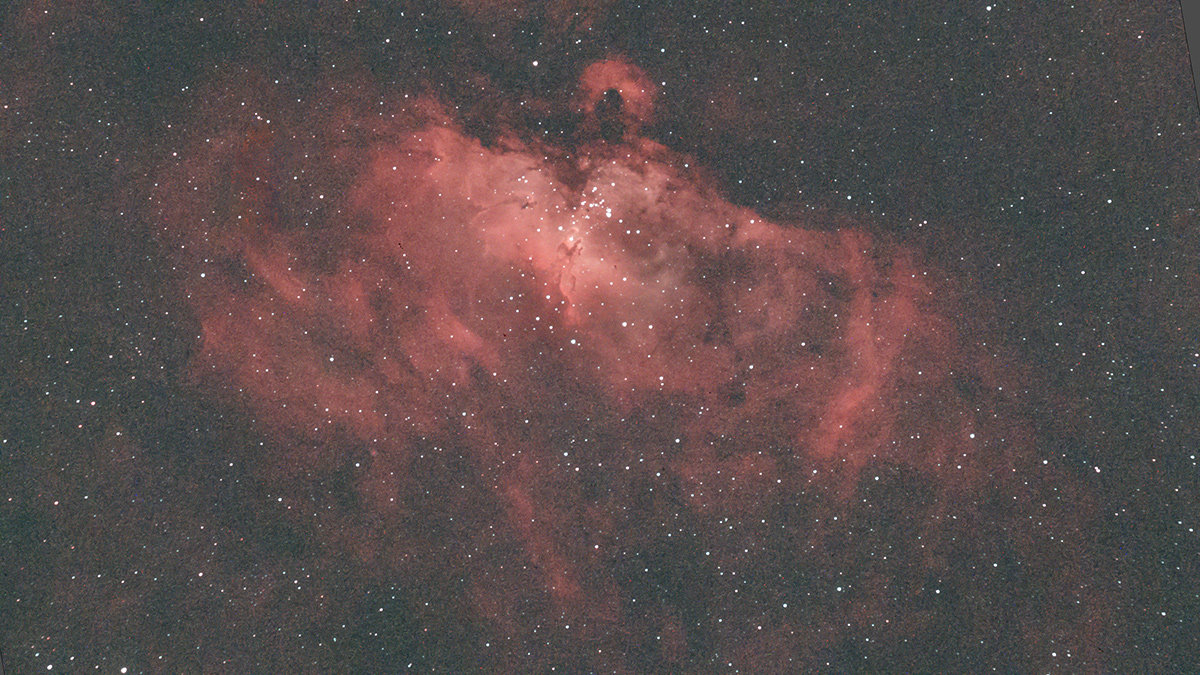
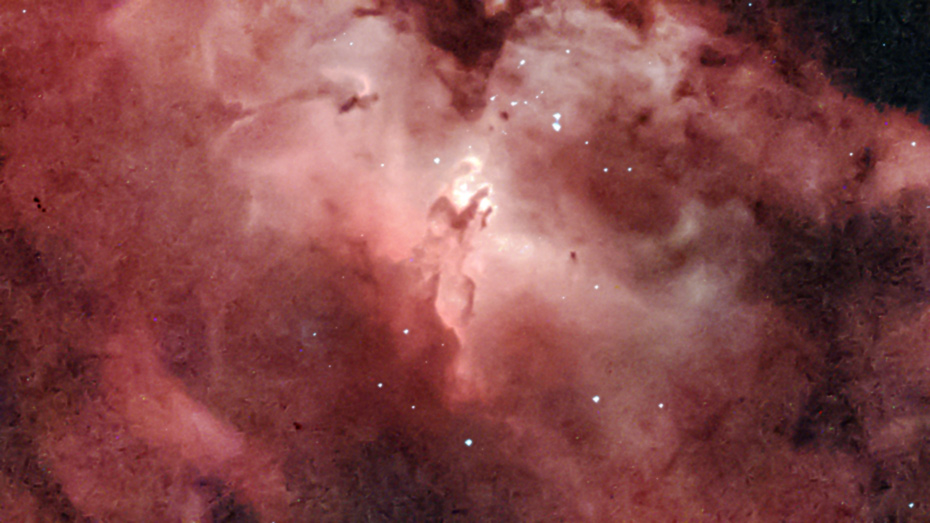
Here is a case study to demonstrate my point. A wide field image of the Eagle Nebula looks sharp (although a little noisy). A close crop of the Pillars of Creation is blurry. That detail just isn’t there.
Exif:
Camera: Canon 500D - astro moded.
Telescope: Altair Astro 70ED Telescope (420mm) + 0.8 reducer.
Mount: Sky-Watcher EQ5 Pro
Filter: Optolong L eNHance
Guide Camera: ZWO ASI120mm-s
Guide Scope: SVBony 30mm (f4)
Computer: ZWO ASIAIR pro
Method:
Lights: 24 x 300s ISO 1600.
Darks: 10 x 300s.
Flats: 10
Stacked in Deep Sky Stacker, Siril for Photometric Colour Calibration and StarNet++ for star removal. Stretched, recompiled and edited in PhotoShop.
Lunar
With the return of astro dark on 21st July and a new moon just a few days later, the final third of the month promises some fantastic imaging sessions if the weather holds. See the link below for the full lunar calendar.
Deep Sky Objects
The Milky Way over Arun Yacht Club, Littlehampton.
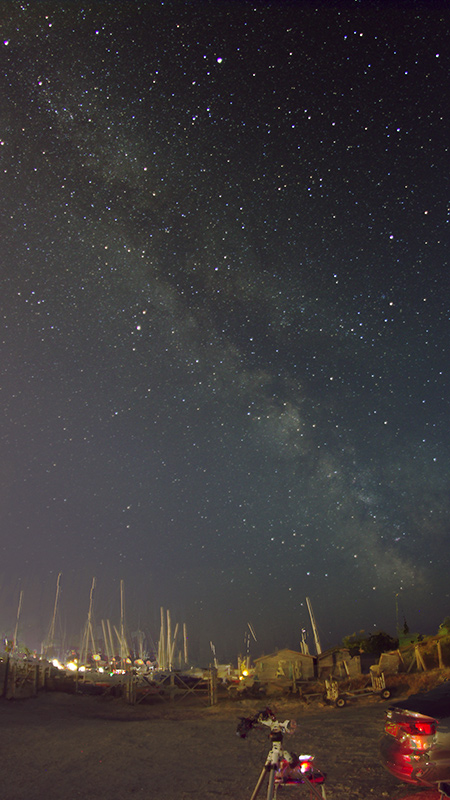
EXIF
- Canon 7D
- Opteka 8mm Fish eye lens
- F/4.6
- 30 sec exposure x 10
- ISO 1600
Stacked and compiled in Sequator, enhanced and cropped in Photoshop.
Milky Way
We love you… what a gift. So many targets, but so little imaging time! As we move through July, the Cygnus region passes directly overhead, while the Milky Way core sits low in the southern sky from the UK.
As you can imagine, the temptation to switch targets after only an hour or so is strong. But it’s important to capture one target well rather than a handful half-finished. Despite this very sensible advice from our Astro Club Leader, Steve Goddard, I sometimes just can’t resist the urge!
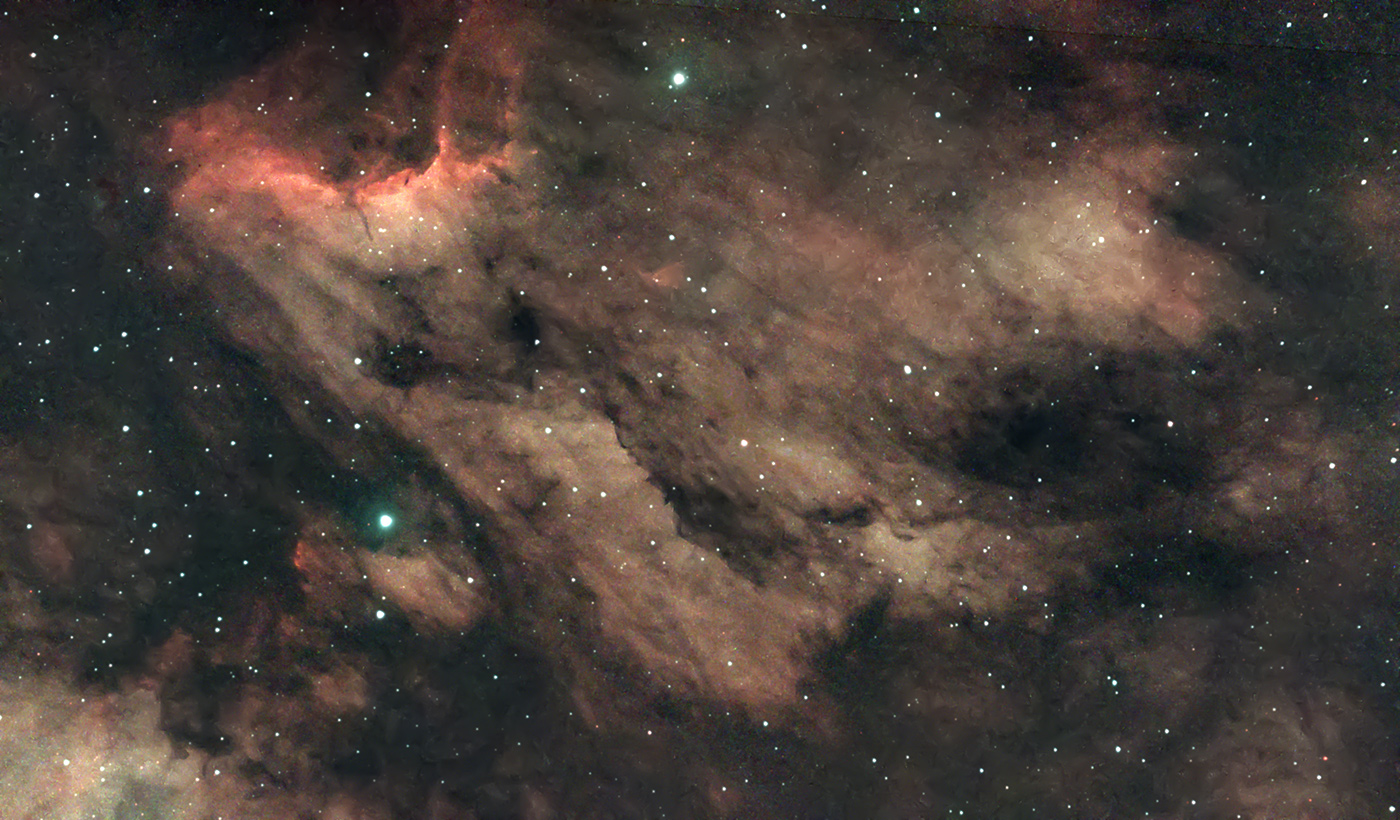
The Pelican Nebula
EXIF
Camera: Canon 500D - astro moded.
Telescope: Altair Astro 70ED Telescope (420mm) + 0.8 reducer.
Mount: Sky-Watcher EQ5 Pro
Filter: Optolong L eNHance
Guide Camera: ZWO ASI120mm-s
Guide Scope: SVBony 30mm (f4)
Computer: ZWO ASIAIR pro
Method:
Lights: 24 x 300s ISO 1600.
Darks: 10 x 300s.
Flats: 10
Stacked in Deep Sky Stacker, Siril for Photometric Colour Calibration and StarNet++ for star removal. Stretched, recompiled and edited in PhotoShop.
Located at the feet of the swan that is Cygnus, this is a very interesting object. With so much turbulent nebulosity, the detail is there to be captured in its twists and undulations. A truly fascinating region.
The Veil Nebula (Western) – Witch’s Broom
Tucked away in the constellation Cygnus, around 2,100 light-years from Earth, drifts the ghost of a cataclysmic stellar explosion — the Veil Nebula. What remains of a massive star that met its end thousands of years ago has become a sprawling, delicate lacework of interstellar theatrics. Within this cosmic wreckage is NGC 6960, nicknamed the Witch’s Broom, a slender arc of glowing tendrils that sweeps behind the foreground star 52 Cygni like stardust caught in a crosswind.
Despite the violent forces that created it, the Witch’s Broom looks anything but chaotic. Its filaments stretch gracefully through space, laced with ionised gases that shine in soft blues and deep crimson reds. Each glowing thread is a whisper from a star that once lived, carrying clues about its final, fiery breaths.
The Veil Nebula isn’t just a single object — it’s a vast web over 100 light-years wide, with other named structures like the Eastern Veil (Bat Nebula – not in shot) and Pickering’s Triangle joining in its celestial choreography. Together, they trace the outlines of a massive shockwave still echoing through the galaxy.
I am fascinated by this target. If we could see it with our naked eyes, it would be around six full moons wide! It can be found on the lower wing of Cygnus (when in the east).

EXIF
Camera: Canon 500D - astro moded.
Telescope: Altair Astro 70ED Telescope (420mm) + 0.8 reducer.
Mount: Sky-Watcher EQ5 Pro
Filter: Optolong L eNHance
Guide Camera: ZWO ASI120mm-s
Guide Scope: SVBony 30mm (f4)
Computer: ZWO ASIAIR pro
Method:
Lights: 50 x 180s ISO 1600.
Darks: 10 x 300s.
Flats: 10
Stacked in Deep Sky Stacker, Siril for Photometric Colour Calibration and StarNet++ for star removal. Stretched, recompiled and edited in PhotoShop.
Trifid and Lagoon nebula - a tribute to celebrate the opening of the Vera C. Ruben Observatory, Chile.
In the heart of the summer Milky Way, nestled among the thick star clouds of Sagittarius, two dazzling nebulae light up the galactic stage: the Trifid Nebula and the Lagoon Nebula. They’re close neighbours in the sky, but each has a personality all its own.
The Trifid Nebula is a cosmic triple threat — literally. It’s known for its unique structure, where dark dust lanes cut through a glowing pink and blue cloud, dividing it into three distinct lobes. That’s where it gets its name. This nebula is something of a hybrid: a stellar nursery, an emission nebula glowing from energised hydrogen, a reflection nebula bouncing starlight off dust, and a dark nebula hiding newborn stars behind opaque clouds. It’s like catching a star in mid-formation, wrapped in its own celestial cocoon.
Just to the south lies the Lagoon Nebula, a vast glowing cloud of gas and dust that looks more like a galactic thunderstorm frozen in time. At roughly 4,000 light-years away, it stretches across a part of the sky big enough to be seen with binoculars, and even shows hints of detail with the naked eye from dark locations.
In its core burns a cluster of young, hot stars whose radiation carves out ridges and channels in the surrounding gas — it’s a landscape shaped by radiation and wind rather than rock and weather. The Lagoon is a true stellar forge, where gravity, light, and time combine to birth generations of stars.
What’s stunning about photographing or observing these two nebulae is how they tell a shared story of cosmic creation — side by side, yet shaped so differently. One is sharply divided and intricate, the other sprawling and chaotic. And together, they remind us that the universe doesn’t just destroy — it creates, and it sculpts light into form.
Here you can see one of the Rubin Observatory’s first images, which is of the Trifid and Lagoon Nebula: https://rubinobservatory.org/news/rubin-first-look/trifid-lagoon — and my homage to it below!

EXIF
Camera: Canon 500D - astro moded.
Telescope: Altair Astro 70ED Telescope (420mm) + 0.8 reducer.
Mount: Sky-Watcher EQ5 Pro
Filter: Optolong L eNHance
Guide Camera: ZWO ASI120mm-s
Guide Scope: SVBony 30mm (f4)
Computer: ZWO ASIAIR pro
Method:
Lights: 37 x 180s ISO 1600.
Darks: 10 x 300s.
Flats: 10
Stacked in Deep Sky Stacker, Siril for Photometric Colour Calibration and StarNet++ for star removal. Stretched, recompiled and edited in PhotoShop.
Share this post:
By Jonathan Penberthy on 30/06/2025
Jonathan Penberthy
Cosmic Shutter Seeker and Star Programmer
Jonathan Penberthy is the Cosmic Shutter Seeker and Star Programmer at Park Cameras, with over 20 years of experience as a software engineer. His career journey has spanned industries, but a move to Park Cameras sparked a passion for astrophotography. Jonathan’s interest began while working on a lens selection app, leading him to explore the night sky with a Canon 7D. When he’s not programming or photographing the stars, he enjoys sailing and navigating by the cosmos. Learn more on his profile page.

Trade in your old equipment
Fast and easy trade in service ensures your old gear is collected efficiently and you are paid quickly! It's very simple to trade in your unwanted photography gear. Just head over to our dedicated Sell or Part Exchange page, fill out the details, and we'll get back to you with an offer for your old gear. Take the cash, or put it towards the cost of your new gear. It's up to you! Find out more
sign up to the newsletter
Keep up to date on the latest photography news, events and offers. Sign up now