- Call us 01444 237070

-
- Back
- Used Cameras
- Used Accessories
- Used Lenses
- Back
- Used Canon Lenses
- Used Nikon Lenses
- Used Fujifilm Lenses
- Used Sony Lenses
- Used Micro 4/3rds Lenses
- Used Leica Lenses
- Used Panasonic Lenses
- Used Pentax Lenses
- Used Samyang Lenses
- Used Sigma Lenses
- Used Tamron Lenses
- Used Tokina Lenses
- Used Voigtlander Lenses
- Used Zeiss Lenses
- Used Hasselblad Lenses
- Used Video
- Used Film Equipment
- Used Stock Alert
- Used Blank Test
- Sell or Part Exchange
- Used Clearance
- Recently Added Used Equipment
- Park Picks
- Faulty
- Trade-In
- Blog
- New in
- Call us
- Contact us
- Stores
- Sign in
product
TUTORIAL-01-11-2018-1
Call us: 01444 237070
Search terms
Brands
Category
Products
[[{name}]]
[[{attributes.Price}]]
- Categories
- Tips & Inspiration
- Reviews
- News
- Events
- Features
- Buying Guides
- Competitions
How To Take Great Firework Photos
Guide updated for 2026.
It’s that time of year again when we remember that capturing fireworks is a rewarding challenge in photography, but getting sharp, colourful photographs takes some preparation. Your camera’s Auto mode may struggle with bright bursts of colour against a dark sky.
To help you get ready for Bonfire Night, New Year’s Eve, or your next fireworks display, we’ve put together this simple guide to photographing fireworks with a DSLR or mirrorless camera. From choosing your equipment to setting exposure and timing each shot, here’s how to capture the colour and atmosphere of the display.
Camera settings for fireworks
Use these settings as a starting point rather than a fixed recipe:
|
Setting |
Recommended Value |
Why use this? |
|
Shooting Mode |
Manual (M) or Bulb (B) |
Gives you total control over exposure time and ambient light. |
|
ISO |
100 or 200 |
Keeps your images clean, sharp, and free of digital noise. |
|
Aperture |
f/8 to f/11 |
The "sweet spot" for depth of field and keeping light trails sharp. |
|
Shutter Speed |
2 to 5 seconds (or Bulb) |
Controls how much of the firework trail you capture in a single frame. |
|
White Balance |
Daylight / Sunny |
Prevents the camera from auto-correcting the vibrant, fiery colours. |
Shorter exposures can isolate individual bursts. Longer exposures can include several fireworks, but may also record more smoke, ambient light, and overlapping trails. Try out different techniques and experiment to find the results you like best.

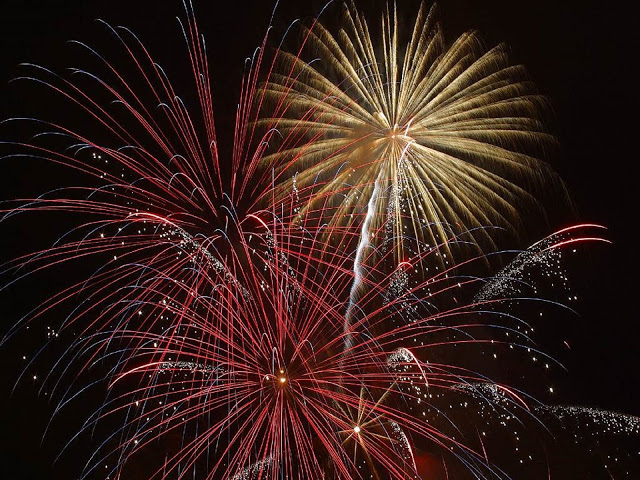
Sample taken with Canon EOS R7 and RF-S 10-18mm F/4.5-6.3 IS USM Lens @10mm. Settings: 1024 seconds. f/14. ISO 200
What equipment do you need?
A DSLR or mirrorless camera with manual exposure controls is ideal. You don’t need a particularly fast or expensive lens, as you’ll usually be shooting with the aperture stopped down to around f/8.0.
Bring the following accessories with you:
- A sturdy tripod to keep the camera still during long exposures.
- A compatible remote release so you can trigger the shutter without touching the camera.
- A zoom lens that gives you room to adjust framing.
- A small torch, charged spare battery and lens cloth.
Tip: A standard kit zoom (like an 18-55mm or 24-70mm) works brilliantly for this. Start at the wider end to leave room around the displays, then zoom in once you know exactly how much of the sky the bursts fill.
-
Arrive early and choose a good viewpoint
Find a position with a clear view, firm ground, and enough space to use your tripod without blocking a public path.
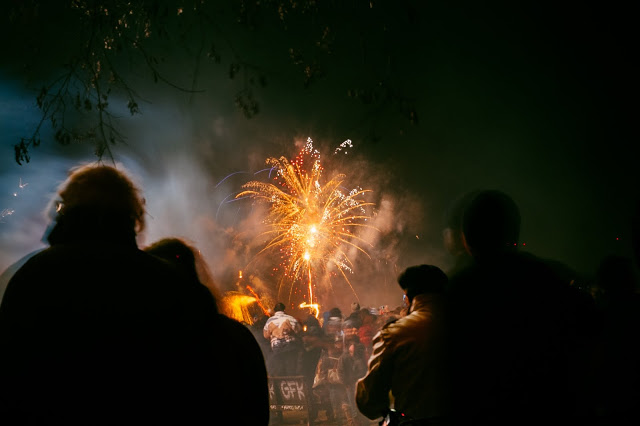
Consider including buildings, trees, or water reflections to give the fireworks a sense of place. Leave plenty of space above the launch area, as the first bursts always reach higher into the night sky than you expect. Avoid bright streetlights shining directly into your lens. A bonfire can add incredible atmosphere, but its intense brightness may make it difficult to balance with the surrounding scene.
-
Set and check your focus manually
Autofocus will struggle and "hunt" in an empty night sky. Before the display starts, autofocus on a distant illuminated subject (like a building or streetlamp near the launch site), then immediately switch your lens or camera body to Manual Focus (MF).
Alternatively, use your camera's magnified live view screen to adjust focus manually on a distant point of light. Don’t assume that turning the focus ring all the way to the infinity end-stop will give the sharpest result, as many modern lenses focus "past" infinity. Check your first few bursts at high magnification during playback, and recheck focus if you change your focal length or accidentally bump the camera.
-
Take a test photograph
Use the settings outlined in the table above. Start at base ISO, which is usually around ISO 100, f/8, and 3 seconds. Check the colour and definition of the trails, along with the brightness of any foreground elements.
If the trails look too bright and lose their rich colour (turning white), try f/11. If they are too faint, try f/5.6. Use your shutter speed to control how much of the burst you record. Shorten the exposure if too many fireworks overlap, or lengthen it if the trails end before the burst has fully developed. Keep an eye on streetlights and illuminated buildings, as longer exposures will brighten these stationary parts of the scene.
-
Try Bulb mode
Bulb mode lets you choose exactly when an exposure starts and finishes rather than using a preset duration.
Open the shutter using your remote release just as a firework rocket rises or right before it bursts, then close it as the trails begin to fade. The way Bulb mode works varies between camera brands: some require you to hold the button down continuously, while others offer a click-to-start and click-to-stop operation. Practice with your remote before the display begins.
-
Watch the smoke and changing pace
Make the most of clear views by photographing heavily early in the display. As smoke builds up, clouds can obscure the trails and drastically reduce contrast in your shots.
Keep reviewing your photographs on the LCD. A quieter sequence of lights may suit a longer exposure, while the busy finale often benefits from much shorter exposures to separate each burst. If heavy smoke fills the frame, it is often better to wait for a clearer interval rather than attempting a settings change to remove it.

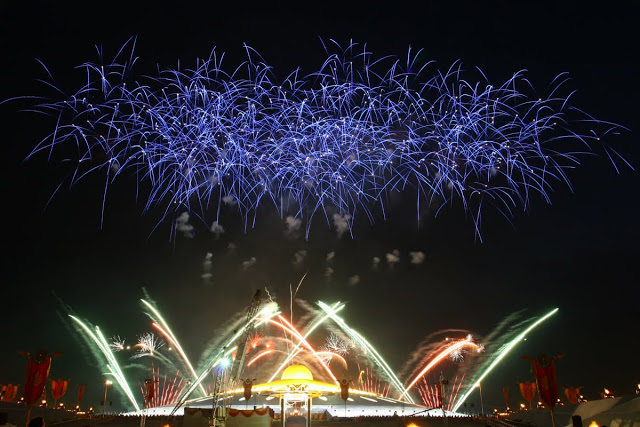
Sample photo captured with Leica Summicron-M 28mm F/2 ASPH Lens Black Anodised, settings unavailable
Troubleshooting your photographs
|
The Problem |
The Cause |
The Fix |
|
Fireworks look like squiggly or jagged lines |
Camera shake during the exposure. |
Ensure image stabilisation (IS/VR/IBIS) is turned OFF on your tripod. Use a remote release or a 2-second timer so your finger doesn't shake the camera. |
|
The light trails are pure white with no colour |
Overexposure from a wide aperture or high ISO. |
Drop your ISO to 100. Close down your aperture to f/11 or f/16 to preserve the rich chemical colours of the flames. |
|
The camera locks up and won't let you take consecutive shots |
Long Exposure Noise Reduction is turned on. |
Turn off "Long Exposure NR" in your camera settings menu. Otherwise, the camera will spend several seconds processing each shot, causing you to miss the action. |
|
The background sky looks purple, blue, or muddy orange |
Auto White Balance (AWB) is shifting between shots. |
Manually lock your White Balance to Daylight/Sunny . This keeps the night sky neutral and consistent. |

Creative techniques to try out
Record Multiple Bursts in One Exposure
For a more advanced approach, open the shutter in Bulb mode and hold an opaque black card (or a dark glove) directly in front of the lens between selected bursts. Keep the card clear of the glass so you don’t knock the camera. Uncover the lens for each burst and finish the exposure before the frame becomes overcrowded. Note that bright foreground lights will continue accumulating exposure whenever the lens is uncovered.
Check for Live Composite Mode
Some cameras (such as Olympus/OM System and Panasonic) offer a Live Composite mode. This creates a single image by only adding newly brightened pixels across successive exposures, making it incredibly useful for combining multiple fireworks while preventing the background or foreground from overexposing. Live Bulb is an alternative feature that provides a developing preview of a long exposure on your screen. Check your specific camera manual to see what modes are available to you.
Try Light Painting
Away from the display and other spectators, use a torch to draw simple shapes or write words in the air during a 5-second exposure. It’s a fun, safe way to experiment with light trails without the hazards associated with hand-held sparklers.
Editing your photographs
Always shoot in RAW format if your camera allows it. Start your post-processing by adjusting the White Balance to a clean, neutral temperature, then make restrained changes to contrast and colour.
Reducing the Highlights slider may recover fine details retained in the RAW file, but completely clipped (pure white) highlights cannot be restored. Use the Dehaze tool sparingly to cut through leftover display smoke, and avoid darkening the night sky so much that you lose the beautiful ambient environmental details around the display. If you choose to blend multiple bursts from separate photographs using layers in Photoshop, use the Lighten blend mode, keep your viewpoint consistent, and check the finished image closely for overlapping buildings or obvious joins.

Stay safe and enjoy the display
Follow the organiser’s instructions, stay behind barriers and keep your equipment clear of walkways.
If you use sparklers, wear gloves, supervise children and place finished sparklers in water. Never give them to children under five.
Set up before the action starts, check your first few frames and make one adjustment at a time. A well-timed photograph of one burst can be more effective than a frame crowded with fireworks.
Years ago, I learned my favourite tip, which is to pop warm jacket potatoes, wrapped in foil, into your coat pockets to keep hands warm between shots. Hand warmers and a post-display snack in one! Just let them cool enough to handle comfortably and you’re good to go.
Explore our tripods and camera remote controls to prepare for your next evening shoot.
Share this post:
By Park Cameras on 03/11/2026
Trade in your old equipment
Fast and easy trade in service ensures your old gear is collected efficiently and you are paid quickly! It's very simple to trade in your unwanted photography gear. Just head over to our dedicated Sell or Part Exchange page, fill out the details, and we'll get back to you with an offer for your old gear. Take the cash, or put it towards the cost of your new gear. It's up to you! Find out more
sign up to the newsletter
Keep up to date on the latest photography news, events and offers. Sign up now