- Call us: 01444 237070
- Contact Us
- Stores
- Sign In / Register
-
- Back
- Used Cameras
- Used Accessories
- Used Lenses
- Used Video
- Used Film Equipment
- Used Stock Alert
- Used Blank Test
- Sell or Part Exchange
- Used Clearance
- Recently Added Used Equipment
- Park Picks
- All Used Black Friday Deals
- Faulty
- Trade-In
- Blog
- New in
- Call us
- Contact us
- Stores
- Sign in
- Categories
- Tips & Inspiration
- Reviews
- News
- Events
- Features
- Buying Guides
- Competitions
Essential Flashgun Lighting Tips with Sony
Some photographers prefer to use natural light as their only light source, taking great pleasure in producing images that are only shot in daylight using the power of the Sun as illumination.
For other photographers, there's nothing quite like the shots you can achieve when using on or off-camera flash, from punchy night scenes, to blur-free indoor images, there are plenty of reasons to use a flash in your photography.
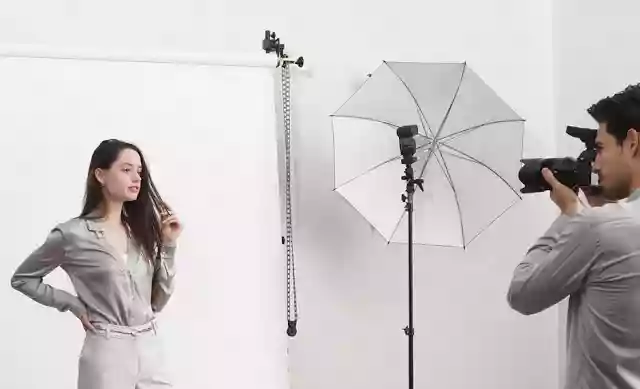
In this quick guide, we're looking at a number of ways of using Sony flashguns to further your creative potential and unlock new photographic possibilities.
What is a Guide Number on a camera flash?
On most flashguns and in-built flash units, you'll see reference to a 'Guide Number'. This is a way of specifying a flash unit's ability to illuminate subjects at a distance.
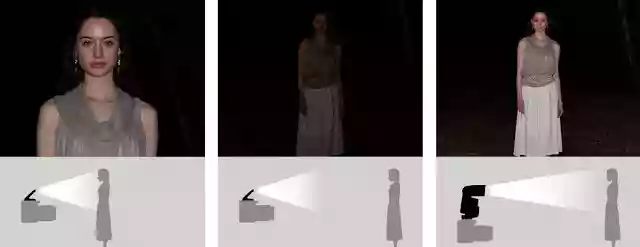
The Guide Number is equal to the maximum flash-to-subject distance multiplied by the appropriate aperture F-stop number. So the equation is:
Aperture (f/stop) x distance (m) = Guide Number (GN)
For example, a guide number of 60 (in meters at ISO 100) means that a subject 15 meters away, shot at an aperture of f/4 will be properly illuminated (because 60 = 15 x 4).
By decreasing the aperture size to f/8, the distance to the subject is halved so you would only be able to properly illuminate a subject at 7.5 meters (60 = 7.5 x 8. It's worth noting, however, that boosting the camera's ISO can be used to produce similar results to using a flash unit with a higher GN.
Sony Flashgun Range
Like most camera manufacturers, Sony also manufacture an excellent range of flashguns that can be mounted on the camera's hotshoe or off-camera for additional lighting in any scene.

There are four main flashguns in the Sony range:
Sony HVL-F32M is the entry-level flashgun with a Guide Number of 32, it's a simply flashgun with easy-to-use controls that will be able to add extra light to small scenes.
Sony HVL-F43M is the first mid-range flashgun from Sony in the range. With a gain of 43 it features a built-in LED light and easy, intuitive operation.
Sony HVL-F45RM is the upper-mid range flashgun with a Guide Number of 45, it has a range of approximately 30 meters and a battery life of up to 210 bursts.
The Sony HVL-F60M is Sony's top-of-the-range flashgun with a gain of 60 and a 1200 lux LED for movies, it's ideal as on and off-camera flash with a high power output.
Whether you use a Sony flashgun or any other brand, here are some helpful tips and tricks to get you started on your creative journey to using flash lighting to further your photographic potential.
Bounce Flash
Pointing your on-camera flash directly at your subject will result in harsh, washed-out lighting with hard shadows and unnatural skin tones. Although you can take the camera flash off your camera and mount it away from your subject, such as off to the side, for a more natural lighting angle, another solution is to use a technique called Bounce Flash.

Bounce flash is the technique of using a nearby surface such as a wall or ceiling effectively as a giant reflector, pointing your flashgun towards it and bouncing the light towards your subject gives a more natural looking light, with softer shadows and deeper skin tones.
This difference between direct flash and bounce flash can be dramatic, and whereas with off-camera flash you need to move the flash unit between setups, with bounce flash you maintain your speed and manoeuvrability and can change setup quickly and easily. Because the flash is bounced off a large surface, the effective coverage is increased (though the power is diminished) which makes it ideal for lighting a large group of people.
Tip #1: Ceiling Bounce Flash
One of the most common and popular bounce flash techniques, particularly for weddings and events is the Ceiling Bounce technique.

This type of bounce flash will result in soft shadows under the chins your subjects with a natural, down-lit look to the lighting. However, be aware that the colour of the ceiling will be reflected onto your subjects - which is fine if the ceiling is white, but problematic if the ceiling is purple (or any other colour for that matter).

To achieve this look, simply aim your flash upwards towards the ceiling at an angle of 45 degrees or less in the direction of your subjects. The ceiling will diffuse and spread your light over a large area for soft moods and a more sophisticated look than with direct flash.
Tip #2: Wall Bounce Flash
Using a large wall to bounce your flash can achieve an image that looks like your subject is stood next to a large window lit by natural light. This is a favourable look for portraits or images of people on their own, and less useful for images of groups as the light will dissipate the further away someone is from the wall.

Be aware that as with ceiling bounce, whatever colour (or material) is on the wall will affect the type of light that ends up on your subject. Using a bog standard white or grey wall will work perfectly well, but if the wall is a dark colour, or covered in fabric (particularly light absorbing fabric like velvet curtains) then the amount of reflected light will be significantly less.

To achieve this look, simply rotate your flashgun towards a wall in the direction of your subject. The resulting image will have soft shadows (the further away your subject is from the wall, the softer the shadows will be), and this light will pick out the contours on the face of your subject. Try using a low power flash with a high ISO to blend bounce flash lighting with indoor lighting.
Flash Synchronisation

Normal flash sync is where your camera and flash are synchronised so that the flash will fire a single burst while the shutter is fully open (after the front curtain and before the rear curtain). This usually results in a perfectly exposed image.
However, there are limits to the shutter speed that you can use with normal flash sync. Professional DSLRs will generally be 1/200th sec or 1/250th sec, but other cameras can be 1/125th or even 1/100th sec depending on the model of the camera.
High Speed Sync Flash
Usually this isn't a problem, but if you're shooting in a situation that requires a faster shutter speed, for example you're shooting a portrait outdoors and want to use a shallow depth of field, you'll need a very fast shutter speed (maybe 1/2000th sec). In these circumstances a normal flash would sync too slowly.
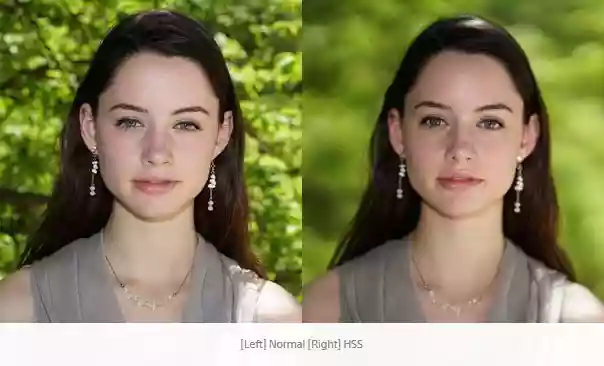
To use flash with a fast shutter speed, you need to use High Speed Sync (HSS). With HSS enabled, the camera can use a much faster shutter speed because the flash is synced to fire for the whole shutter process.
This means that the flash stays on for the front curtain, fully open, and rear curtain process. Essentially it lengthens the time that the flash is on so that it can be captured by the faster shutter speed.
Slow Sync Flash
Without using a flash, low light photography is usually achieved by slowing down your shutter speed until you have enough illumination to result in a properly exposed image.
However, there comes a point when you can't use a slower shutter speed or your image will be blurred. In these circumstances, we can use a technique called Slow Sync Flash.
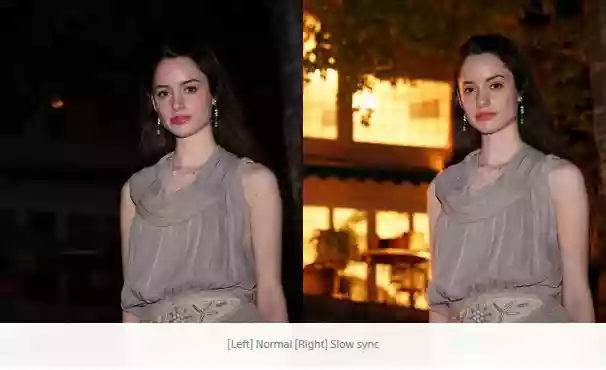
Using a standard flash in these circumstances can result in an improperly exposed image, with just your subject perfectly exposed and the rest of the image in complete darkness. This is where Slow Sync Flash comes in.
Slow Sync Flash works by firing the flash at the beginning (or end) of a longer shutter exposure. For example, if you're photographing a party using a shutter speed of 1/5th sec, the flash will fire as soon as the shutter is fully open, this captures your subject perfectly illuminated - the shutter then stays open to allow the rest of the scene to be equally well illuminated.
Slow sync flash allows you to use much longer shutter speeds without worrying about motion blur or camera shake on your subject, which will be frozen in motion by the camera flash.
We hope you have found this article on how to use Sony flashguns useful, head over to the Park Cameras website to see more Sony digital cameras and flashguns.
If you need any more help or advice, check out our School of Photography courses where you can learn photography in one-on-one sessions or group classes.
Share this post:
By Park Cameras on 14/09/2017
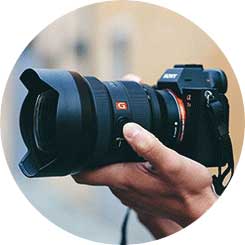
Trade in your old equipment
Fast and easy trade in service ensures your old gear is collected efficiently and you are paid quickly! It's very simple to trade in your unwanted photography gear. Just head over to our dedicated Sell or Part Exchange page, fill out the details, and we'll get back to you with an offer for your old gear. Take the cash, or put it towards the cost of your new gear. It's up to you! Find out more
sign up to the newsletter
Keep up to date on the latest photography news, events and offers. Sign up now