- Call us 01444 237070

-
- Back
- Used Cameras
- Used Accessories
- Used Lenses
- Back
- Used Canon Lenses
- Used Nikon Lenses
- Used Fujifilm Lenses
- Used Sony Lenses
- Used Micro 4/3rds Lenses
- Used Leica Lenses
- Used Panasonic Lenses
- Used Pentax Lenses
- Used Samyang Lenses
- Used Sigma Lenses
- Used Tamron Lenses
- Used Tokina Lenses
- Used Voigtlander Lenses
- Used Zeiss Lenses
- Used Hasselblad Lenses
- Used Video
- Used Film Equipment
- Used Stock Alert
- Used Blank Test
- Sell or Part Exchange
- Used Clearance
- Recently Added Used Equipment
- Park Picks
- Faulty
- Trade-In
- Blog
- New in
- Call us
- Contact us
- Stores
- Sign in
- Categories
- Tips & Inspiration
- Reviews
- News
- Events
- Features
- Buying Guides
- Competitions
Guide to Camera Lenses
Buying your first extra lens can feel like learning a new language. The names are packed with numbers and letters, and none of it makes sense. By the end of this guide, you'll know what fits your camera, what the main numbers mean and what to look for based on the pictures you want to take.
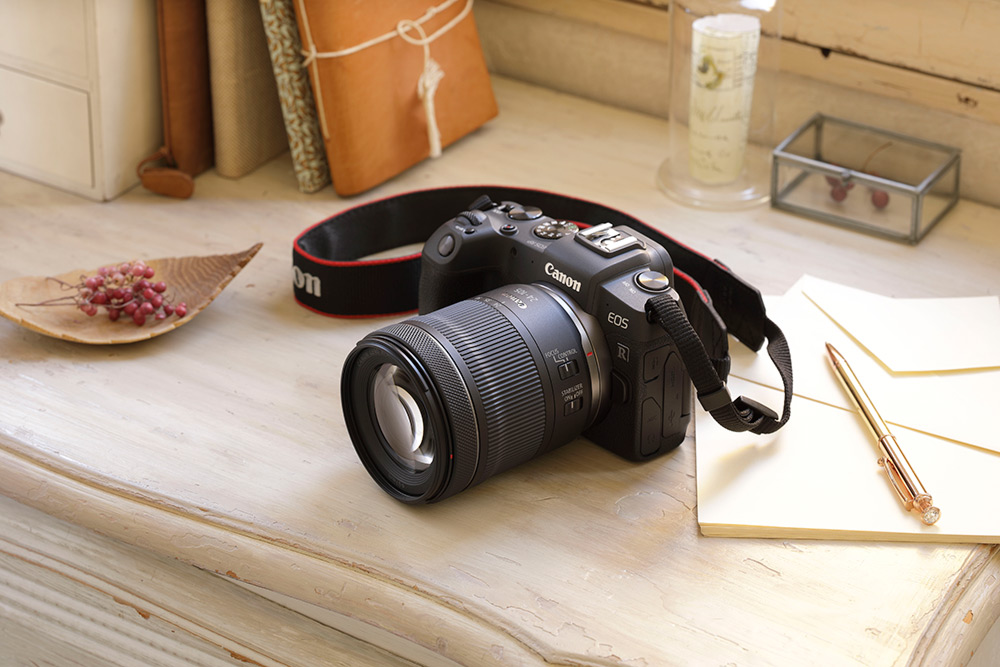
First, which lenses fit my camera?
Before anything else, check the mount. This is the fitting where a lens clicks onto the front of your camera, and each brand tends to use its own. In simple terms, a lens made for one brand's mount won't attach to another's.
The easiest check is to find the mount name in its manual or on a product page, then make sure the same name appears in the description of anything you're thinking of buying. Independent makers such as Sigma and Tamron produce versions for different systems, so it's the mount name that matters, not just the brand.
Older lenses from DSLR cameras can sometimes be used on newer mirrorless bodies with an adapter. Compatibility varies, so check which features are supported before buying, especially when mixing brands or using older equipment.
You'll also see terms such as full-frame, APS-C and Micro Four Thirds. These describe different sensor sizes inside the camera. Some lenses are designed only for the smaller sizes, so check that the description says it suits your camera's sensor. We'll come back to how sensor size changes the view in the focal length section.
If you're unsure, checking before you buy is far easier than trying to memorise every mount name.
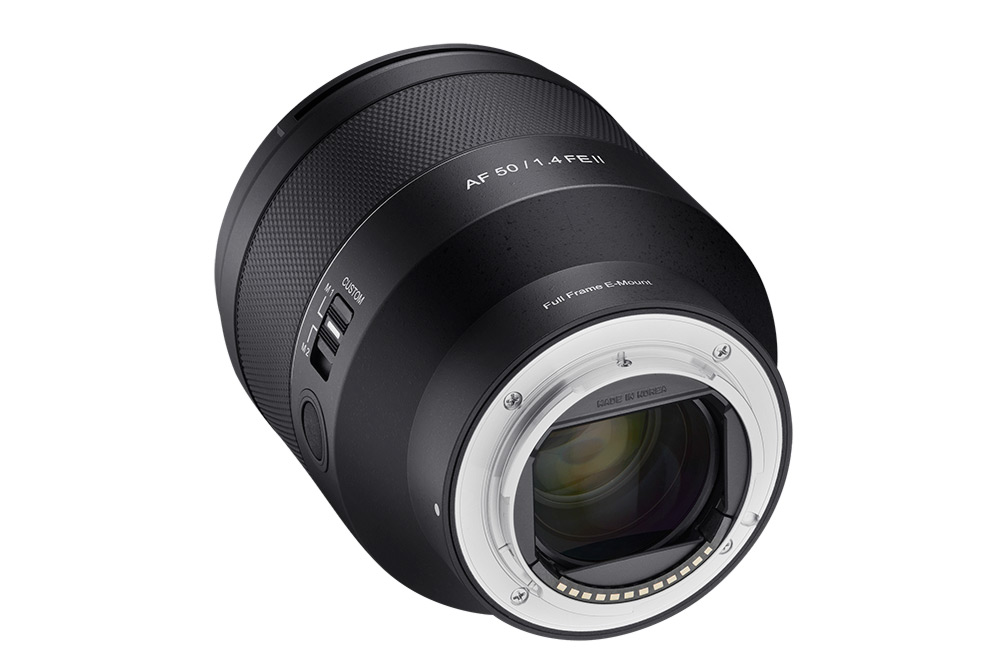
The mount at the rear needs to be compatible with your camera.
What do the numbers on a lens mean?
Lens names look like a secret code until you know which parts matter. Take a typical example:
| 24-70mm | f/2.8 | IS USM |
|---|---|---|
| How wide or close the view can be | The widest opening for letting light in | Extras, which vary by brand |
24-70mm is the focal length range. At 24mm you see a big slice of the scene. At 70mm you see a tighter section, so your subject looks closer. Twisting or sliding the barrel moves you anywhere in between.
f/2.8 is the widest aperture, which is the biggest opening the lens can use to let light in. The smaller this number, the more light it can gather. A wider aperture can also make it easier to blur the background, helping your subject stand out.
The letters at the end usually refer to things like the focusing motor, image stabilisation or the product range. Every manufacturer has its own code, so you don't need to learn them. If a set of letters catches your eye, the product description normally spells out what it means.
A 50mm f/1.8 has only one focal length because it stays fixed, while f/1.8 tells you it opens wide, which helps when light is low.
Focal length, widest aperture and compatibility are the three things to look at first. The rest can wait.
What is focal length?
Focal length is measured in millimetres (mm), and it decides how much of the scene fits into your picture.
The easiest way to remember it: a small number gives you a wider view, and a big number gives you a closer view of something further away.
A wide view is handy for landscapes, buildings and squeezing a whole group into a photo. Longer focal lengths make distant subjects fill more of the frame, which is why they're so popular for wildlife and sport. There's plenty of room between those extremes.
| Focal length (on full-frame) | What you see | Often used for |
|---|---|---|
| Below 24mm | Very wide | Landscapes, interiors, buildings, night skies |
| 24-35mm | Wide | Travel, landscapes, street, people in their surroundings |
| 35-70mm | Everyday view | Family, street, travel, portraits |
| 70-200mm | Tighter, with room to stand back | Portraits, events, sport, picking out details in a landscape |
| 200mm and longer | Far-off subjects fill the frame | Wildlife, birds, sport and action |
These aren't rules. A 200mm can make a brilliant landscape and a wide angle can create an unusual portrait. The ranges simply give you somewhere sensible to start.
Why does the same focal length look different on different cameras?
The table above assumes a full-frame camera. With a smaller sensor (APS-C or Micro Four Thirds), the same focal length captures a narrower area of the scene.
On most APS-C cameras it's about 1.5 times (1.6 for Canon), so a 50mm gives a view similar to a 75mm on full-frame. On Micro Four Thirds it's 2 times, so a 50mm behaves like a 100mm. Nothing about the lens has changed. The smaller sensor just records less of what's in front of it.
In practice, this gives you a little extra reach for distant subjects, which is handy for wildlife. The catch is that you need a smaller number to get the same wide view. To match what a 24mm shows on full-frame, you'd look for something around 16mm on most APS-C cameras.
Prime or zoom: which should I choose?
A prime has one fixed focal length, such as 35mm, 50mm or 85mm. There's nothing to twist. To change how much fits in the picture, you move yourself, stepping closer or further back.
A zoom covers a range, such as 18-55mm or 70-200mm. You change the framing by turning or sliding the barrel, without moving your feet or swapping to something else.
Neither is better overall. It depends on how you like to shoot.
Why you might prefer a zoom
- It's useful when you can't easily move, such as at a concert, on a cliff path, near wild animals or in a crowded street.
- One zoom can do the job of several primes, which helps when the moment won't wait for you to swap.
- It suits travel and everyday photography, where one piece of kit has to cover a lot.
Compared with a prime offering a similar maximum aperture, a zoom will often be larger and heavier.
Why you might prefer a prime
- It's usually smaller and lighter, so it's easier to carry all day.
- Wide apertures are available at friendly prices. An f/1.8 prime can be far cheaper than a zoom that opens as wide, which helps in low light and for softer backgrounds.
- Having just one view can make you think harder about where to stand and what to include. Many photographers find that useful.
The trade-off is that you do the zooming with your feet, which isn't always possible.
You'll often hear that primes are sharper and zooms are a compromise. It's not a reliable way to choose. Well-made examples of both can give excellent results, and for everyday photos the difference is rarely what holds a picture back. Plenty of photographers use both, a zoom for flexibility and a small prime for low light or travelling light.
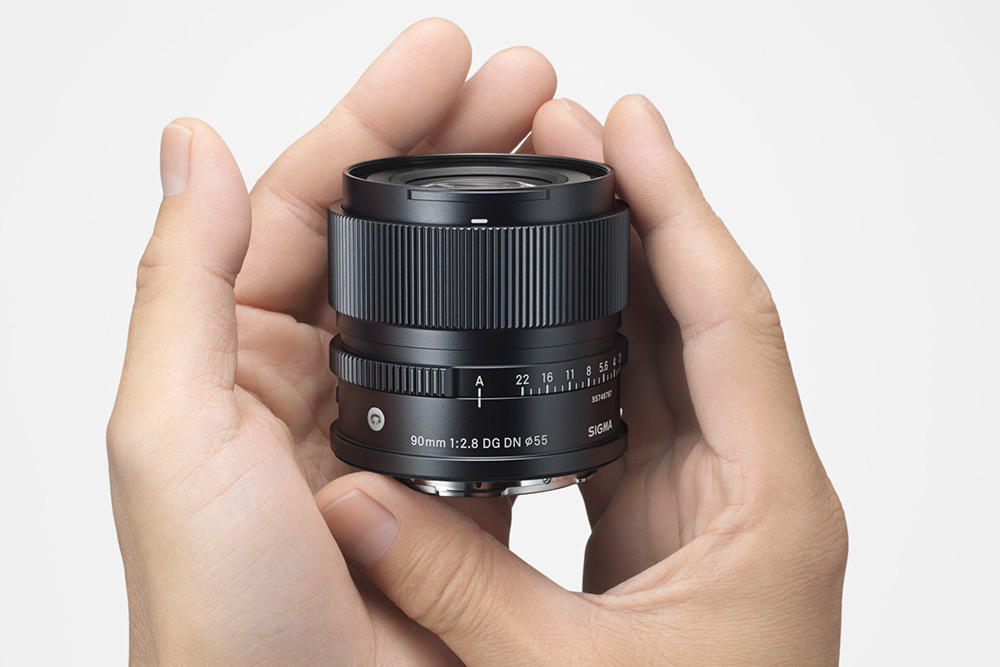
Compact primes can be particularly easy to carry for everyday photography.
What does aperture mean?
Inside every lens is an adjustable opening called the aperture. It gets wider or narrower to control how much light reaches the sensor. It's shown as an f-number, such as f/1.8, f/2.8, f/5.6 or f/11.
The confusing part is that a smaller number means a wider opening. So f/1.8 lets in far more light than f/5.6.
Picture a friend sitting by a window on a grey evening. At f/5.6, the room is dim, so your camera has to work harder to make a bright enough picture. It either takes a longer exposure, which risks blur if anything moves, or brightens the image artificially, which can add grain. At f/1.8, much more light reaches the sensor, so you can use a faster shutter speed in the same conditions.
It changes the background too. At f/1.8 your friend stays sharp while the bookshelves behind them can become softly blurred. At f/5.6 more of the room may come into focus, so the background looks busier. That blurred-background look comes from a shallow depth of field, which just means only a slice of the scene, front to back, appears sharp.
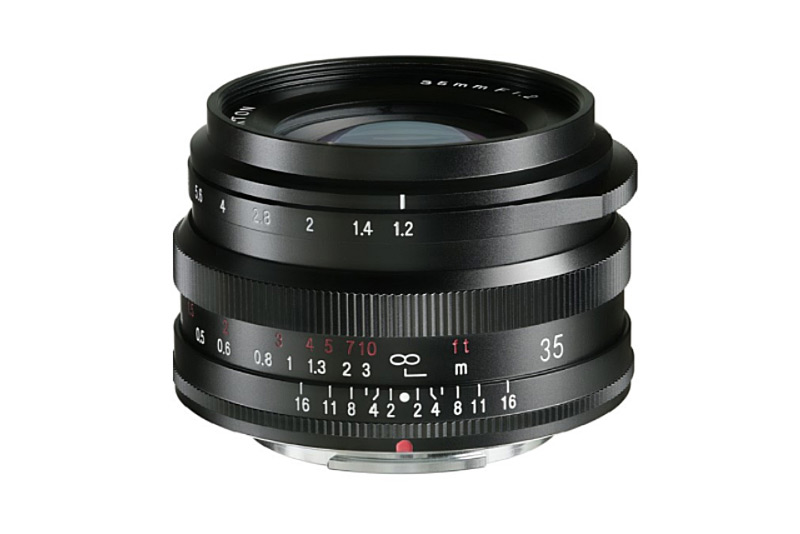
Aperture settings are shown as f-numbers, with smaller numbers representing wider openings.
That doesn't mean you should always use the widest setting. A landscape works the other way. If you want the flowers at your feet and the mountains in the distance both sharp, a smaller opening such as f/11 can be a better choice.
Why do some zooms show two aperture numbers?
You might see something like 18-55mm f/3.5-5.6. This means the widest available opening changes as you zoom. It can open to f/3.5 at the wide end but only to f/5.6 when zoomed in.
A zoom listed as 24-70mm f/2.8 keeps the same wide opening from one end to the other. That's valuable for some photography and video, but it usually adds size, weight and cost. If you mainly shoot outdoors, travel a lot or simply want to keep things light, a variable aperture zoom can be a much more practical choice.
Which type is right for what I photograph?
Start with what you enjoy photographing, not with a list of specifications. Below are the things that tend to matter for each subject. Please treat them as starting points, not rules. A long focal length can make a striking landscape, and a wide view can make an unusual portrait. Break these ideas whenever your pictures call for it.
Everyday photos and family
A standard zoom is hard to beat when you're starting out. It's flexible enough for people, pets, days out and holidays without constantly swapping.
The kit zoom, the one that came in the box, is often better than beginners give it credit for. Use it for a while before assuming it needs replacing. You'll learn which focal lengths you enjoy and, more importantly, where its limits are getting in the way of the pictures you want.
Travel
Size and weight matter more than you'd expect when you're carrying a camera all day. A compact standard zoom may be plenty, while a broader all-in-one zoom can cover everything from wide scenes to far-off details without any swapping. The trade-off is usually a narrower maximum aperture than larger, more specialist models offer.
There isn't much point in owning impressive kit if it's so big and heavy that it stays in the hotel.
Street and city life
A moderate wide view is popular, often somewhere around 28mm to 50mm, because it lets you include people and their surroundings. Small, light models are easy to carry and don't draw attention, and a wide aperture helps when the light drops in the evening. Quiet autofocus is a bonus if you want to stay unnoticed.
Landscapes
Wide angles are popular because they fit big scenes into the frame, but they aren't the only choice. Longer focal lengths can isolate distant hills, pick out light falling across one part of a scene or simplify a busy view. Rather than automatically buying the widest option available, ask whether you want the whole view or just a piece of it.
Portraits
A slightly longer focal length gives you a comfortable distance from the person and can make it easier to separate them from what's behind. Wide apertures are popular too, because they give you more control over background blur.
A 50mm is an affordable starting point on many systems, and something around 85mm is a favourite on full-frame. But portraits aren't limited to those numbers. Wider views are great when you want to show the person's surroundings, and longer ones can look beautiful outdoors.
Wildlife and sport
This is where reach matters. Birds, animals and action often can't be approached closely enough to fill the frame with a standard zoom, so longer focal lengths come into their own. A zoom is especially useful here because the distance to your subject can change in a second.
Autofocus, stabilisation, handling and weight all become more important as focal lengths get longer. A giant model isn't the right choice if you plan to walk several miles with it or hold it for hours.
Close-ups and tiny details
For insects, flowers and small details, look at how closely it can focus and how much it magnifies. A true 1:1 macro can reproduce a subject life-size on the sensor, which makes a huge difference when something very small needs to fill the picture.
Some general-purpose models also focus surprisingly close without reaching 1:1. That may be all you need for flowers, food, details and larger subjects.
If your subject isn't listed, the same questions work. How much do you need to fit in? How far away is it? How much light will you have? How far will you be carrying it?
Do I need image stabilisation?
Sometimes, but it's a helpful extra rather than a must-have. It's most useful when you're holding the camera in your hands, using a long focal length or shooting in dim light.
Stabilisation reduces blur caused by the tiny movements of your hands. It lets you shoot handheld at slower shutter speeds, which is how long the sensor is exposed to light, in situations where you'd otherwise need a tripod or a brighter scene. It's also good for smoother video.
Some cameras have it built into the body, usually called IBIS (in-body image stabilisation). Other systems build it into the lens instead, and some combinations use both together. If your camera already has IBIS, you have stabilisation available with lenses that don't include their own. Some systems can also combine in-body and optical stabilisation for additional support.
What it can't do is stop your subject moving. If a bird flaps its wings or a footballer sprints across the frame, you still need a quick shutter speed to freeze them. Stabilisation only helps with your movement, not theirs.
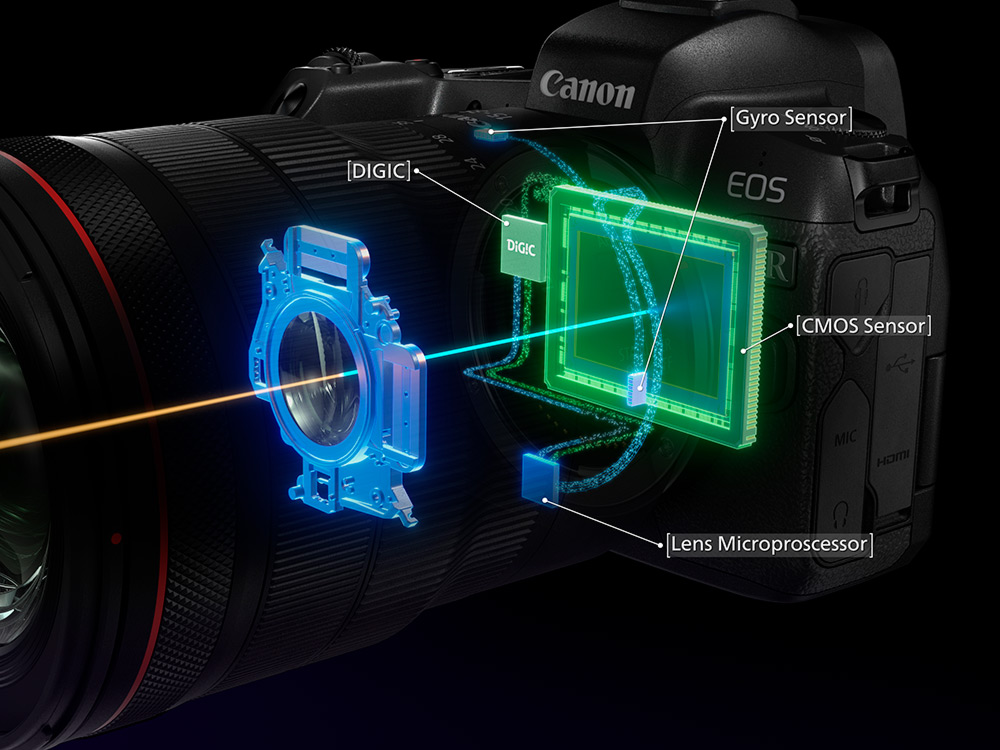
Some camera systems can combine stabilisation in the body and lens.
What else should I look for?
Once you've settled on a focal length and aperture, these are the practical things worth comparing.
Size and weight. Numbers on a spec sheet don't tell you how something feels after four hours of walking. Think about whether you'll carry it all day, travel with it or use it mostly in one spot, and be honest with yourself.
Minimum focusing distance. This is the closest you can be to a subject while it's still sharp. A smaller number lets you get closer, which is handy for flowers, food and small details. You don't need a dedicated macro model if you only want occasional close-ups.
Autofocus. This is how quickly, smoothly and quietly it locks onto a subject. It matters most for moving subjects such as children, pets, sport and birds. Quiet, smooth focusing also helps when you're filming.
Weather resistance. Seals around the barrel help keep out dust and light rain, which is useful outdoors. Weather resistant doesn't mean waterproof, so it still needs looking after.
Filter thread. Filters screw onto the front of many lenses, and the size is measured in millimetres. If you own filters, or plan to buy some, choosing models with the same thread size means one set can be shared instead of buying duplicates. You can explore lens filters to see the different types and sizes available.
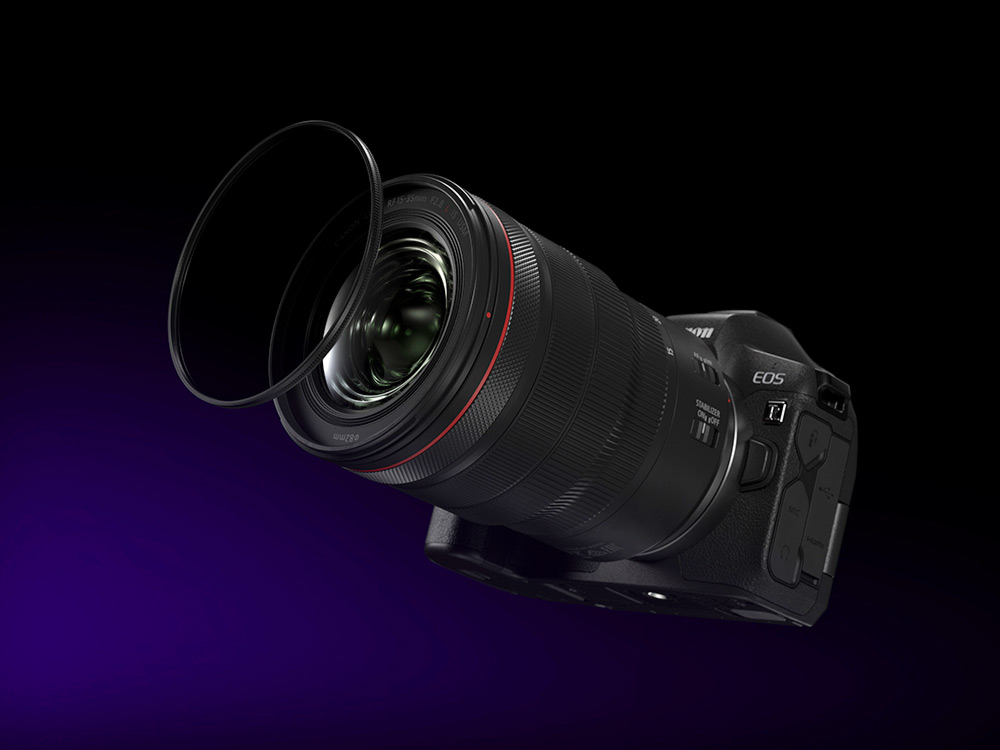
Physical controls. Some models have extra rings, buttons or switches on the barrel, such as aperture rings, custom buttons and focus limiters. They're brilliant if they make the way you shoot easier, but they're only worth paying for if you'll actually use them.
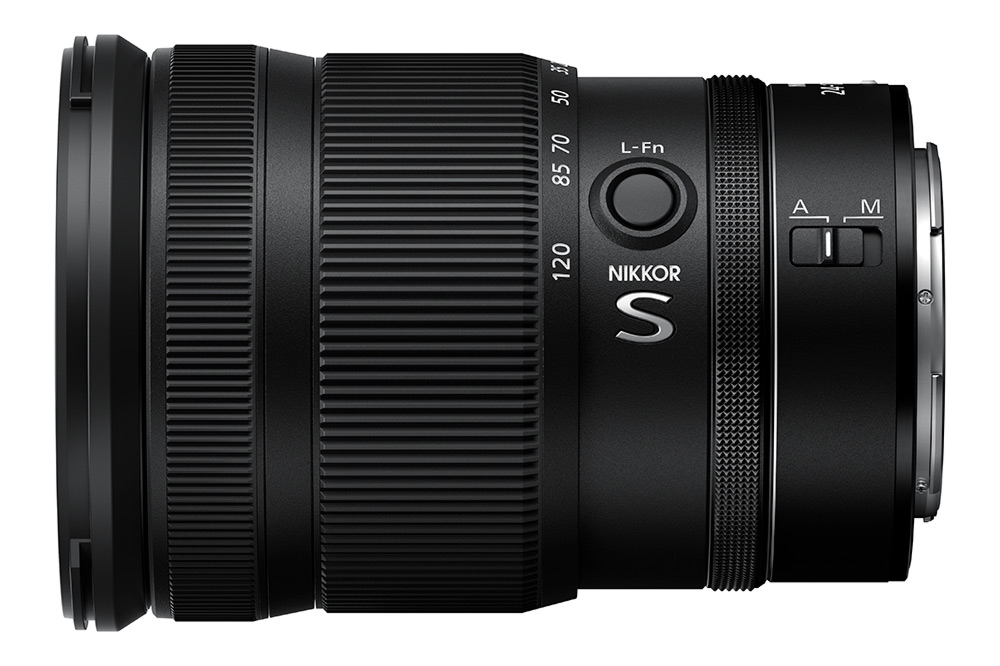
Extra switches, rings and custom buttons can make frequently used settings quicker to reach.
Why are some lenses so expensive?
Two lenses can cover a similar range of view and yet cost wildly different amounts. Beginners often wonder why. Here are the main reasons.
A wider maximum aperture. Letting in lots of light, especially across a whole zoom range, needs larger pieces of glass made to tighter standards. That adds size, weight and cost.
Specialist glass. More expensive models often use specially made glass and coatings to reduce colour fringing and glare, and to keep detail crisp right to the edges of the picture.
Autofocus systems. Faster, quieter and more precise focusing motors are harder to build, particularly ones that can follow moving subjects.
Construction and weather sealing. Metal parts, seals and sturdier builds are designed to cope with knocks, dust and drizzle.
Size and complexity. Long telephotos and wide-aperture zooms need big front elements and lots of moving parts. Some designs are simply difficult to make.
Production volume. Popular models, such as a common f/1.8 prime or a kit zoom, are made in huge numbers, which keeps the cost of each one down. Niche designs sell in far smaller numbers, so each one costs more to produce.
But a higher price doesn't mean better for you. A small, affordable model that suits your photography can be far more useful than a professional one that's too heavy, too specialised or simply more than you need. A good question to ask is what you're paying extra for, and whether you'd actually use it.
Choosing your first extra lens
If you're still unsure what to buy, start with what came with your camera. Spend a few weeks photographing the things you enjoy, then notice what keeps getting in the way.
Your photos can help. Most photo apps show the focal length used for each picture in its details. Look through your favourites and see which setting you reached for most often. If you were always at the longest end and still wanting the subject bigger, you need more reach. If you were always at the widest end and still backing into walls, you need something wider.
Then match the problem to the answer:
- Can't get close enough to your subject? Look at something longer.
- Can't fit everything into the frame? Look at something wider.
- Struggling in dim light, or want a softer background? A wider maximum aperture (a smaller f-number) could help.
- Want tiny subjects to look bigger? Look at close focusing and macro ability.
- Tired of swapping while you travel? A zoom with a broader range might suit you better.
You don't need to build a collection that covers every focal length. The right additions are the ones that solve a problem you keep running into, or let you take pictures you couldn't before.
That's also why there's no single best first upgrade. Once you know what your current kit is stopping you from doing, choosing the next piece becomes much easier.
Find the right one for your photography
Whether you've worked out that you need a wider view, more reach, better low-light performance or closer focusing, you can now narrow the choice around the pictures you actually want to take. Browse our camera lenses to compare compatible options for your system.
Share this post:
By Park Cameras on 10/11/2021
Trade in your old equipment
Fast and easy trade in service ensures your old gear is collected efficiently and you are paid quickly! It's very simple to trade in your unwanted photography gear. Just head over to our dedicated Sell or Part Exchange page, fill out the details, and we'll get back to you with an offer for your old gear. Take the cash, or put it towards the cost of your new gear. It's up to you! Find out more
sign up to the newsletter
Keep up to date on the latest photography news, events and offers. Sign up now