- Call us: 01444 237070
- Contact Us
- Stores
- Sign In / Register
-
- Back
- Used Cameras
- Used Lenses
- Used Video
- Used Film Equipment
- Used Stock Alert
- Used Accessories
- Recently Added Used Equipment
- Used Clearance
- Faulty
- Park Picks
- Sell or Part Exchange
- Trade-In
- Blog
- New in
- Call us
- Contact us
- Stores
- Sign in
- Categories
- Tips & Inspiration
- Reviews
- News
- Events
- Features
- Buying Guides
- Competitions
Low Light Photography Tips
In discussing cameras and lenses, the term 'ideal for low light' often surfaces, but what exactly does that mean? Low light photography encompasses capturing images in dimly lit conditions, which can be anything from subdued indoor lighting to low light night photography. It’s essentially any situation where there is less ambient lighting, and spans various genres, including portraits, landscapes, and street photography.
Understanding what constitutes low light is crucial, as is knowing which equipment you need and the best camera settings to use. This guide shares low light photography tips to steer you through settings and techniques to master it, illuminating how to capture stunning images in less-than-ideal lighting conditions.
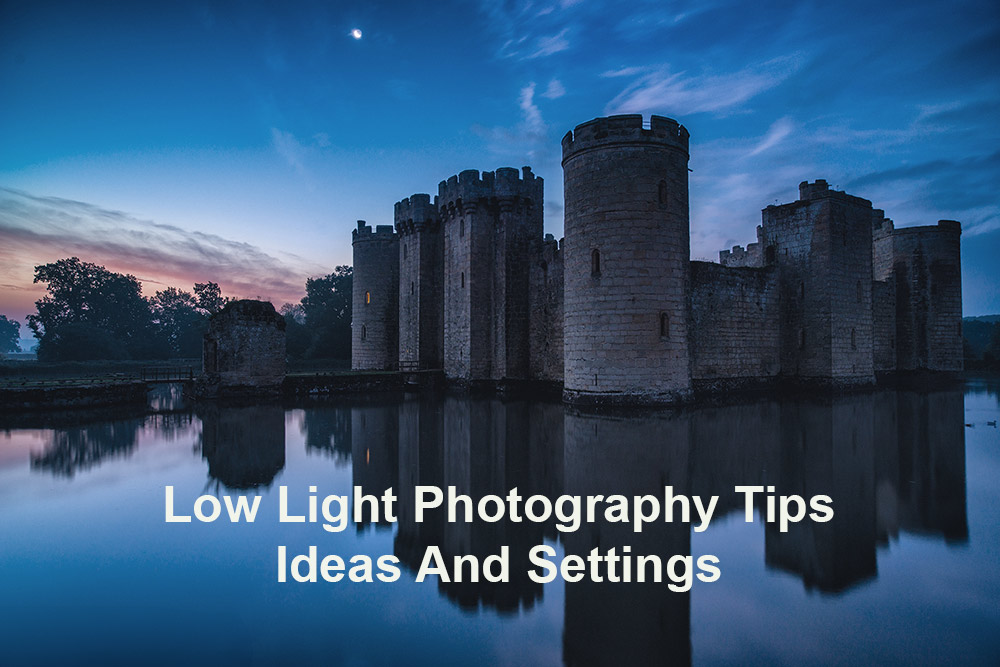
Image creadit Nick Dautlich
Use the fastest lens possible with a wide aperture
When capturing photography in low light, using a lens with a wide aperture, or a 'fast' lens, is crucial for many subjects. A wide aperture, which is denoted by a smaller f-number (like f/1.4, f/1.8), allows more light to enter the lens, making it better suited for dimly lit conditions.
This is useful because it reduces the need for overly high ISO settings, which can introduce unmanageable noise into your photos. Additionally, a wider aperture provides a shallower depth of field, enabling you to create images with a distinct focus and smoothly blurred backgrounds, assuming you are after that effect. You can get to grips with the basics in our guide to camera lenses, which shares useful insights to help you get the most out of your gear.
For portraits, street photography and other types of subject photography, a shallow depth of field is often desirable, however if you’re capturing landscapes, cityscapes or static scenes, you don’t need such a fast lens, as you can shoot from a tripod.
Image creadit: Jake Marote
Which lens is best for low light in photography?
Many photographers favour a fixed focal length lens, such as a 35mm or 50mm for low light, although lens choice largely depends on your camera brand and the subject. The debate between prime vs zoom lenses often centres around maximum aperture, and prime lenses typically offer wider apertures, making them better suited here.
Choosing the right lens can significantly enhance the quality of your low light images, giving you more creative control and better overall results. For Canon users the Canon RF 50mm F/1.8 STM Prime Lens combines the right qualities with its compact, portable design, and wide aperture.
Sony users have plenty of options to choose between, although the Sony FE 35mm F/1.8 and Sony FE 50mm F/1.8 stand out as compelling options for similar reasons as the Canon lens above. All of the other brands including Fujifilm, Nikon and Panasonic offer brilliant options to achieve excellent low light shots, with either a DSLR or mirrorless camera.

Slow your shutter speed for night time long exposures
Slow your shutter speed
One of the most important low light photography settings for certain situations is a slow shutter speed, which allows more time for the sensor to gather light. However, it also increases the risk of motion blur. For static subjects, this technique is ideal, but moving subjects might appear blurred.
Camera and/or lens image stabilisation is a great way of counteracting camera shake at slower speeds, although for low light landscape photography and cityscapes at night, a tripod is often necessary for the sharpest results.
Slow shutter speeds can also open creative low light photography possibilities, like capturing light trails or smoothing water motion. Consideration of the subject and available stabilisation is key to harnessing the benefits of photographing at slow speeds, without compromising image sharpness.

St Marco square at night, image credit Nick Dautlich
What shutter speed for low light is best?
When deciding what shutter speed for low light is best, consider if your subject is in motion, which lens you're using, and how many stops of stabilisation are available. This will help determine the initial speed to try, which you can fine-tune after reviewing your first shots.
Many mirrorless cameras provide excellent image stabilisation, with models such as the Fujifilm X-T5, OM System OM-5 and Canon EOS R7 offering between 6 and 7-stops of compensation. This allows you to shoot at speeds as slow as 1/30, 1/20 and even slower if using a shorter and lighter lens.
For heavy lenses, or longer telephoto lenses, you will need to increase the shutter speed slightly to combat shake. Similarly if the subject is moving you’ll possibly have to increase the speed and ISO accordingly in order to avoid motion blur. You can negate some of these obstacles by bringing your own photography lighting to your low light scene, which brings us on to the next tip.
Using Rotolight RGBWW lighting for dramatic effect
Look for light, or bring your own
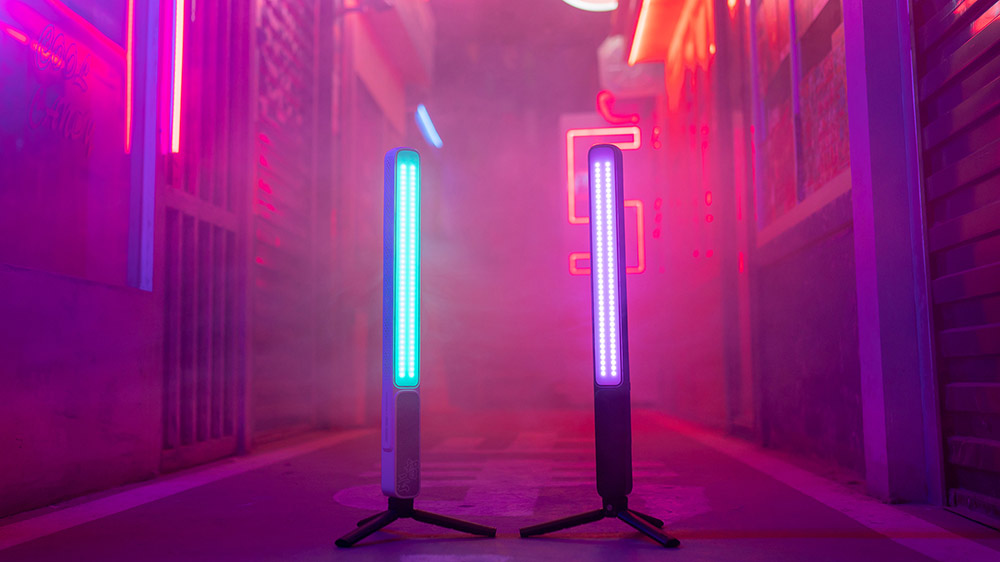
For low light photography, finding or creating light sources is key to a successful image. Look for ambient sources like streetlights, car headlights, or candlelight to illuminate scenes naturally. For more controlled lighting, or for subjects which need additional illumination, consider using portable LED photography lights, flashguns or studio lights.
LED lights are a more recent innovation, which are not only handy for photography, but also double as a lighting solution for video shoots. Many LED’s provide flexibility for adjusting light intensity, focus and colour, enhancing your ability to capture well-lit, creative images in low-light conditions.
There are plenty of pocket-friendly options available, including the Kenro Smart Lite Bi-Colour Compact LED Video Light and Kenro Smart Lite Compact RGB Tube Light. Both are compact, adjustable, and fit into a small bag or pocket, opening up new avenues of creativity when shooting on-location.
The following two contrasting photographers are excellent examples of how to use either natural or supplemental lighting. British photographer Liam Wong’s low light photography focuses on fascinating naturally lit street scenes taken at night, whereas Lindsay Adler is known for her refined use of studio lighting to achieve beautiful low light portrait photography.

Using Leica camera with artificial lighting for drama
Which mode is best for low light photography?
Selecting the right mode on your camera plays a significant role in low light photography. Manual mode offers complete control over settings such as aperture, shutter speed, and ISO, allowing for precise adjustments based on current lighting conditions. However, manual requires a good understanding of how these elements work together.
Aperture Priority mode and auto ISO on the other hand, let you set the aperture while the camera adjusts the shutter speed accordingly. This mode is useful for maintaining control over light gathering and depth of field, while the camera manages exposure through speed and ISO. You can dial in exposure compensation when using any automatic modes on most cameras, which provides an additional layer of control, without taking full control over exposure yourself. There’s a pro tip from a wildlife photographer below, which can be applied to various scenarios to enhance an image.
Different camera modes have their advantages, but the choice depends on your comfort level with manual controls and the specific requirements of the shooting scenario. It is possible to learn manual photography in 10 minutes, and once mastered, you’ll be able to take control to refine the results whenever needed.
Zhiyun Fivray lights create cinema-like ambience
Check your focus
Focusing in low light is challenging. Some cameras, especially newer models, have better low-light focusing capabilities. Adjusting the focus point or switching to manual focus can help achieve sharp results when autofocus struggles. In some situations, temporarily adding light to focus and then removing it can also help attain focus.
This technique is especially useful in extremely dim conditions, ensuring the camera locks onto the subject accurately. Remember, manual focus requires patience and practice, but can be highly effective in low light situations, especially where we have excellent tools such as focus peaking and punch-in magnification.
Cameras with state-of-the-art low light focus include models such as the Nikon Z F, which achieves focus as low as -10 EV – or virtually pitch black conditions.
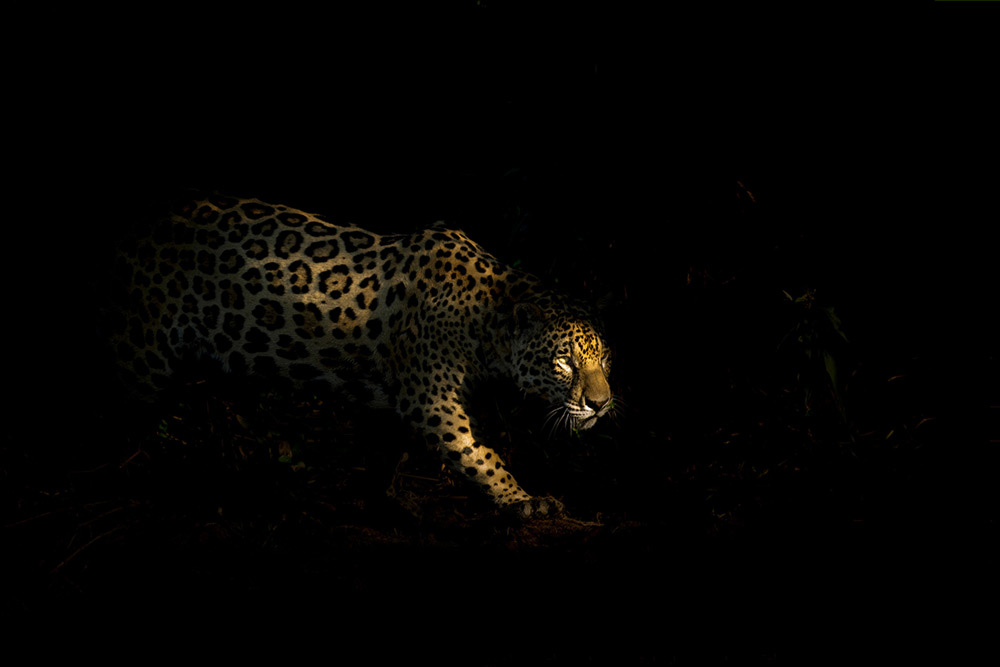
Ben Hall used negative EV to lower the exposure of this jaguar image
Use negative exposure compensation
Using negative exposure compensation allows you to intentionally darken a scene, which can enhance a picture’s mood. This setting is useful for maintaining the ambiance of a low light environment without overexposing it. By reducing the exposure, you preserve natural shadows and highlights that define the atmosphere, creating a realistic and dramatic effect.
This technique requires balancing the exposure level to avoid losing too much detail in the shadows, making it an effective way to emphasise the nuances, which are often found in low light scenes. The striking image of a jaguar stalking its prey by wildlife photographer Ben Hall is an excellent example. The low ambient light was enhanced by setting -3 EV exposure compensation, in order to darken the scene and focus available light onto the wild cat.
Most cameras offer exposure compensation, either with a dedicated dial in the case of Sony cameras, while some other brands offer this feature via the menu or with a custom button.
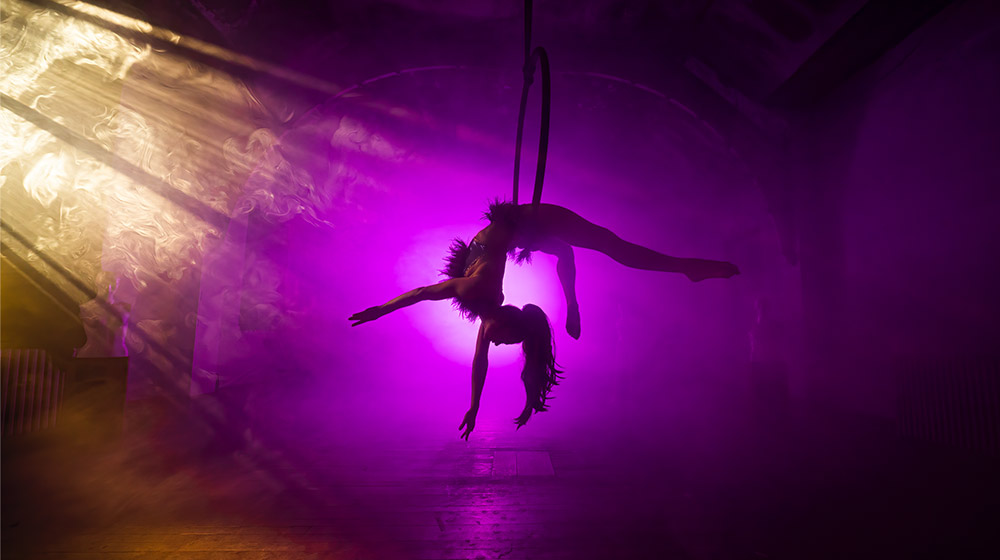
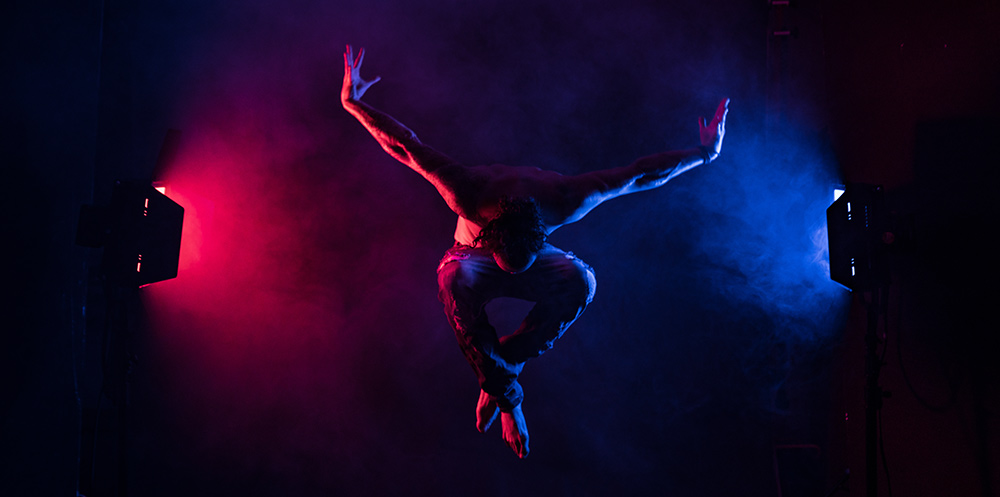
Low light dancer with RGB WW lighting from Rotolight
Post-Processing low light photos
Shooting in RAW allows for better post-processing flexibility than JPG when using photography software, which enables you to closer achieve the final result you envisaged. There are an infinite number of ways to process photos, and for low light photography it’s recommended to reduce the amount of noise from the outset.
Lightroom and Capture One are two of the best tools for noise reduction and image editing, but there are many other apps also available. After reducing noise, the next step is to adjust the white balance. This is crucial as low light sources, like street lights and artificial lighting, can often lead to unusual colour casts in your photos. After this simply adjust any other settings such as contrast and tone to achieve the perfect result, remembering to maintain the photo's natural look, if that’s the style you’re after.
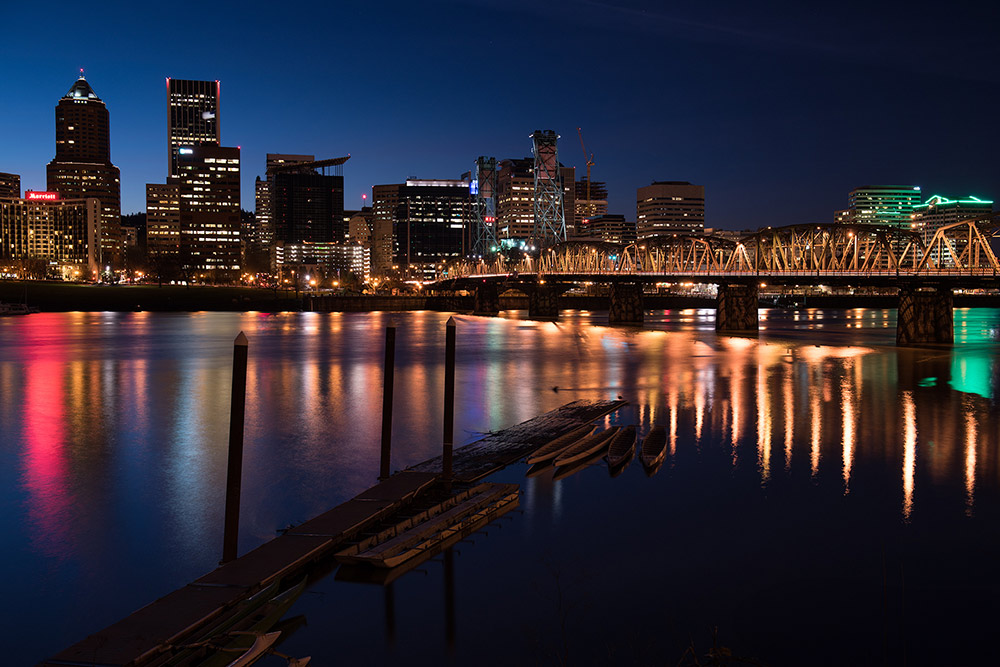
Urban scene at night image credit Nick Dautlich
Practice makes perfect
Regardless of what camera, lens, or accessories you use, the key is to actively practice your photography skills, and if you're struggling to think of projects to experiment with, here's a list of 10 low light photography ideas to inspire you.
- Cityscapes at Twilight – Capture the transition of city lights at dusk
- Candlelit Portraits – Use candles for a warm, intimate lighting in portraits
- Night Sky and Stars – Try astrophotography to capture the beauty of the night sky
- Street Photography at Night – Explore dynamic street life after dark
- Silhouettes Against Sunset – Create silhouettes with a setting sun background
- Light Trails – Photograph moving traffic at night to capture light trails
- Indoor Low Light Scenes – Shoot cozy indoor scenes with ambient lighting
- Reflections in Puddles – Post-rain puddles offer interesting night reflections
- Neon Signs – Capture the vivid colours of neon lights indoors and outside
- 10.Moonlit Landscapes – Experiment with the serene light and full moon photography
Watch our 5 Tips for Low Light Photography video
Gareth shares five tips in his video here.
From choosing the right lens and camera settings, to understanding the importance of slow shutter speeds and manual focus, we’ve learned the importance of equipment vs technique for low light photography. You can add supplemental lighting to create mood, or find ambient light which enhances the subject, and don’t forget the crucial role of adjusting white balance and noise reduction during post-processing.
Don't let low light limit your creativity – explore our range of cameras, lenses and LED photography lights to find the perfect gear to capture the beauty of the night.
Share this post:
By Nick Dautlich on 11/01/2024

Trade in your old equipment
Fast and easy trade in service ensures your old gear is collected efficiently and you are paid quickly! It's very simple to trade in your unwanted photography gear. Just head over to our dedicated Sell or Part Exchange page, fill out the details, and we'll get back to you with an offer for your old gear. Take the cash, or put it towards the cost of your new gear. It's up to you! Find out more
sign up to the newsletter
Keep up to date on the latest photography news, events and offers. Sign up now