- Call us: 01444 237070
- Contact Us
- Stores
- Sign In / Register
-
- Back
- Used Cameras
- Used Lenses
- Used Video
- Used Film Equipment
- Used Stock Alert
- Used Accessories
- Recently Added Used Equipment
- Used Clearance
- Faulty
- Park Picks
- Sell or Part Exchange
- Trade-In
- Blog
- New in
- Call us
- Contact us
- Stores
- Sign in
- Categories
- Tips & Inspiration
- Reviews
- News
- Events
- Features
- Buying Guides
- Competitions
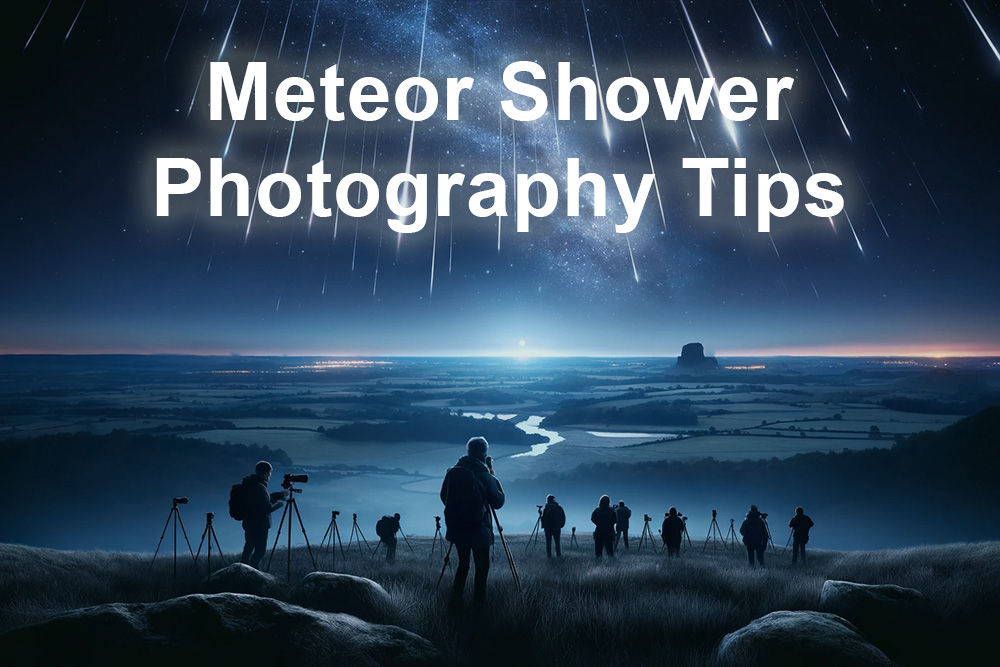
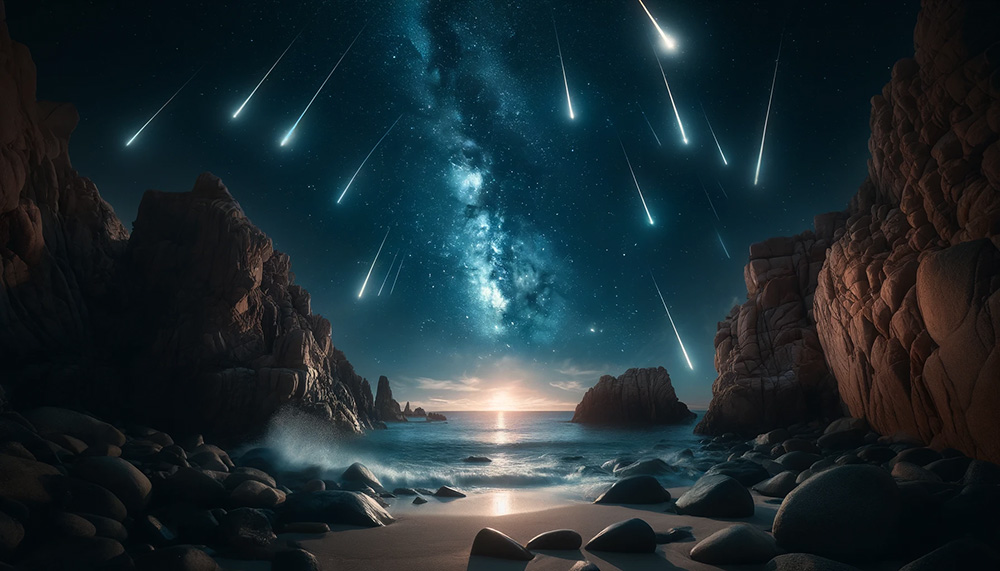
Meteor Shower Photography Tips
In the UK, we're fortunate to witness frequent meteor showers, and with the Lyrid meteor shower peaking between April 14 to 30, 2024, now is the ideal moment to brush up on meteor shower photography tips.
Discover the best camera, lens, and accessories you need when learning how to photograph a meteor shower, in order to capture awe-inspiring images of these celestial events. This beginners guide also discusses essential technical camera settings and compositional techniques of night sky photography, so you can nail exactly how to photograph meteor showers first time around.
The post also covers the importance of understanding camera settings, with a focus on the 500 rule for preventing star trails while capturing the swift motion of meteors. Additionally, we provide insightful tips on post-processing techniques to transform raw night skies into mesmerising images.
Where is the best place to see the Lyrid meteor shower UK?
While there’s not exactly a ‘best place’ to see the Lyrid meteor shower in the UK, it does pay to find a dark location away from city lights, with a clear view of the sky. We’re fortunate to have the South downs on our doorstep, but parks will generally suffice.
For photographers dealing with light pollution, Cokin offers a range of Clearsky Pollution Filters. Among these, the Cokin X-PRO Series NUANCES Clearsky Light Pollution Filter is compatible with P-SERIES (M size) filter holders. Alternatively, you might opt for a circular option like the P Series NUANCES 77mm Clearsky Light Pollution Filter, or another size compatible with your lens.
Check the end of this post to discover some of the most photogenic locations in the UK, which are perfect for night photography.
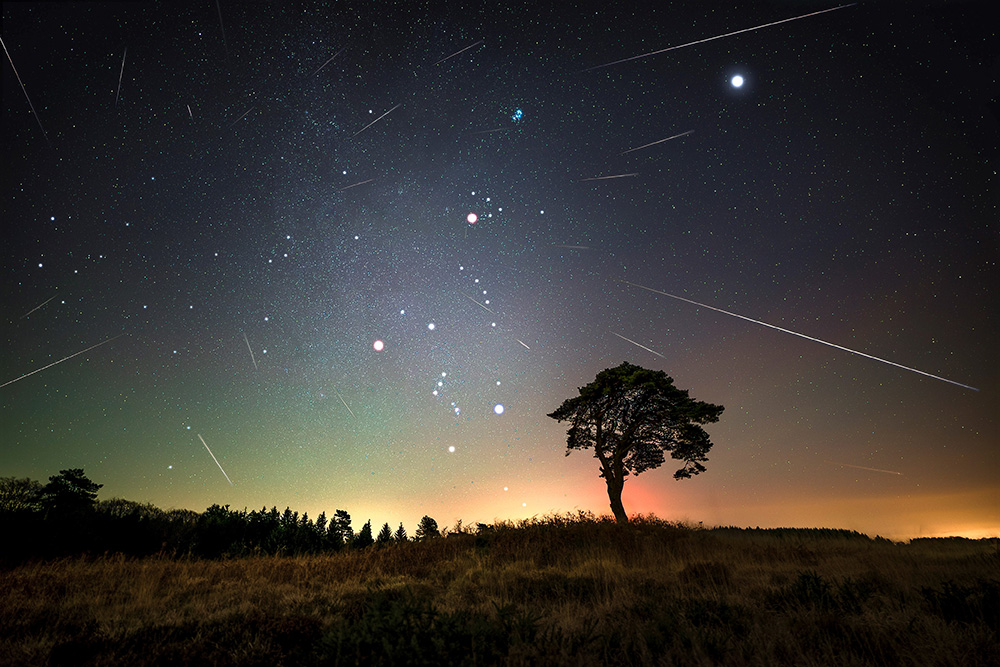
Exif Data: Sony A7S II, Sigma 14mm DG DN Art, 120x10 second exposures. The Mendips, Somerset, UK. Image Credit: Josh Dury Photo-Media
Josh Dury’s meteor photography tip
Stay out as long as possible to situate more meteors; towards the ‘radiant’ where meteors appear to come from, do your research to know when the next one is coming; how many meteors per hour. Alongside the moon and weather forecasts. Time at new moon with lengthier period of clear skies.
When is the best time to see the Lyrids meteor shower?
Begin viewing early in 2024, as the Lyrids meteor shower starts on April 14, just a day after the First Quarter Moon, peaking on April 22-23 during the Full Moon. Initially, viewing conditions will be relatively good but will deteriorate as the moon becomes fuller, affecting visibility.
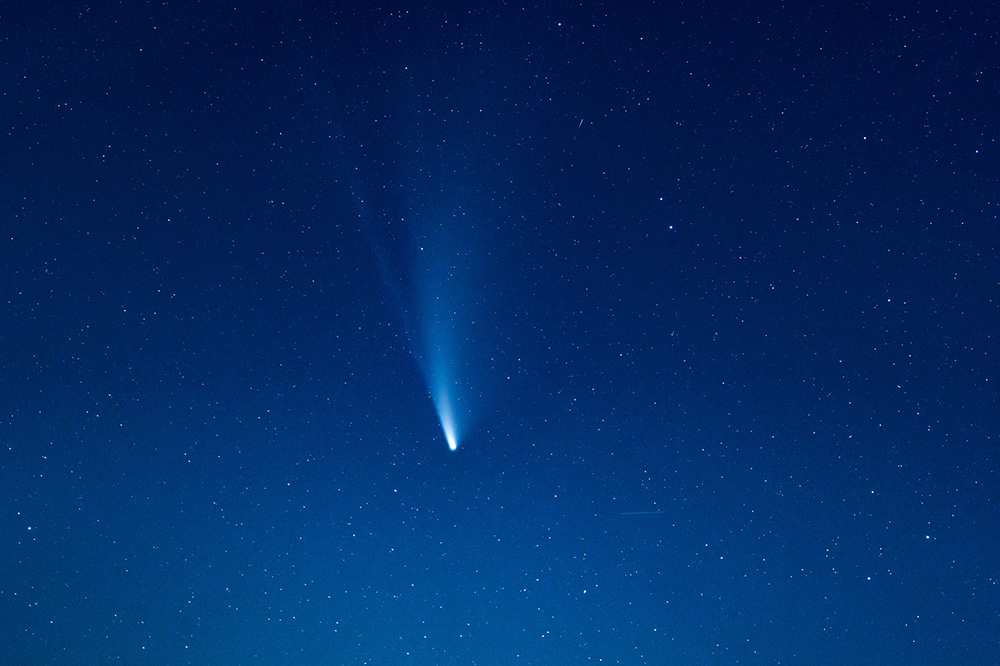
Sample image of Comet Neowise courtesy of Tim Berry, captured with the SIGMA 105mm F1.4 DG DN | Art. Sony A7 III camera settings: 4 seconds exposure. f/1.4. ISO 1600
The Best Camera for Meteor Shower Photography
Choosing the right camera is essential for capturing the ethereal beauty of meteor showers and astro generally. DSLR and mirrorless cameras offer the greatest flexibility and image quality. Key features to look for include ISO performance, an accurate autofocus system that can be manually overridden, and great battery performance.
While full-frame sensors are preferred for their excellent low light capabilities, crop-sensor and micro four thirds cameras also produce excellent results with the right settings and lenses. Popular models among astrophotographers include the Nikon D850 for its exceptional image quality and the Sony A7 IV for its powerful noise control and all-round versatility.
Ultimately, the best camera for meteor shower photography is one that balances ISO sensitivity, ease of manual shooting, and resolution, and there are plenty of new and used cameras, which can capture astrophotography perfectly.
What camera lens is best for meteor showers?
For meteor shower photography, a wide-angle camera lens with a large aperture – ideally f/2.8 or wider, is best. This allows you to capture expansive sky views and maximise light intake, which is essential for detailed, vibrant images of the night sky's most active moments.
A wide or ultra wide lens will not only encompass broad swathes of the night sky, enabling the inclusion of more meteors in a single frame, but also allows you to capture a foreground element and interest in the lower part of the image.
Prime lenses in the range of 14mm to 24mm are often favoured for excellent sharpness and the ability to let in a lot of light. The Sigma 15mm F/1.4 DG DN Diagonal Fisheye Art Lens For Sony E and L-mount is a standout for exceptional clarity and wide aperture, making it an excellent choice for astrophotography enthusiasts. Similarly, the Viltrox AF 20mm F/2.8 FE Lens For Sony is another popular option, offering great performance at far a more accessible price point.
Other lens brand options include the budget-friendly Canon RF 16mm F/2.8 STM Lens, the Nikon Z 26mm F/2.8 Lens reviewed here, or the Fujifilm XF 16mm F1.4 R WR Lens, which is appreciated for its wide aperture and ultra wide focal width.
Choosing the right lens is a balancing act between a wide field of view, light gathering capability, and portability, aiming to capture the beauty of meteor showers with as much detail and context as possible.
![]()
Benro app for identification and tracking
The 500 rule in night photography
The 500 rule is a crucial guideline in night photography, especially when capturing the fleeting beauty of meteor showers. This simple formula, dividing 500 by the focal length of the lens, helps photographers calculate the maximum exposure time to avoid star trails in their images. By adhering to this rule, you can ensure that stars appear as sharp points of light, even in long exposures, preserving the natural spectacle of the night sky.
When photographing meteor showers, which move rapidly across the sky, the 500 rule becomes even more pertinent for certain types of images. It allows photographers to maximise their camera's potential to capture as many meteors as possible without the distraction of star movement. This balance between exposure time and capturing motion is key to producing breathtaking images of meteor showers, where each meteor's path is crisply defined against a backdrop of stationary stars.
Table showing the 500 Rule for Astrophotography Exposure Times
| Focal Length (mm) | Max Exposure Time for Full-Frame (Seconds) | Max Exposure Time for APS-C (Seconds) |
|---|---|---|
| 10mm | 50 seconds | ~33 seconds |
| 20mm | 25 seconds | ~17 seconds |
| 14mm | ~36 seconds | ~24 seconds |
| 24mm | ~21 seconds | ~14 seconds |
| 35mm | ~14 seconds | ~10 seconds |
What if we want streaks to show meteors?
When capturing meteor showers, the objective often shifts from avoiding to intentionally creating streaks to illustrate the meteors' paths across the night sky. While the 500 rule is geared towards preventing star trails for clear, pinpoint stars, adjusting your exposure time beyond these limits can artfully capture the swift, radiant trails of meteors.
This technique not only highlights the movement and direction of each meteor but also adds a dynamic element to the composition, making the viewer feel the meteor shower's impactful presence.
While the 500 rule serves as a foundational guideline for photography, creatively bending recommendations can lead to stunning depictions of meteor showers, where the streaks themselves tell the celestial tale.
Essential Accessories Beyond the Camera
Capturing meteors and the night sky generally requires more than just a camera and lens; it also demands some photo accessories to enhance your experience. Here are our top picks:
- A remote shutter release minimises vibrations for clearer shots.
- A sturdy tripod provides stability for long exposures.
- Lens cleaning equipment keeps your lens spotless for optimal clarity.
- Durable camera backpack protects your equipment during travel and hikes.
- Spare memory cards and camera batteries ensure you never miss a shot due to full storage or low battery.
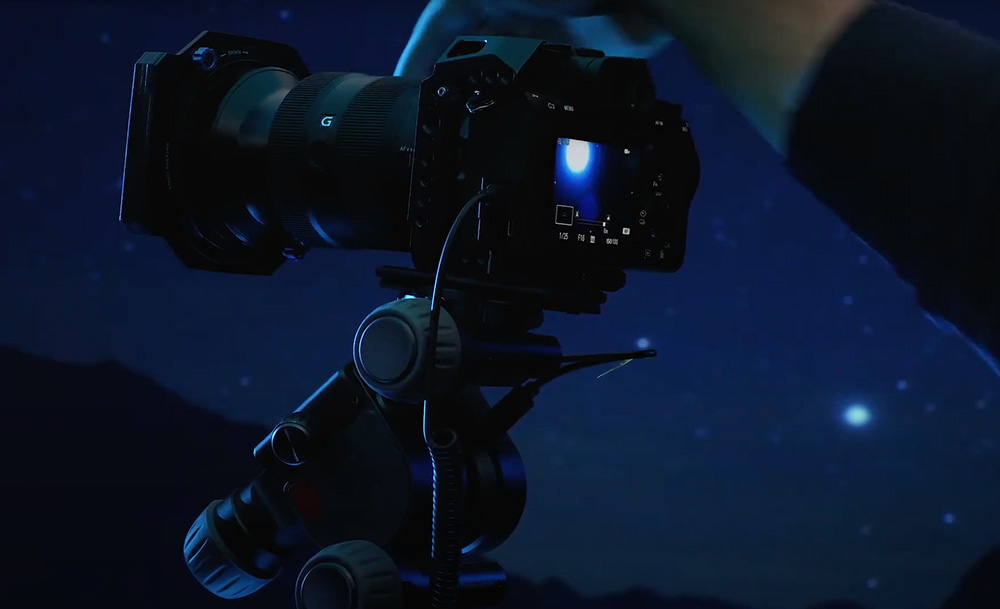
Shooting with the Benro Polaris Astro 3-Axis Head
Tripods and Star Trackers
For night sky photography, selecting the right tripod is crucial, and can have a direct influence on sharpness and overall image quality. Options range from budget-friendly aluminium tripods to premium carbon fibre tripods, catering to all astrophotography enthusiasts' needs for stability and lightweight durability.
For a budget-friendly option, consider the Manfrotto MK190XPRO4-BHQ2 190 XPRO. It's an excellent entry-level choice that provides reliability without a hefty price tag, making it ideal for beginners or those needing a lightweight companion for their celestial pursuits.
On the higher end, carbon fibre models like the Gitzo GT3543LS Systematic Series 3 and the Manfrotto 055CXPRO3 offer unparalleled stability and strength at a fraction of the weight of traditional tripods. Their durability and ease of use in various terrains make them favourites among astrophotographers who demand the best in field performance.
For anyone looking to take their astrophotography to the next level, the Benro Polaris Astro 3-Axis Head, also available at Park Cameras, is a game-changer. This innovative electronic tripod head not only provides traditional stability but also features advanced tracking capabilities, allowing photographers to precisely follow the movement of celestial bodies across the sky.
Its integration with smartphone apps for automated shooting and tracking makes capturing stunning long-exposure shots of meteor showers and the Milky Way more accessible than ever.
Together, these tripods and the Benro Polaris Astro 3-Axis Head represent a tiny fraction of available astrophotography gear, which provide options for every level of enthusiast looking to capture the night sky's fleeting beauty.

12P Pons Brooks Comet courtesy of Jon Penberthy. Canon 7D with Sigma 70-200mm f/2.8 @200mm. SVBony CLS filter. Star Adventurer 2i. Lights: 4 x 2 min. Darks: From library.Stacked in Deep Sky Stacker
Using the Royal Museums Night Sky Calendar to Plan Your Shoot
Maximising the potential of your night sky photography starts with precise planning, for which the Royal Museums Greenwich Guide to the Night Sky offers an essential resource. This comprehensive guide details key astronomical events, including meteor showers, planet alignments, and lunar cycles, all from a UK-centric perspective. It enables photographers to schedule their shoots when celestial displays are at their peak brilliance.
This invaluable guide highlights the optimal viewing conditions for events like the Lyrid meteor shower in April 2024, taking into account factors such as the moon's brightness and potential light pollution. For astrophotographers, this means the ability to strategically plan sessions when the night sky is least obscured by moonlight, enhancing the clarity and impact of their celestial captures.
A Beginner’s Guide to Camera Settings for Capturing Meteor Showers
Capturing the beauty of meteor showers requires mastering a few key camera settings. These 9 tips provide a beginner-friendly guide to help you dial-in these settings, ensuring you’re equipped to capture stunning meteor shower images, which will impress friends and family.
- Manual Mode – Switch your camera to Manual Mode (M) to gain full control over the exposure settings. Manual photography is easy to learn and crucial for night sky photography, where automatic modes may not provide the desired results.
- Aperture – Set your lens to its widest aperture (lowest f-number) to allow as much light as possible to hit the sensor. An aperture of f/2.8 or wider is ideal for capturing the faint light of meteors.
- ISO – Begin with an ISO setting around 1600 to 3200. Higher ISOs increase the camera's sensitivity to light, crucial for night photography. Be cautious of higher ISO levels, as they can introduce noise.
- Shutter Speed – Use the 500 rule to avoid star trails: divide 500 by your lens’ focal length to find the maximum shutter speed. For meteor showers, a shutter speed of 15 to 30 seconds often works well to capture meteor streaks without significant star movement.
- Focus – Autofocus won't work well in the dark. Switch to manual focus and set your lens to infinity (∞), or use live view mode to manually focus on a bright star for sharp images.
- White Balance– Set White Balance to Daylight to accurately capture the night sky’s colours. Auto White Balance may result in unwanted colour casts./li>
- File Format – Shoot in RAW format for the highest quality images and more flexibility in post-processing. RAW files capture more detail and allow for adjustments in exposure and colour without degrading image quality.
- Noise Reduction – Consider enabling Long Exposure Noise Reduction to minimise noise in long exposures, though be aware it will double the time required for each shot.
- Intervalometer (Remote Cable Release) – A remote shutter release or an intervalometer prevents camera shake and allows you to take continuous shots for stacking in post-processing, enhancing the meteor shower effect.
Understanding and experimenting with these settings will not only improve your night photography skills but also increase your chances of capturing breathtaking photos of meteor showers. Remember that practice and patience are key to mastering any type of photography.
Processing Raw Night Skies into Stellar Masterpieces
Adjusting Exposure and Contrast
Begin by tweaking the exposure. Even well-planned shots might require slight adjustments to brightness and contrast to bring out the details in the night sky.
Enhancing Colours
Meteor showers can cast subtle colours across the sky. Use the colour temperature and tint sliders to enhance these hues gently. A slight increase in vibrance and saturation can also accentuate the colours without making them look unnatural.
Reducing Noise
High ISO settings often used in night photography can introduce noise. Use your editing software's noise reduction tools carefully to reduce graininess without smoothing out important details like stars.
Sharpening
Apply sharpening judiciously to enhance the clarity of the stars and meteors. Avoid over-sharpening, as it can amplify noise and create artefacts.
Compositing and Stacking
To capture more meteors and reduce noise, consider stacking multiple shots of the same scene. Software like StarStaX or Sequator can align and blend these images, increasing the number of meteors captured and reducing noise.
Cropping for Composition
Sometimes, the most compelling part of your image might be a fraction of the overall photo, which is where cropping can help focus on the primary subject, creating a more impactful composition.
Lens Correction
As mentioned earlier, wide-angle lenses are ideal for capturing the night sky, although they can introduce distortion. Use lens correction profiles in your editing software to straighten the horizon and reduce any edge distortion.
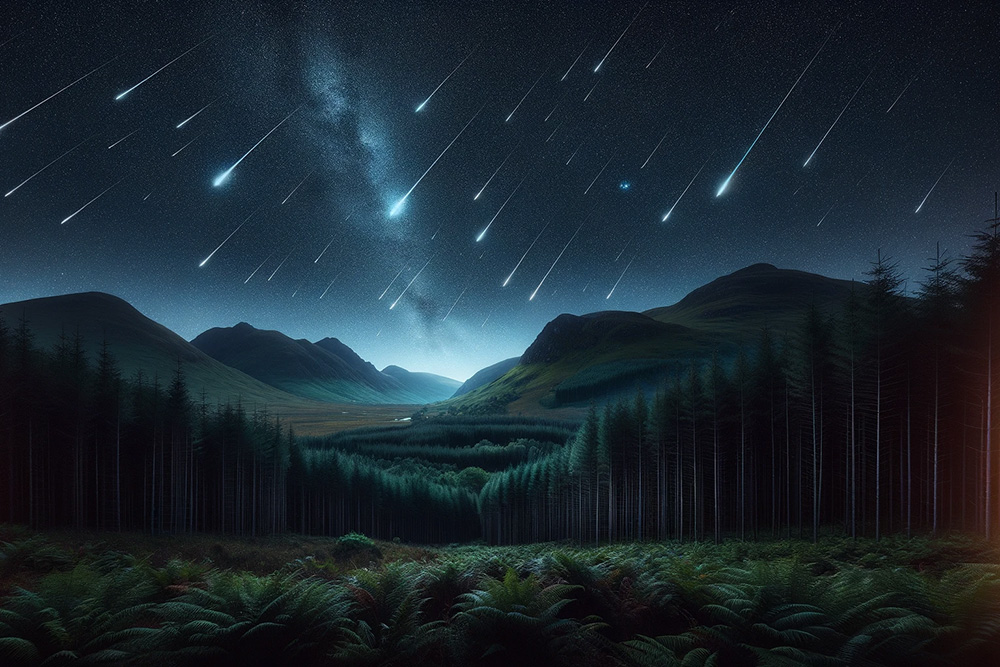
Inspirational UK Astro Locations
Why not combine a photo trip with an inspiring setting? These top five locations not only offer some of the best skies for astrophotography in the UK, but also provide an escape into nature, where the cosmos takes centre stage. Remember to check local guidelines, and always respect the natural environment.
- Galloway Forest Park, Scotland. Recognised as the UK's first Dark Sky Park, Galloway Forest offers exceptionally dark skies. Its remote location minimises light pollution, making it a perfect canvas for meteor shower photography and for capturing the Milky Way.
- Brecon Beacons National Park, Wales. Another Dark Sky Reserve, the Brecon Beacons provides photographers with panoramic views of the heavens. The Usk Reservoir and Pontsticill Reservoir are particularly recommended for their reflective views of the sky.
- Northumberland National Park, England. Home to the Kielder Observatory and part of the Northumberland Dark Sky Park, this area is renowned for its pristine skies. The lack of light pollution allows for spectacular views of meteors streaking across the sky.
- Isle of Skye, Scotland. The Isle of Skye isn’t just famous for its breathtaking landscapes; it's also a fantastic location for astrophotography. The Quiraing and Neist Point offer dramatic foregrounds against the backdrop of the night sky.
- Exmoor National Park, England. Designated as Europe's first International Dark Sky Reserve, Exmoor's skies are among the darkest in the country. With wide-open horizons and minimal light pollution, it’s an ideal spot for capturing the natural beauty of meteor showers.
Capturing the beauty of the night sky and specifically meteor showers combines art with science. From selecting the right gear to mastering camera settings and post-processing, each step is pivotal in transforming a cosmic spectacle into a timeless image.
The UK's dark skies offer a unique canvas, with locations such as Galloway Forest Park providing the perfect backdrop for celestial events. As you venture out to capture meteor showers, remember that patience, practice, and persistence are your best tools. Share your images on our social channel as you embrace the challenge, and let the universe's magnificence unfold through your lens.
Park Cameras are passionate about photography and you can find the best digital cameras, lenses and photo accessories to support astro and any other style of creativity, which you’re passionate about.
Share this post:
By Nick Dautlich on 03/04/2024

Trade in your old equipment
Fast and easy trade in service ensures your old gear is collected efficiently and you are paid quickly! It's very simple to trade in your unwanted photography gear. Just head over to our dedicated Sell or Part Exchange page, fill out the details, and we'll get back to you with an offer for your old gear. Take the cash, or put it towards the cost of your new gear. It's up to you! Find out more
sign up to the newsletter
Keep up to date on the latest photography news, events and offers. Sign up now